Itertools is a powerful module and is part of python standard library. It provides a set of fast and memory efficient functions. You can learn more about them by referring to this article.
I have used following code to get the expected output
import pprint
pp = pprint.PrettyPrinter(indent=4)

from itertools import groupby
from operator import itemgetter
# Define group by key
grouper = itemgetter("id", "name")
result = []

#itertools requires sorted input, so we will first sort the input data

for key, grp in groupby(sorted(data, key = grouper), grouper):
    temp_dict = dict(zip(["id", "name"], key))
    temp_dict['child'] = []
    # Use list comprehension to collect all the items in grp
    temp_dict['child'] = list(item['child'] for item in grp)
    result.append(temp_dict)

# print the result
pp.pprint(result)
Amazon Redshift is fully managed Cloud Datawarehouse from AWS for running analytic workloads. Lot of customers have requirements to encrypt data in transit as part of security guidelines. Redshift provides support for SSL connections to encrypt data and server certificates to validate the server certificate that the client connects to.
Before we proceed how SSL works with Redshift, lets understand why we need SSL. SSL is required to encrypt client/server communications and provides protection against three types of attack:
Eavesdropping – In case of un-encrypted connections, a hacker could use network tools to inspect traffic between client and server and steal data and database credentials. With SSL, all the traffic is encrypted.
Man in the middle (MITM) – In this case a hacker could hack DNS and redirect the connection to a different server than intended. SSL uses certificate verification to prevent this, by authenticating the server to the client.
Impersonation – In this hacker could use database credentials to connect to server and gain access to data. SSL uses client certificates to prevent this, by making sure that only holders of valid certificates can access the server.
You can easily enable SSL on Amazon Redshift Cluster by setting require_ssl to True in Redshift parameter group.
In this blog post, I would discuss 3 sslmode settings – require, verify-ca, and verify-full , through use of psql and python.
Setup details
I have a Amazon Redshift cluster with publicly accessible set to “No” and I would be accessing it via my local machine. Since database is in private subnet, I would need to use port forwarding via bastion host. Make sure this bastion host ip is whitelisted in Redshift security group to allow connections
## Add the key in ssh agent
ssh-add <your key>

## Here bastion host ip is 1.2.3.4 and we would like to connect to a redshift cluster in Singapore running on port 5439. We would like to forward traffic on localhost , port 9200 to redshift
ssh -L 9200:redshift-cluster.xxxxxx.ap-southeast-1.redshift.amazonaws.com:5439 [email protected]
When we enable require_ssl to true, we have instructed Redshift to allow encrypted connections. So if any client tries to connect without SSL, then those connections are rejected. To test this , let’s modify sslmode settings for psql client, by setting PGSSLMODE environment variable.
export PGSSLMODE=disable
psql -h localhost -p 9200 -d dev -U dbmaster
psql: FATAL: no pg_hba.conf entry for host "::ffff:172.31.xx.9", user "dbmaster", database "dev", SSL off
As we can see, all database connections are rejected. Let’s now discuss SSL mode – require, verify-ca, and verify-full
1. sslmode=require
With sslmode setting of require, we are telling that we need a encrypted connection. If a certificate file is present, then it will also make use of it to validate the server and behavior will be same as verify-ca. But if the certificate file is not present, then it won’t complain (unlike verify-ca) and connect to Redshift cluster.
export PGSSLMODE=require
psql -h localhost -p 9200 -d dev -U dbmaster
psql (11.5, server 8.0.2)
SSL connection (protocol: TLSv1.2, cipher: ECDHE-RSA-AES256-GCM-SHA384, bits: 256, compression: off)
Type "help" for help.
We can see that psql has made a SSL connection and is using TLS 1.2.
2. sslmode=verify-ca
If we use, verify-ca, then the server is verified by checking the certificate chain up to the root certificate stored on the client. At this point, we need to also give Redshift certificate which has tobe be downloaded from download link provided in Amazon Redshift documentation. To demonstrate, that we really need a certificate, let’s try connecting without certificate
export PGSSLMODE=verify-ca
psql -h localhost -p 9200 -d dev -U dbmaster
psql: error: could not connect to server: root certificate file "/Users/amit/.postgresql/root.crt" does not exist
Either provide the file or change sslmode to disable server certificate verification.
psql is complaining that it couldn’t find the certificate and we should either provide ssl certificate or change sslmode settings. Let’s download the certificate and store under home directory
mkdir ~/.postgresql
cd .postgresql

curl -o root.crt https://s3.amazonaws.com/redshift-downloads/redshift-ca-bundle.crt
After downloading certificate , and placing under the desired directory, our connection attempt succeeds
3. sslmode=verify-full
Next, if we want to prevent Man in the Middle Attack (MITM), we need to enable sslmode=verify-full . In this case the server host name provided in psql host argument will be matched against the name stored in the server certificate. If hostname matches, the connection is successful, else it will be rejected.
export PGSSLMODE=verify-full
psql -h localhost -p 8192 -d dev -U awsuser
psql: error: could not connect to server: server certificate for "*.xxxxxx.ap-southeast-1.redshift.amazonaws.com" does not match host name "localhost"
In our test connection fails, as we are using port forwarding and localhost doesn’t match the redshift hostname pattern
What this means is that if you use any services like route53 to have friendly names, verify-full won’t work as the hostname specified in psql command and host presented in certificate don’t match. If your security team is ok with verify-ca option, then you can revert to that setting, else you will have to get rid of aliases and use actual hostname.
In my case, I can resolve the error by connecting to Redshift Cluster from bastion host (instead of my local host tunnel setup) and using psql command with actual hostname
psql -h redshift-cluster.xxxxxx.ap-southeast-1.redshift.amazonaws.com -p 5439 -d dev -U dbmaster
SSL Connection using Python
Next, let’s see how you can connect to Redshift cluster using python code. This is useful, if you have Lambda code or other client applications which are written in Python. For this example, we will use PyGreSQL module for connecting to Redshift Cluster.
$ python
Python 3.7.9 (default, Aug 31 2020, 12:42:55)
[GCC 7.3.0] :: Anaconda, Inc. on linux
Type "help", "copyright", "credits" or "license" for more information.

>>> import pgdb
>>> rs_port =5439
>>> rs_user = 'dbmaster'
>>> rs_passwd='****'
>>> rs_dbname = 'dev'
>>> rs_host='redshift-cluster.xxxxx.ap-southeast-1.redshift.amazonaws.com'
>>> rs_port =5439

>>> conn = pgdb.connect(dbname=rs_dbname,host=rs_host,port=rs_port , user=rs_user, password=rs_passwd,sslmode=rs_sslmode)
Traceback (most recent call last):
File "<stdin>", line 1, in <module>
File "/home/ec2-user/miniconda3/envs/venv37/lib/python3.7/site-packages/pgdb.py", line 1690, in connect
cnx = _connect(dbname, dbhost, dbport, dbopt, dbuser, dbpasswd)
pg.InternalError: root certificate file "/home/ec2-user/.postgresql/root.crt" does not exist
Either provide the file or change sslmode to disable server certificate verification.
Before running above code, I removed the certificate file to show that pgdb.connect requires SSL certificate. Let’s now add the certificate to non-default location like “/home/ec2-user/root.crt” and use sslrootcert argument to pass the location
Terraform supports team-based workflows with its feature “Remote Backend”. Remote backend allows Terraform to store its State file on a shared storage
so that any team member can use Terraform to manage same infrastructure. A state file keeps track of current state of infrastructure that is getting
deployed and managed by Terraform. Read more about Terraform state here.
The remote shared storage can be:
– Azure Blob
– Amazon S3
– Terraform Cloud
In this post I will be using VSCode to:
-Login using Azure account named “terraform” (this account has only been assigned storage-contributor role)
-Use Azure service-principal configuration in Terraform
-Configure Terraform to store state-file on Azure Blob storage to create an Azure resource group
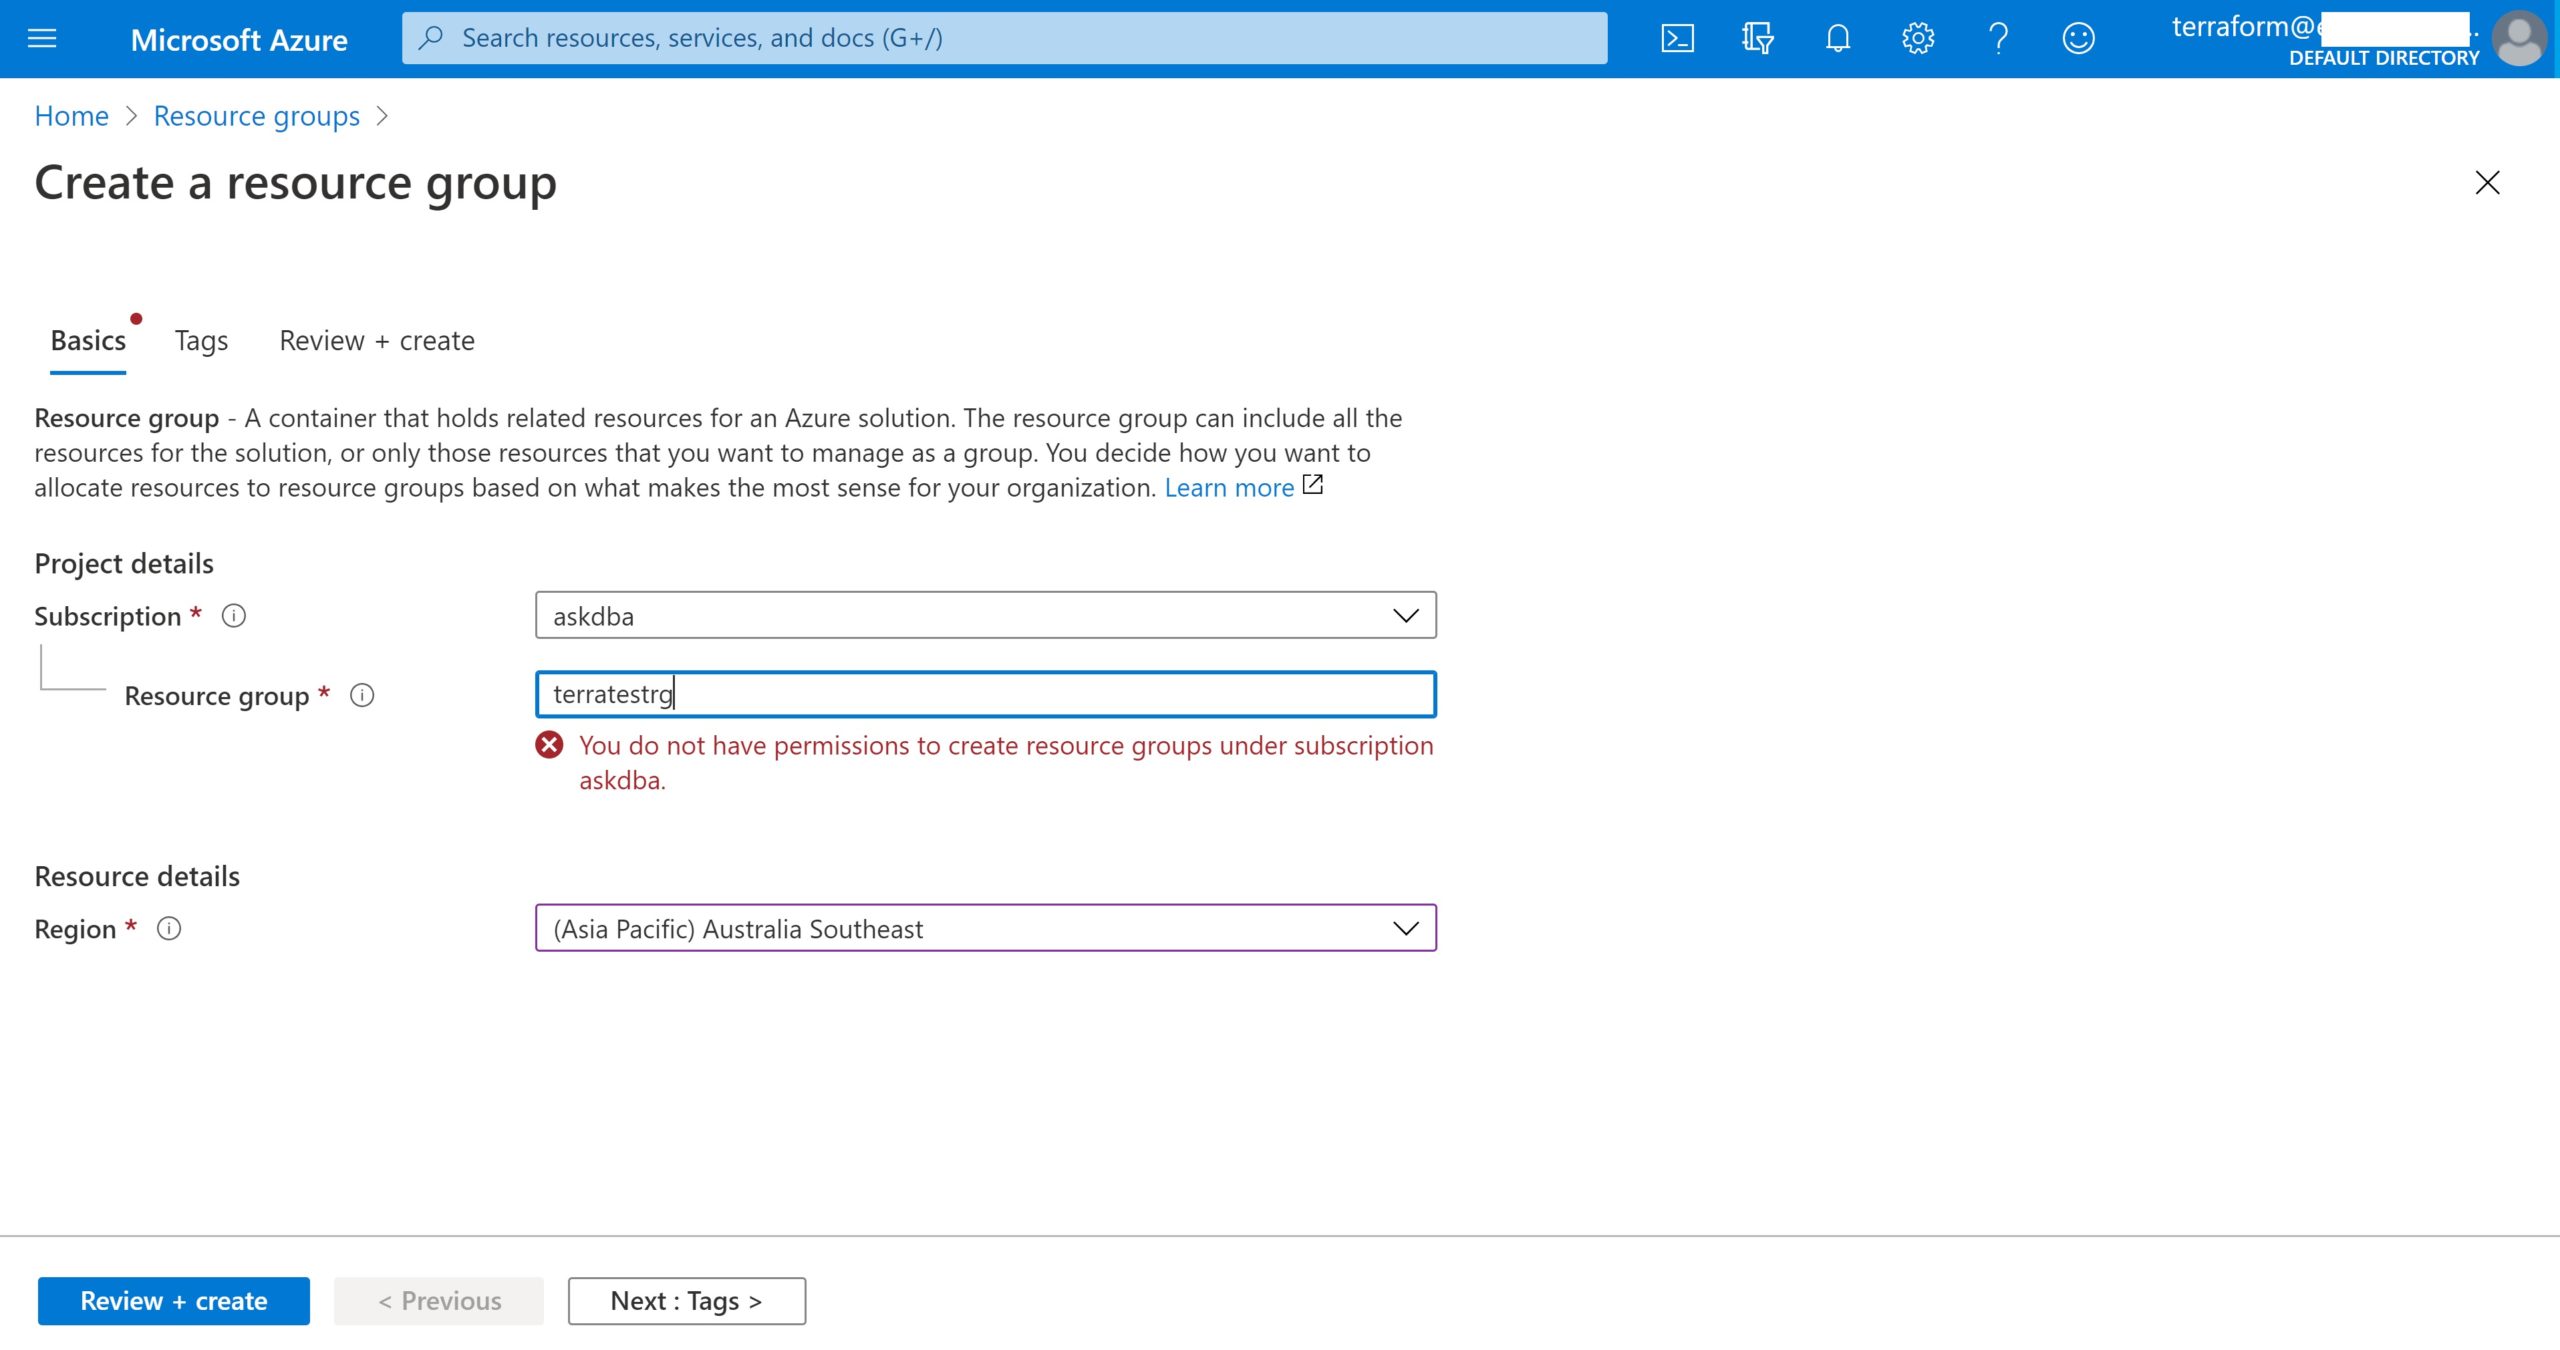
As a first step to demonstrate Azure service-principal usage, login as terraform user from azure portal and verify that this user doesn’t have privileges to create a resource group.
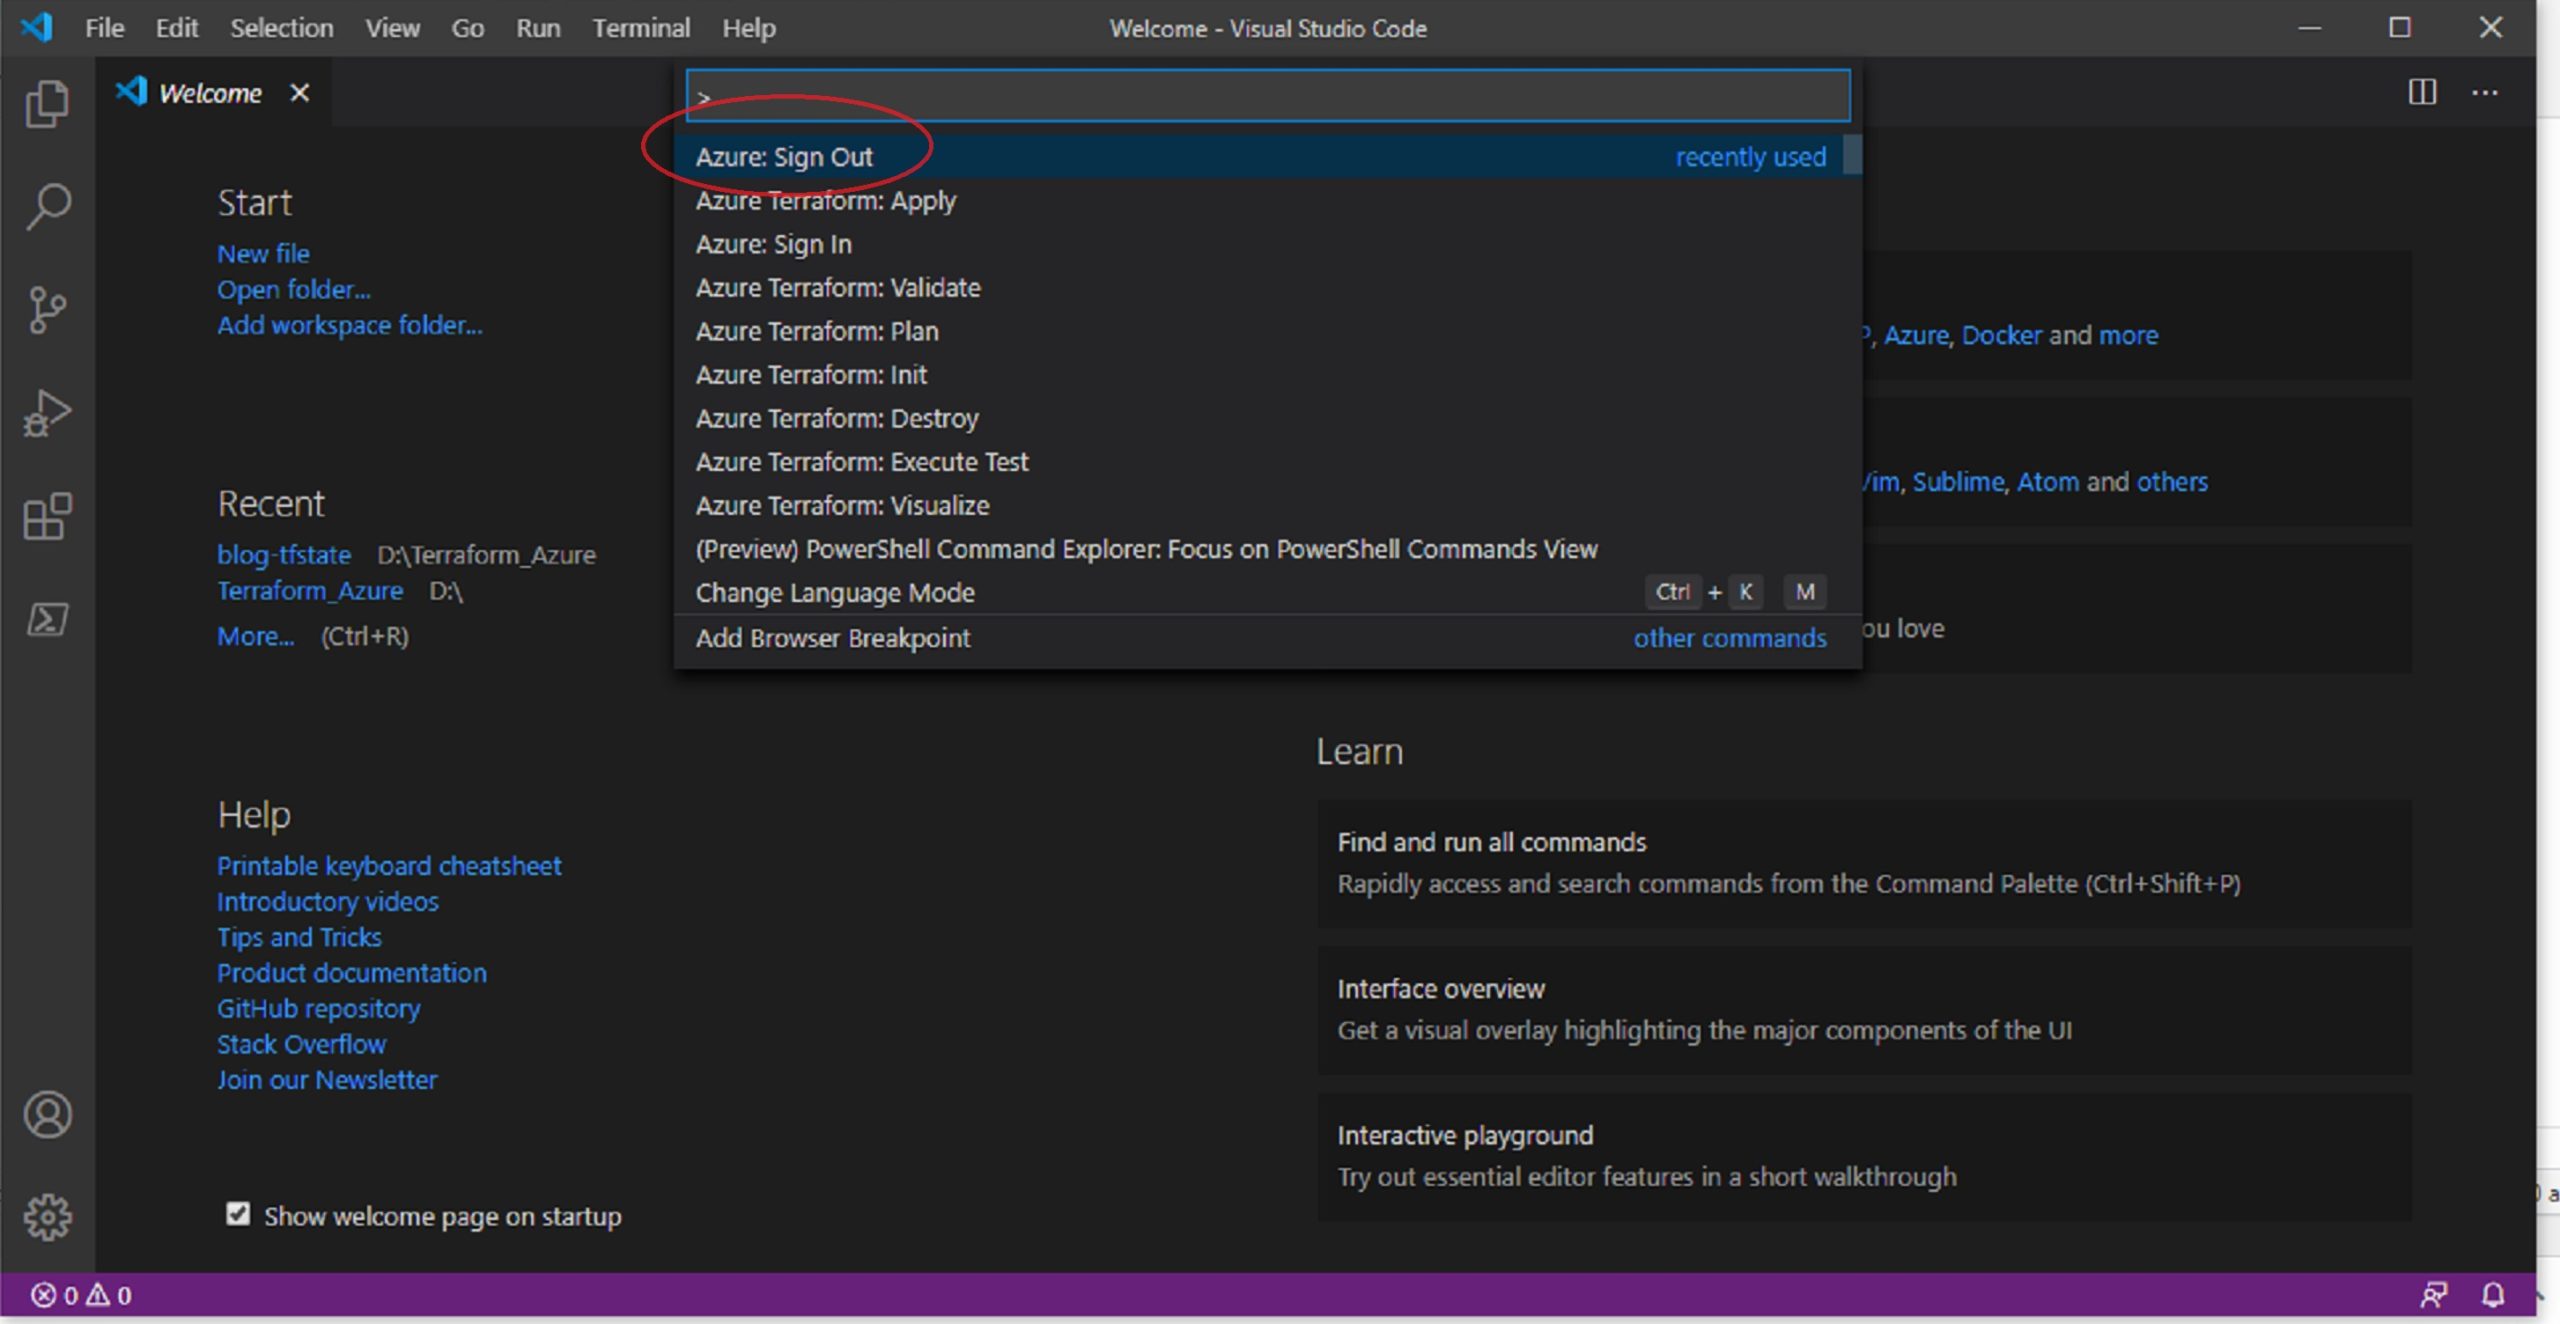
Now, to login as terraform user in Azure, open VSCode and click on View => CommandPalette and type Azure: Sign Out
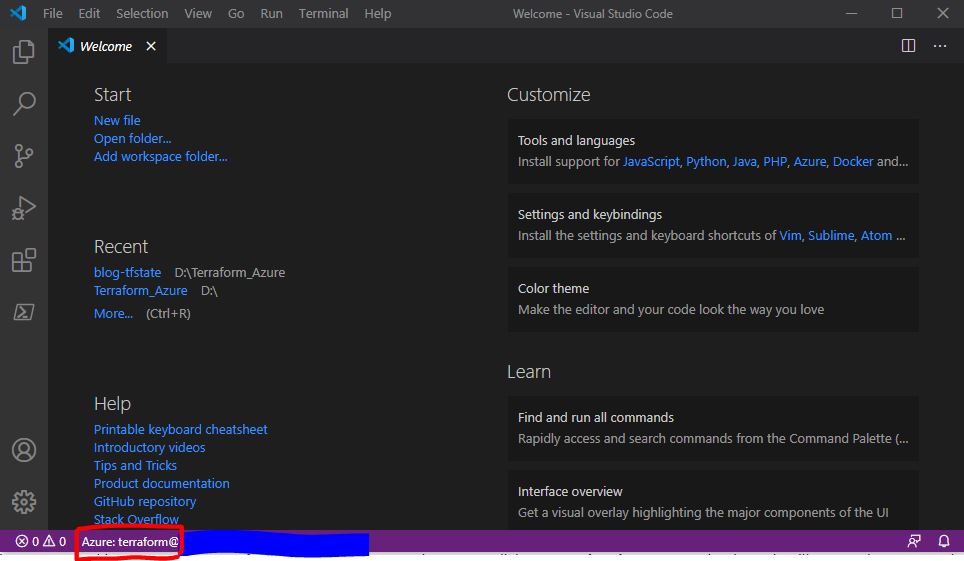
By this, you are making sure to logout of any previous Azure session. Now, click Azure: sign-in command palette, it will open a browser and ask you to sign-in, use the Azure account(terraform) created for this sign-in purpose. You will see the username at the bottom of VSCode.
We will now be configuring the already created Azure service-principal in Terraform (refer to my previous blog post). The service-principal looks like below after it is created, and it is important to note down these details for a service-principal:
These values of Azure service-principal map to the Terraform variables as below: (Click here to read more about it in Terraform document)
appId = Client-id in Terraform
password = client-secret in Terraform
tenant = tenant-id in Terraform
We will configure these login details in Terraform using variables.tf file. Defining variables can be done in a single step or by using input variable file to hold the variable names and using variable definition file (.tfvars). Terraform automatically loads variable definition files if :
– File name is exactly terraform.tfvars
– File names ending with .auto.tfvars
Created a folder on your PC with name “tfstate” to hold variables.tf, main.tf and terraform.tfvars files.
variables.tf
variable “azure_app_id” { description = “Azure App Id for Service Principal” type = string } Variable “azure_password” { description = “Azure Password for service principal” type = string } Variable “azure_tenant_id” { description = “Azure tenant for service principal” type = string } variable “azure_subscription_id” { description = “Azure subscription-id for service principal” type = string }
A “Backend” in Terraform determines how the state is loaded, here we are specifying “azurerm” as the backend, which means it will go to Azure, and we are specifying the BLOB resource group name, storage account name and container name where the state file will reside in Azure. “Key” represents the name of state-file in BLOB.
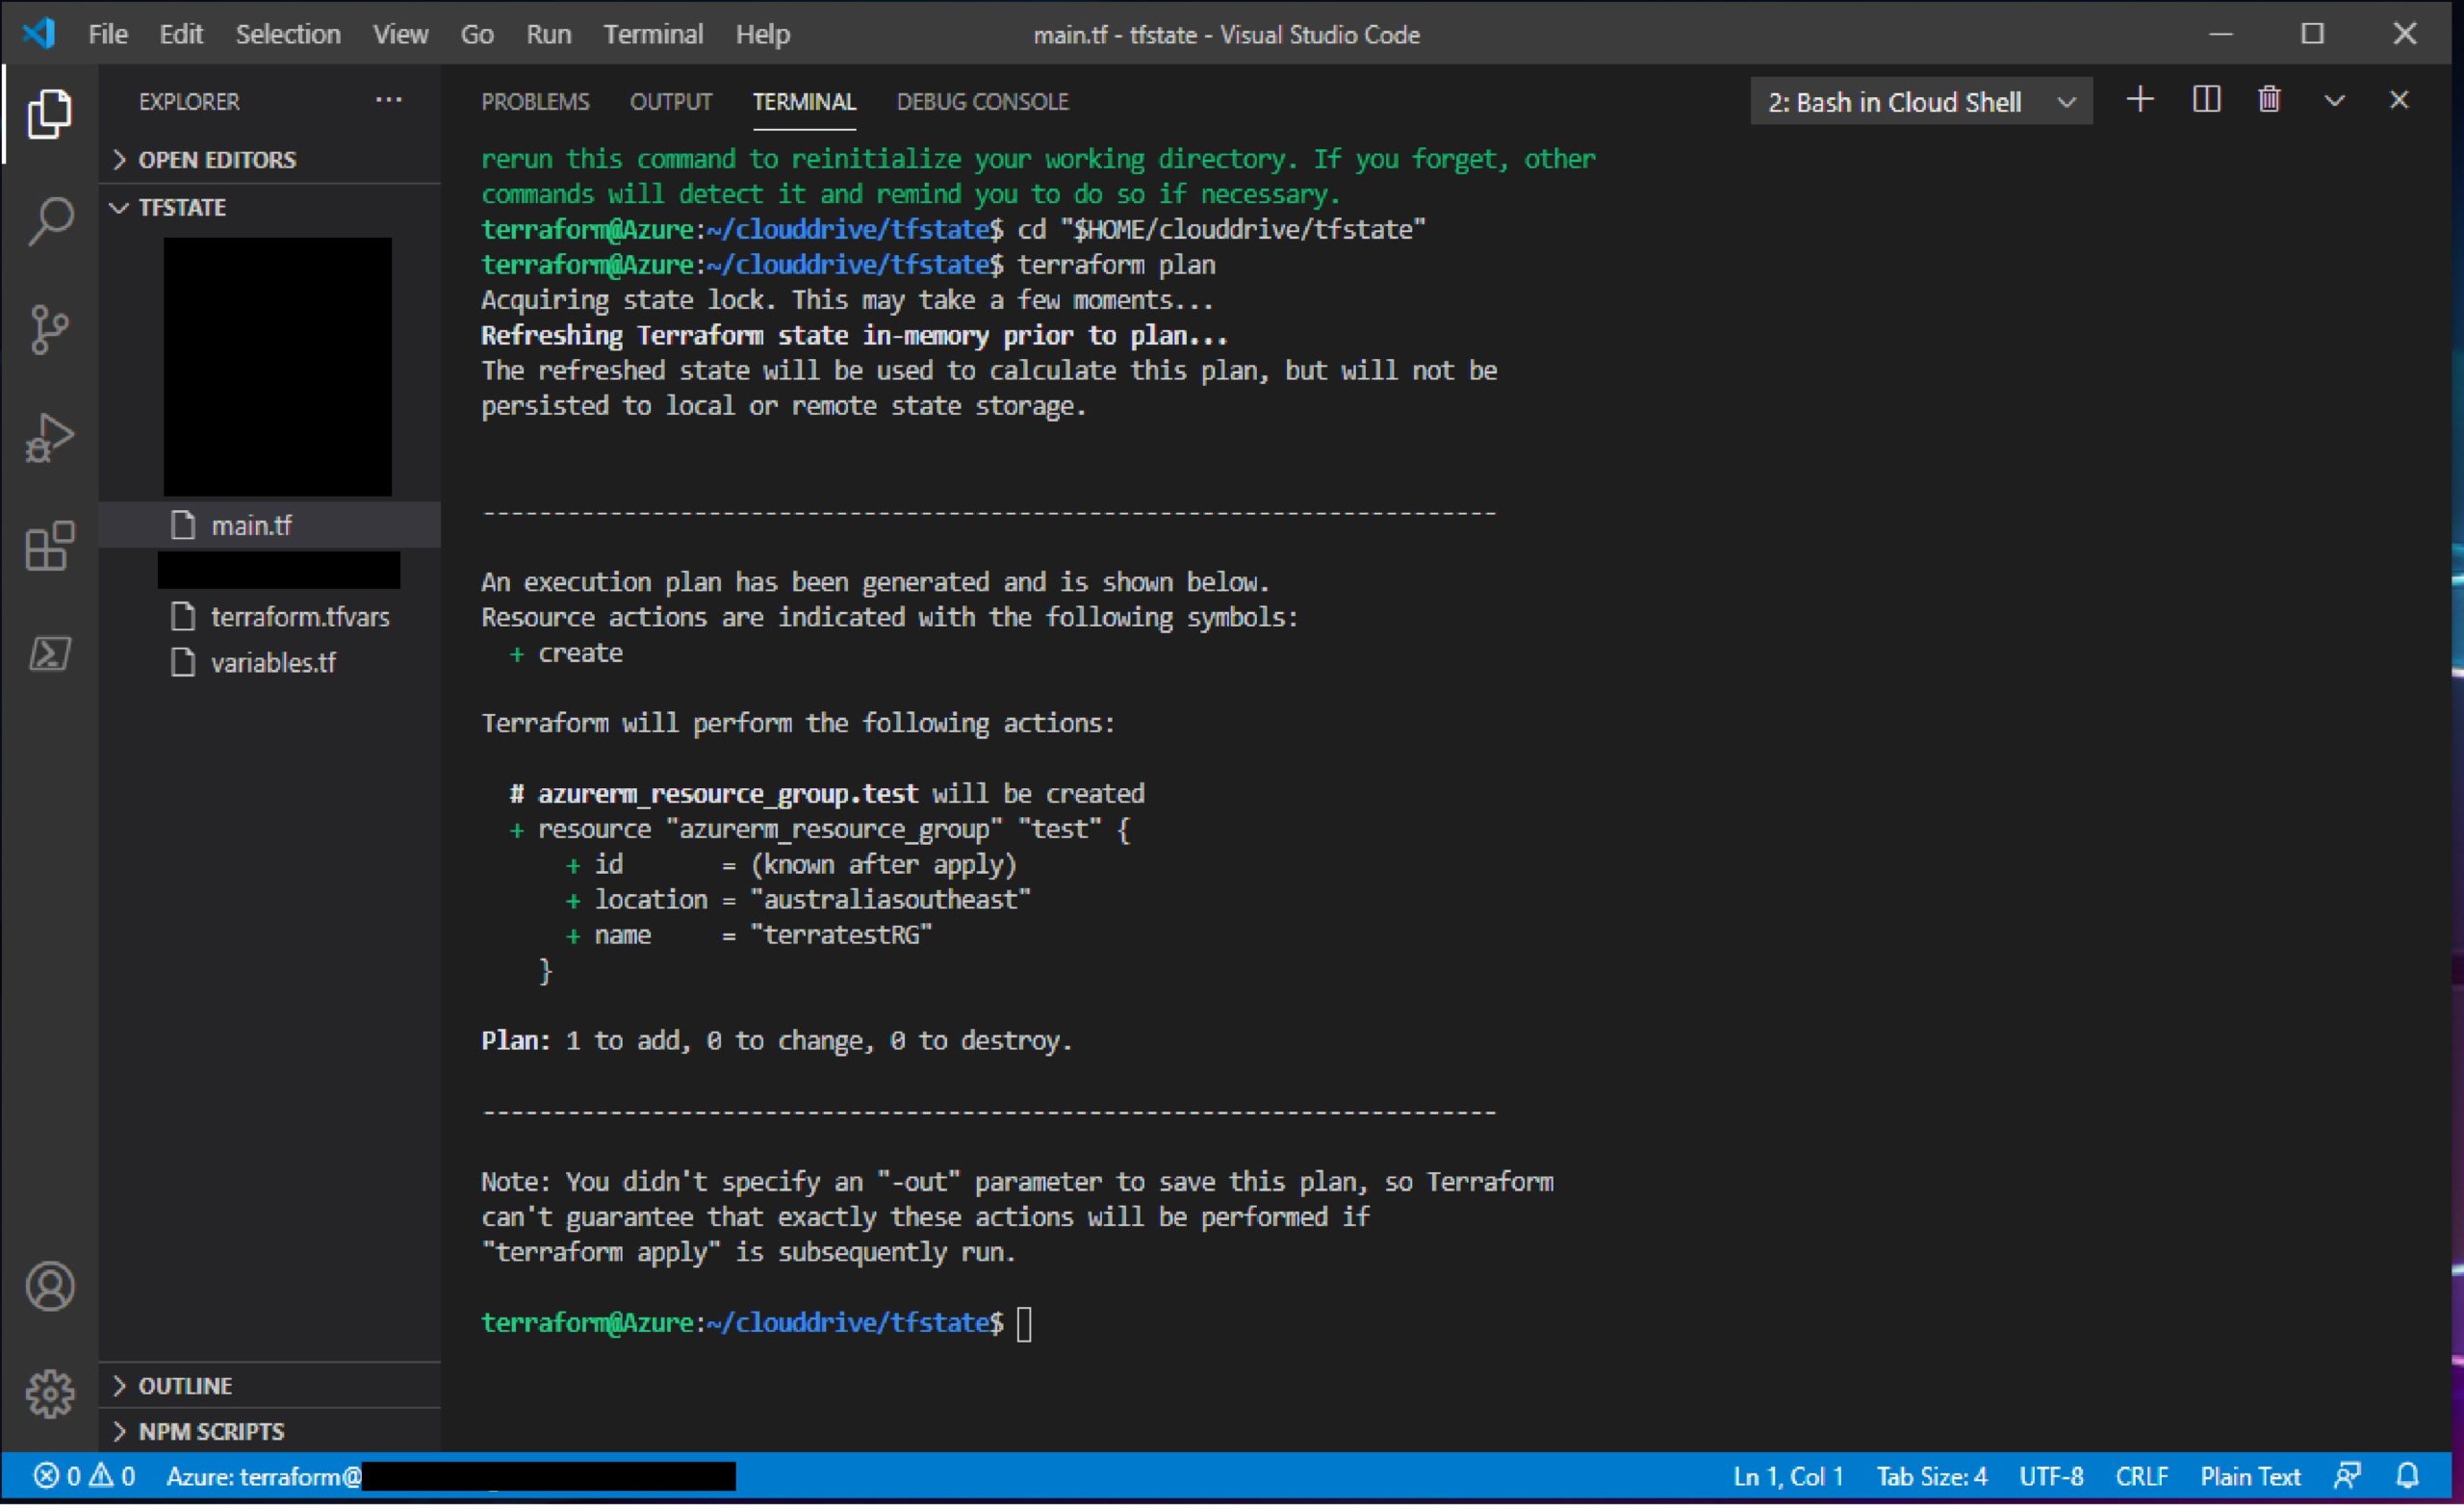
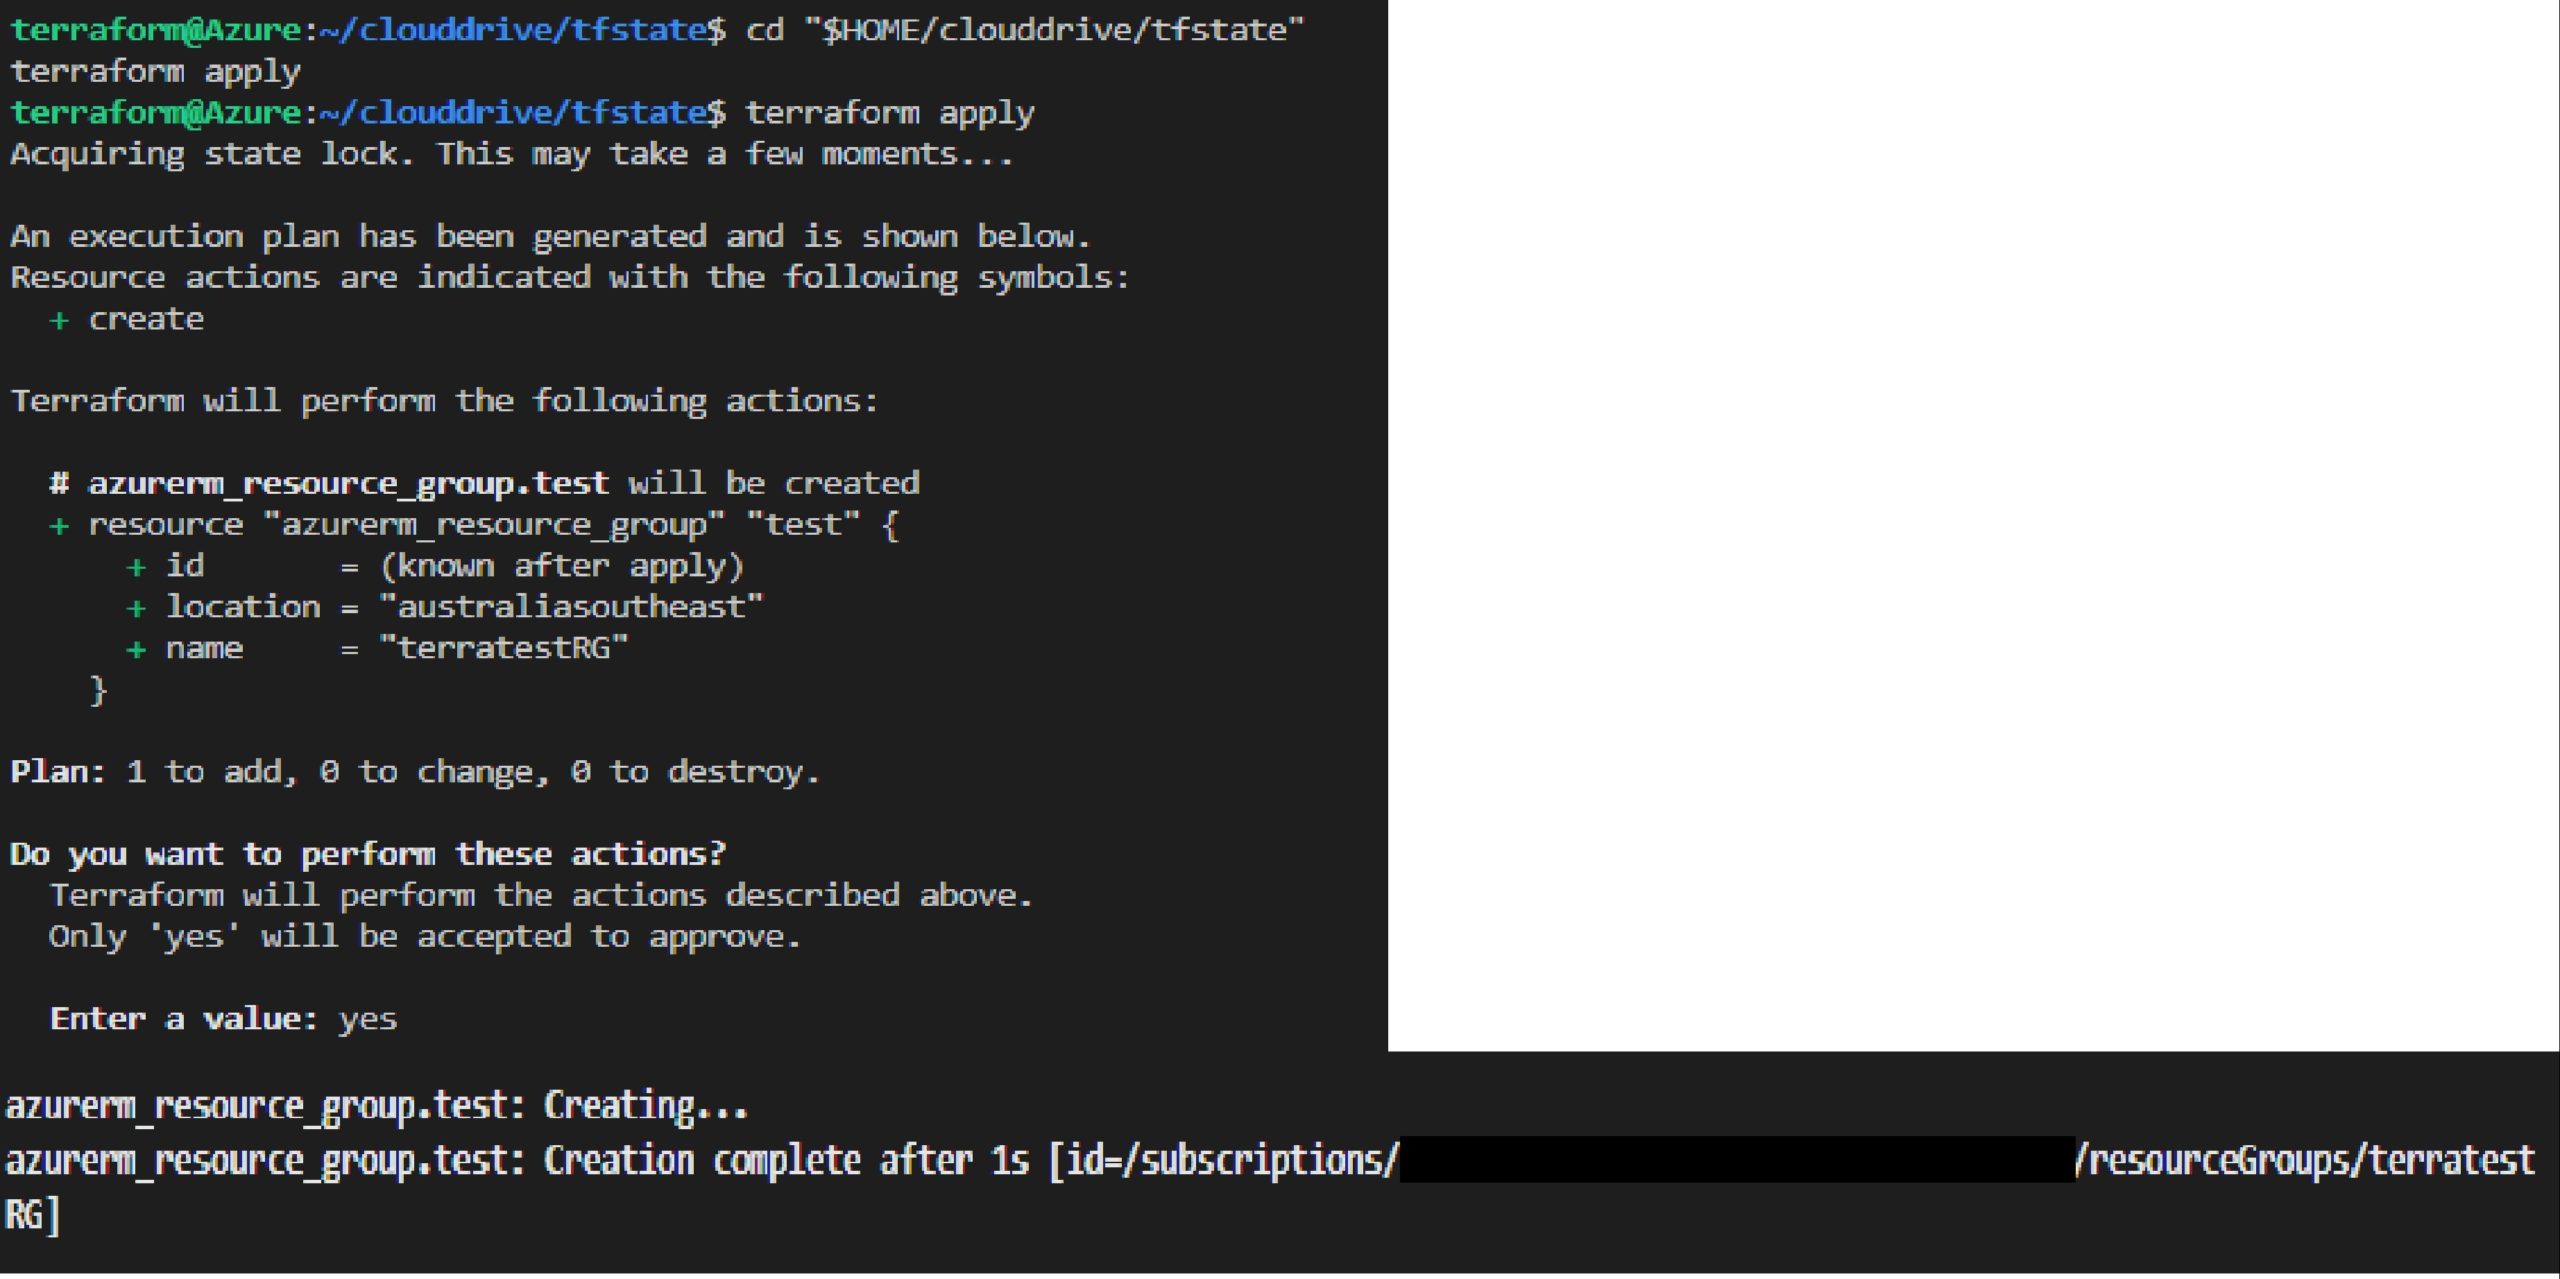
This code will create a resource group named terratestRG in Australia Southeast region.
Once these files are created in “tfstate” folder, go to VSCode and open the folder using File =>Open Folder => tfstate , click command palette and run “Azure: Terraform init”
A pop-up will appear asking to “Open Cloud Shell” click yes.
It has initialize azurerm backend and installed required plugins for azure and it will copy all the local terraform files in tfstate folder to Azure file-share.
Click on Azure :Terraform Plan in Command Palette, following plan will be created.
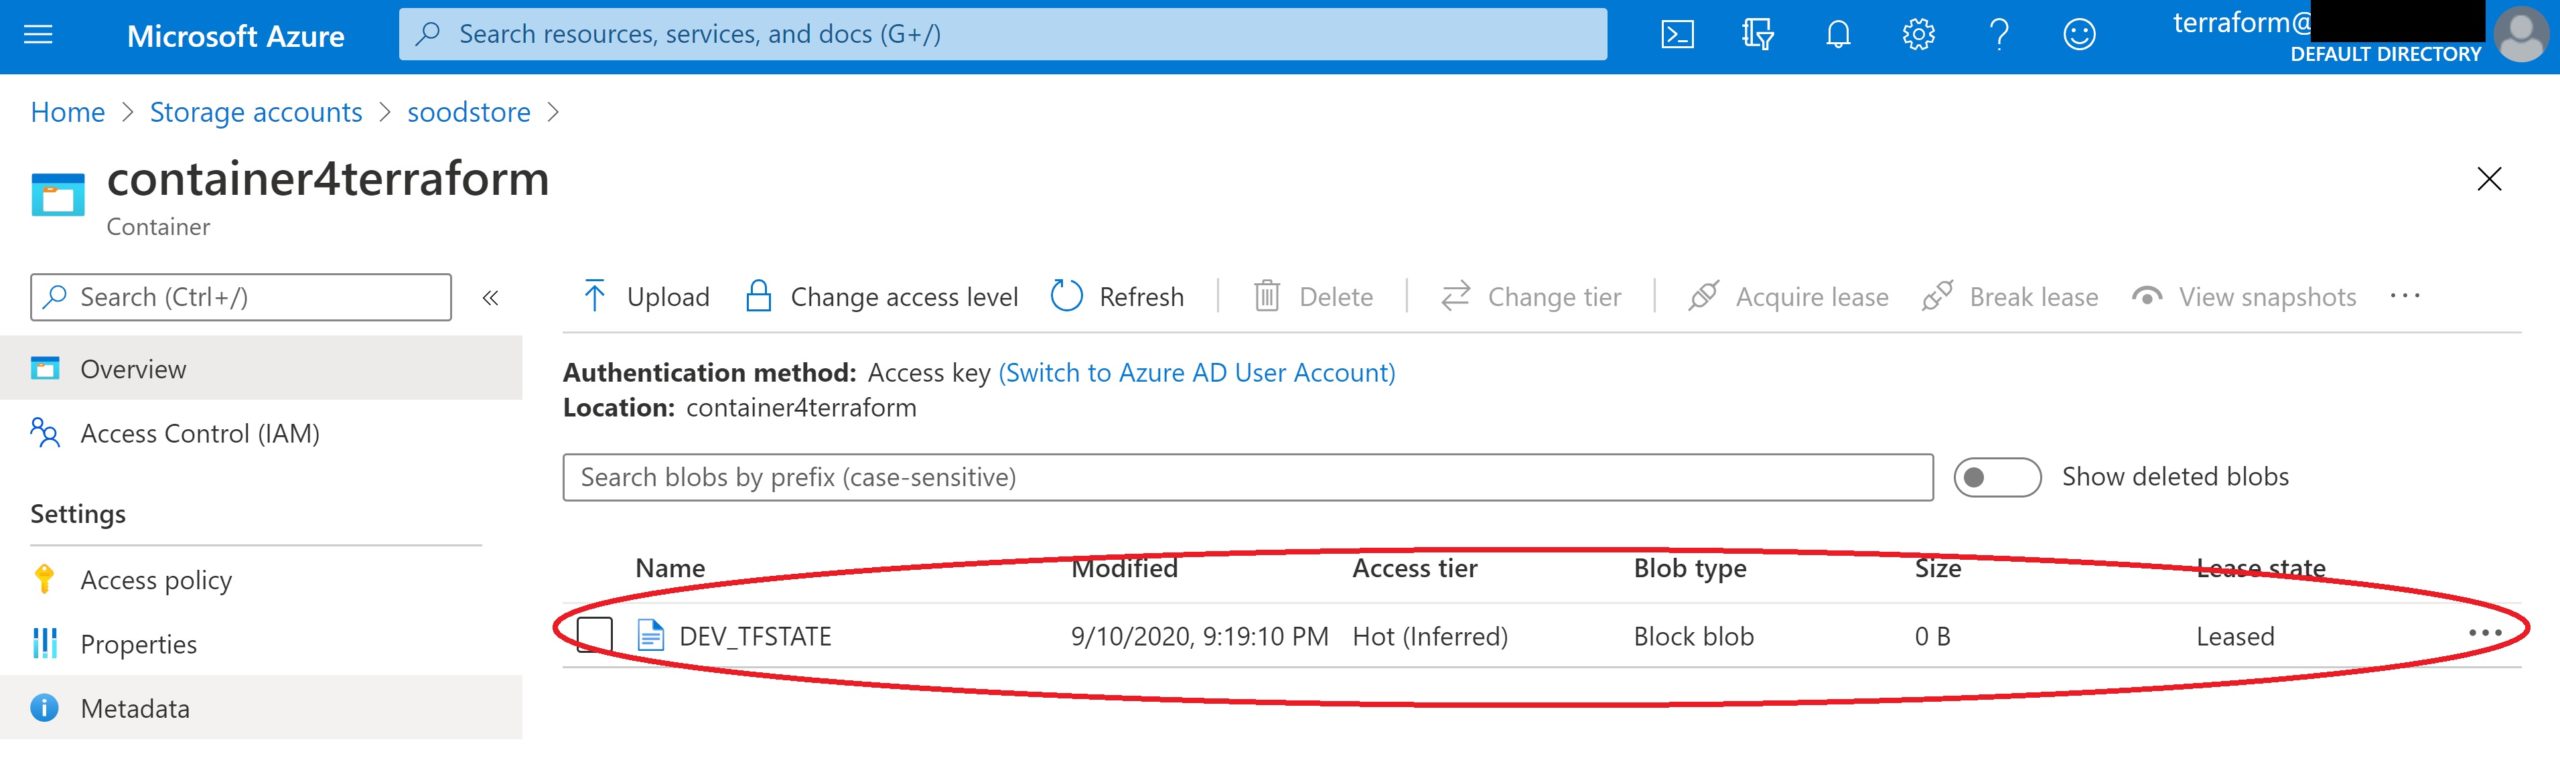
It has initialized a plan to create mentioned resource group and at the same time we can see that Terraform state-file “DEV_TFSTATE” is created in the specified container
Click on Azure :Terraform Apply in Command Palette and it will create the resource group.
Azure resource group is created using VSCode, Azure service-principal and placing Terraform state-file under Blob storage.
Node.js: This is required to get Azure login page from VSCode. To download click here. To verify the installation, run node -v from a terminal window. It may ask you to execute node -c, you have to do it otherwise the Azure login page will not appear.
GraphViz: This is optional, used to get graphical interpretation of Terraform init, plan etc. If you need to, download and install GraphViz
Installing Azure Terraform VSCode extension
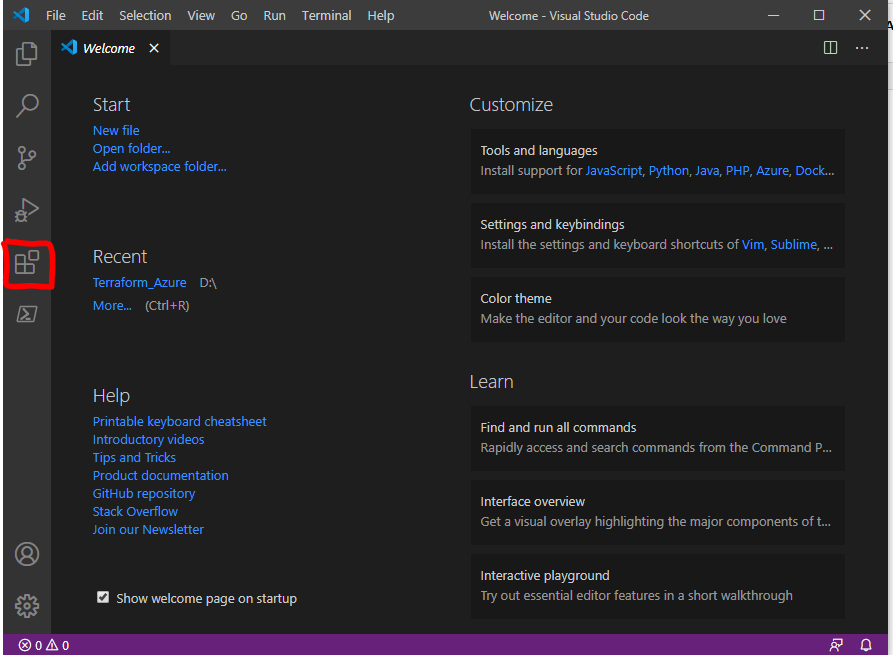
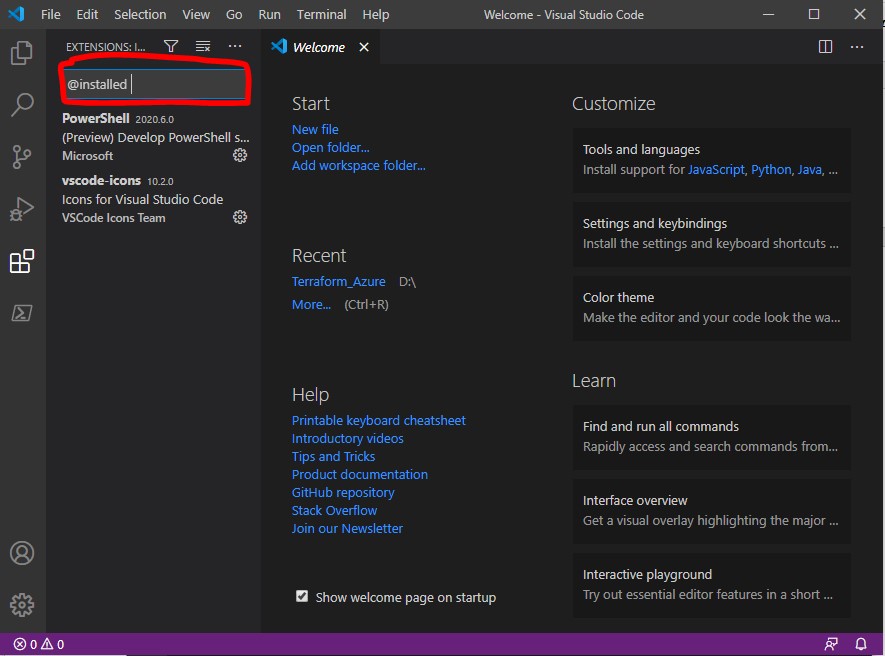
Launch Visual Studio Code and select Extensions
In search extension type @installed to check which extensions are already installed in you VSCode
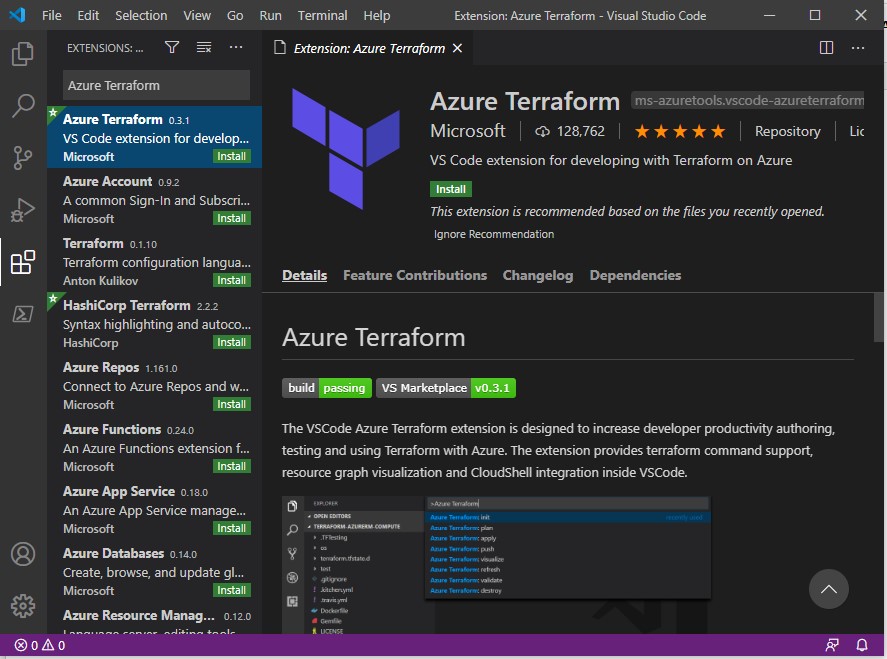
Search Azure Terraform in extension search box
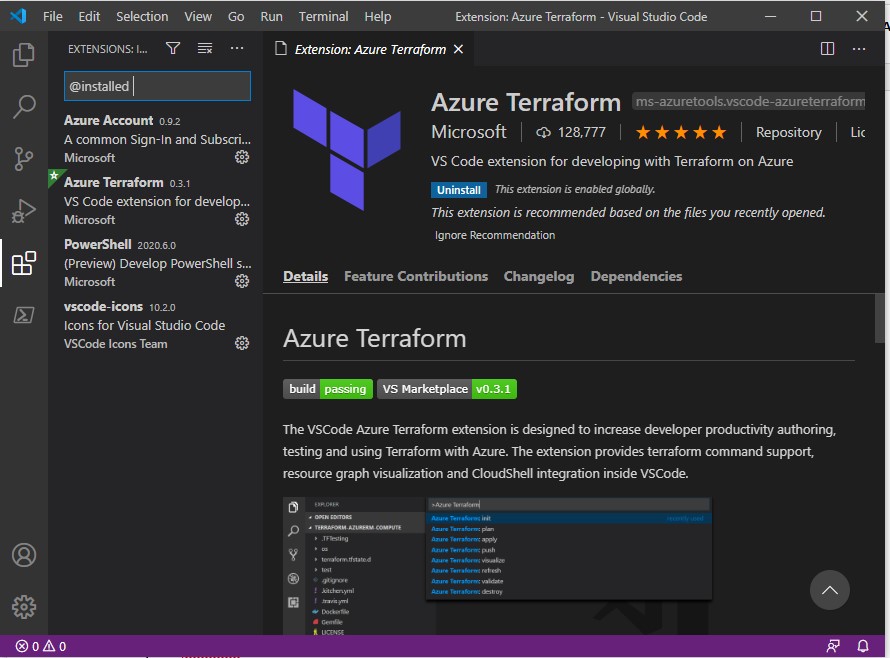
Select Install, when you install this extension, Azure Account extension will be automatically installed in your VSCode. Use @installed in the search box to get list of installed extensions
Here you will see Azure Terraform and Azure Account are installed for you to use.
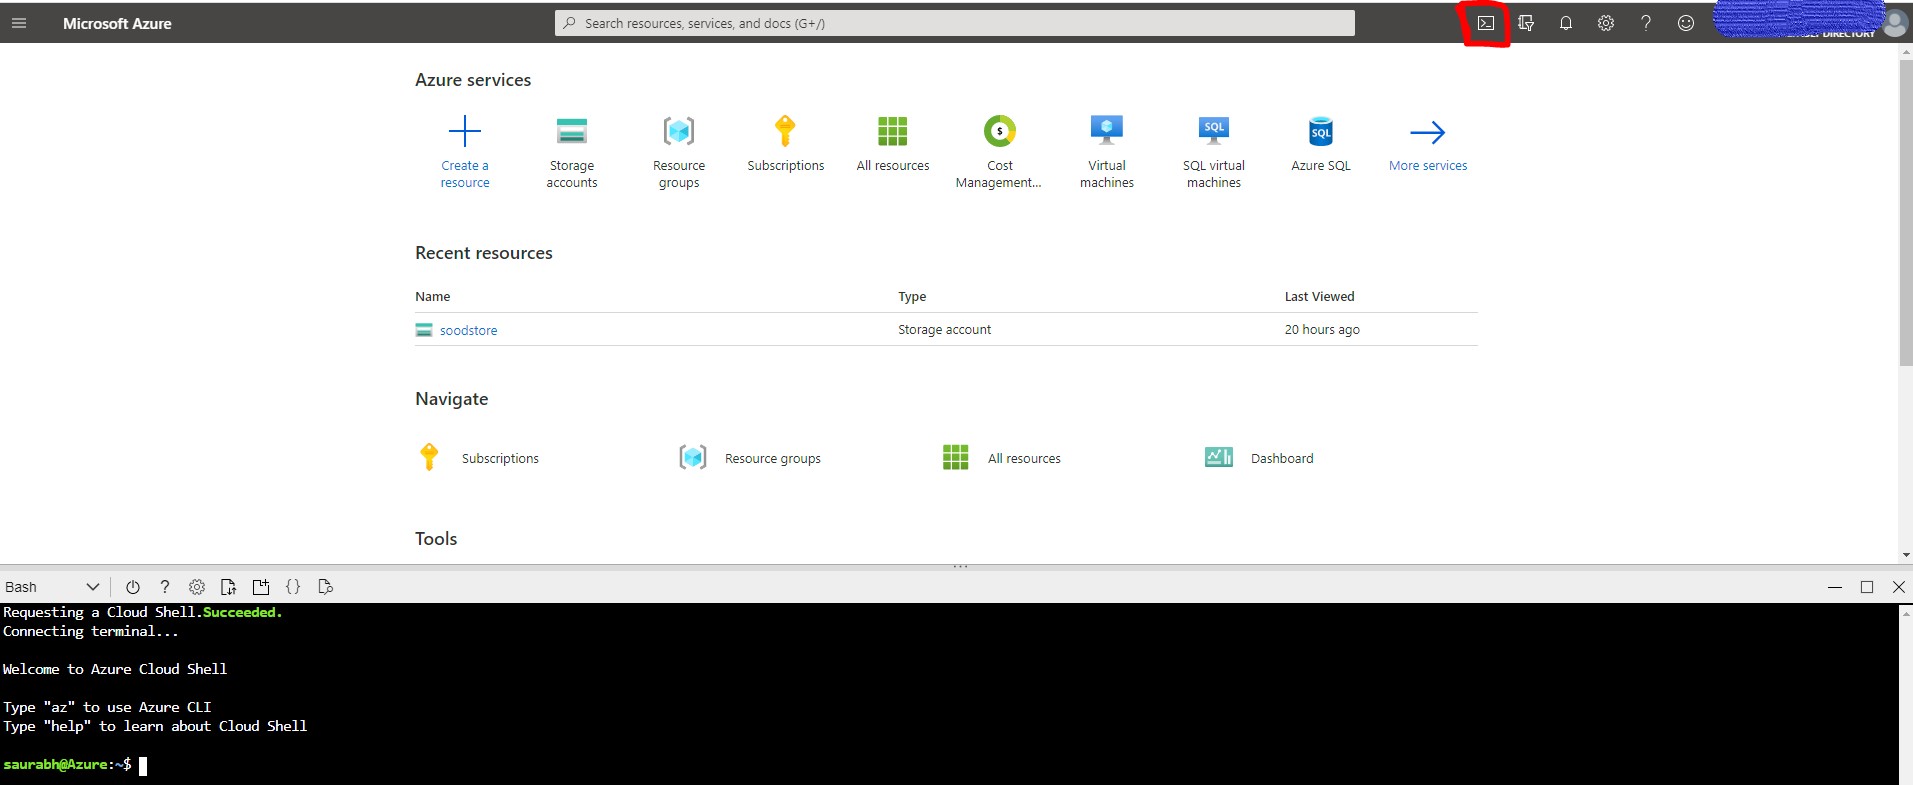
Configuring Terraform using Azure Cloud Shell
Prerequisite is only to have an Azure subscription. If you are opening Azure CLI for first time, it will ask for a mounted file share, if you don’t have it already, it will ask you to create it and will be mounted as clouddrive under you $HOME directory. Click on highlighted icon to launch Azure cloud shell.
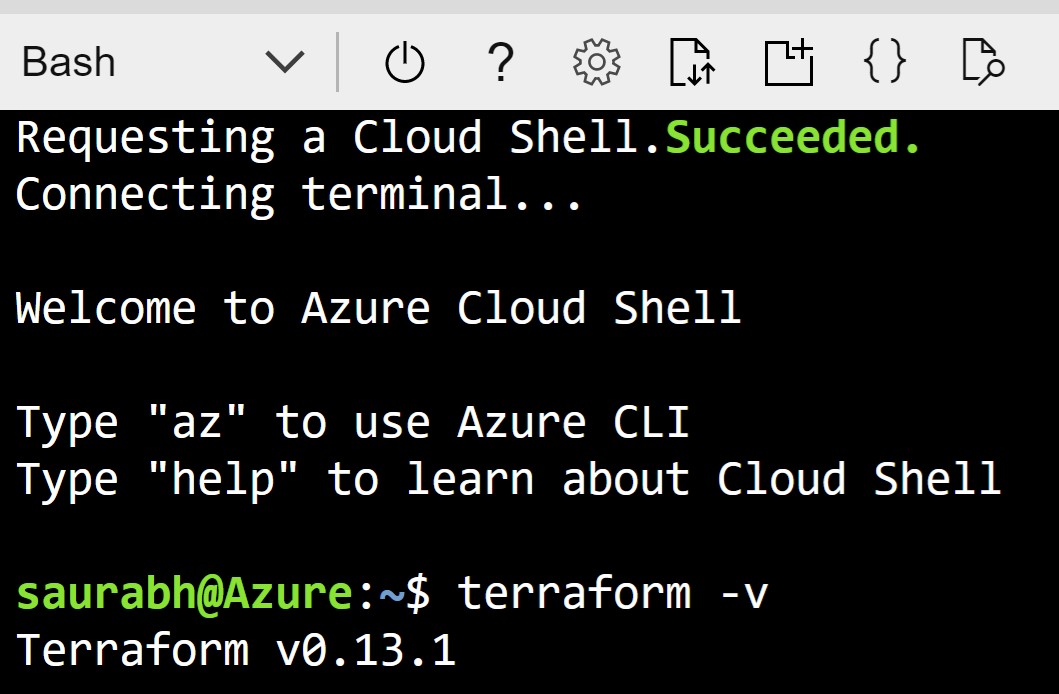
Install Terraform: Cloud Shell automatically have latest version of Terraform installed, so there are no additional installation steps required.
NOTE: Automation tools like Terraform should always have restricted permission and use azure service principal to authenticate themselves.
Now we will create a service principal for Terraform, which it will use to login to Azure subscription.
From Azure cloud shell run following command:
$ az account show (This will list your subscription-id )
$ az ad sp create-for-rbac –role=”Contributor” –scopes=”/subscriptions/<your-subscription-id>” –name=”SPterraform”
Above command will create a service principal named SPTerraform.
The randomly generated password can’t be retrieved, so make sure to save it. Now, login using this service principal:
$ az login –service-principal -u “http://SPTerraform” -p “password-shown-above” –tenant “tenenat-shown-above”
You have logged-in as a service principal to run Terraform and Azure CLI is ready to use.
This complete the basic setup to run Terraform with Azure, In my upcoming posts I demonstrate how to use this setup to write Terraform code using “Azure CLI” & “Azure Terraform” VSCode.
This is short post on Timeout errors faced using custom libraries with AWS Glue Python shell job. I referred the steps listed in AWS docs to create a custom library , and submitted the job with timeout of 5 minutes. But the job timed out without any errors in logs. Cloudwatch log reported following messages
2020-06-13T12:02:28.821+05:30 Installed /glue/lib/installation/redshift_utils-0.1-py3.7.egg
2020-06-13T12:02:28.822+05:30 Processing dependencies for redshift-utils==0.1
2020-06-13T12:12:45.550+05:30 Searching for redshift-module==0.1
2020-06-13T12:12:45.550+05:30 Reading https://pypi.org/simple/redshift-module/
On searching for error, I came across this AWS Forum post ,where it was recommended to use python3.6. I referred back documentation and it confirmed that AWS Glue shell jobs are compatible with python 2.7 and 3.6. I was using python3.7 virtualenv for my testing, so this had to be fixed.
To easily manage multiple environments, I installed miniconda on my Mac which allows to create virtual environment with different python version. Post installation, I created a new python3.6 env with conda and created the egg file
MVCC (Multi-Version Concurrency Control) feature allows databases to provide concurrent access to data. This allows each SQL statement to see a snapshot of data as it was some time ago, regardless of the current state of the underlying data. This prevents statements from viewing inconsistent data produced by concurrent transactions performing updates on the same data rows, providing transaction isolation for each database session. To summarize “Readers don’t block writers and writers don’t block readers”
If you are coming from Oracle or MySQL background, you would be aware that during an update/delete ,DML activity will make changes to rows and use separate store called “Undo” to track the old image of data. If any other session want to get consistent image, then database uses undo to provide consistent snapshot of data. Like many other databases, PostgreSQL also supports MVCC but takes different approach to store the old changes.
In PostgreSQL, update or delete of a row (tuple in PostgreSQL) does not immediately remove the old version of the row. When you update a row, it will create a copy of the row with new changes and insert in the table. Then, it will update the old copy header to make it invisible for future transactions. Similarly for delete, it won’t delete the row but update metadata to make them invisible. Eventually, these old rows will no longer be required by transactions and will have to be cleaned up. This cleanup is handled by “Vacuum”. Note that apart from increasing the total database size, table or index bloat also impacts query performance as database need to process bigger objects.
=>vacuum table 'bloated_table';
If you run above command, it will remove dead tuples in tables and indexes and marks the space available for future reuse. But this will not release the space to operating system. As vacuum is manual approach, PostgreSQL has a background process called “Autovacuum” which takes care of this maintenance process automatically. Autovacuum process to delete rows is controlled by 2 parameters autovacuum_vacuum_threshold and autovacuum_vacuum_scale_factor (There are other parametes like autovacuum_freeze_max_age which can trigger autovacuum)
vacuum threshold = autovacuum_vacuum_threshold + autovacuum_vacuum_scale_factor * number of tuples
You can find this values by querying pg_settings. For RDS, autovacuum_vacuum_threshold is 50 rows and autovacuum_vacuum_scale_factor is 0.1 i.e 10% of the table size.
select name,setting from pg_settings where name in ('autovacuum_vacuum_threshold','autovacuum_vacuum_scale_factor');
               name              | setting
 --------------------------------+---------
  autovacuum_vacuum_scale_factor | 0.1
  autovacuum_vacuum_threshold    | 50
This means that if there is table with 100 M rows, you should have ~10M changes ( 50+0.1*100M ) before autovacuum is triggered. Additionally, there are limited number of autovacuum worker processes and if autovacuum is not tuned properly, table could have much higher dead rows. It’s advisable to reduce the scale factor to lower value, either at table level or at database level to prevent bloat. You would also need to tune the autovacuum process settings to improve the cleanup process. There is an excellent blog article titled “A Case Study of Tuning Autovacuum in Amazon RDS for PostgreSQL” on AWS database blog which helps to tune autovacuum.
If you wish to reclaim OS space, then you need to execute “Vacuum Full” which will compact tables by writing a complete new version of the table file with no dead tuples. But this comes at a cost. Vacuum full requires “Exclusive lock” on the table and blocks any DML on the table, leading to downtime. This can be problematic as large tables with multiple indexes can take really long time (7-8 hours) to rebuild.
Enter pg_repack !! This utility helps to perform Full vacuum without downtime by making use of trigger to take care of changes happening on parent table. Below table compares the internal working on Table vs Index rebuilds
Table Rebuild
Index Rebuild
To perform a full-table repack, pg_repack will:
1. create a log table to record changes made to the original table 2. add a trigger onto the original table, logging INSERTs, UPDATEs and DELETEs into our log table 3.create a new table containing all the rows in the old table 4. build indexes on this new table 5. apply all changes which have accrued in the log table to the new table 6. swap the tables, including indexes and toast tables, using the system catalogs 7. drop the original table
pg_repack will only hold an ACCESS EXCLUSIVE lock for a short period during initial setup (steps 1 and 2 above) and during the final swap-and-drop phase (steps 6 and For the rest of its time, pg_repack only needs to hold an ACCESS SHARE lock on the original table, meaning INSERTs, UPDATEs, and DELETEs may proceed as usual.
To perform an index-only repack, pg_repack will:
1. create new indexes on the table using CONCURRENTLY matching the definitions of the old indexes 2. swap out the old for the new indexes in the catalogs 3. drop the old indexes
Let’s use pg_repack to clear this bloat. To use pg_repack, you need to install extension and a client utility. RDS PostgreSQL supports pg_repack for installations having version of 9.6.3 and higher.Extension version will differ depending on your RDS PostgreSQL version. e.g RDS PostgreSQL 9.6.3 installs pg_repack 1.4.0 extension, whereas 9.6.11 installs pg_repack 1.4.3 extension.
To create extension, connect as master user for RDS database and run create extension command,
postgres=>  create extension pg_extension;
postgres=> \dx pg_repack
                                 List of installed extensions
    Name    | Version | Schema |                         Description
 -----------+---------+--------+--------------------------------------------------------------
  pg_repack | 1.4.3   | public | Reorganize tables in PostgreSQL databases with minimal locks
To install pg_repack client, download the tar bar from here and build the utility. You need to ensure that extension and client utility version matches. pg_repack provides option to perform full vacuum at table level, index level or table+index . If you want to perform vacuum full for table and associated indexes, then it can be done by using below statement
-k flag is important as RDS master user does not have Postgresql superuser role and omitting this option leads to error “ERROR: pg_repack failed with error: You must be a superuser to use pg_repack”
Above statement will create new indexes and will drop the older indexes after all indexes are recreated. If you are performing this action on really big tables, it will take time and will slow down DML activity on the table as you will have 2*n-1 indexes before last one is created (n=number of indexes).Therefore, if there are multiple indexes on the table, it would be better to recreate index one by one using –index clause
In my scenario, I went with table+index vacuum option.After rebuild, actual table size reduction was 10% instead of 24% and for index , it was 75% instead of 85%. As you can see, there could be 10-20% variance between actual object size (post vacuum) vs estimated size. Therefore, it would be good to carry out testing in clone environment before committing on size savings.
Object Name
Original Size
Estimated Size after removing bloat Size
Actual size after rebuild
bloated
30GB
23GB
27G
pkey_bloated
64GB
10GB
16GB
Pg_repack creates the objects under repack schema and later moves it to the correct schema. To monitor the pg_repack session, use pg_stat_activity view
select * from pg_stat_activity where application_name='pg_repack'
This blog reflect our own views and do not necessarily represent the views of our current or previous employers.
The contents of this blog are from our experience, you may use at your own risk, however you are strongly advised to cross reference with Product documentation and test before deploying to production environments.


Recent Comments