[—ATOC—]
[—TAG:h3—]
Why I moved?
Last Month I had moved my blog hosting from Dreamhost to Amazon Web Services(AWS). I decided to change hosting provider as my blog suffered 17 outages (as per pingdom report for month of December 2012)
| Uptime | Outages | Response time |
| 97.33% | 17 | 2359 ms |
Dreamhost mentioned that my wordpress processes were running out of memory (30M) and it was being killed by their memory manager. They recommended to either uninstall some of plugins or move to Virtual Private server at additional cost of $15 per month (300M memory)
At this point I decided to explore other hosting providers. I had read about Amazon web service and searching on internet revealed articles detailing setup (mentioned in reference section below). I decided for AWS as it provides free account for 1 year which was fine for me to test
Setting up AWS EC2 Instance
To start with we need to create AWS account at http://aws.amazon.com. Amazon offers one full free year of AWS use and offers micro instance (with 613M memory) as part of package. You can refer to AWS free tier usage page to know details about services part of this package
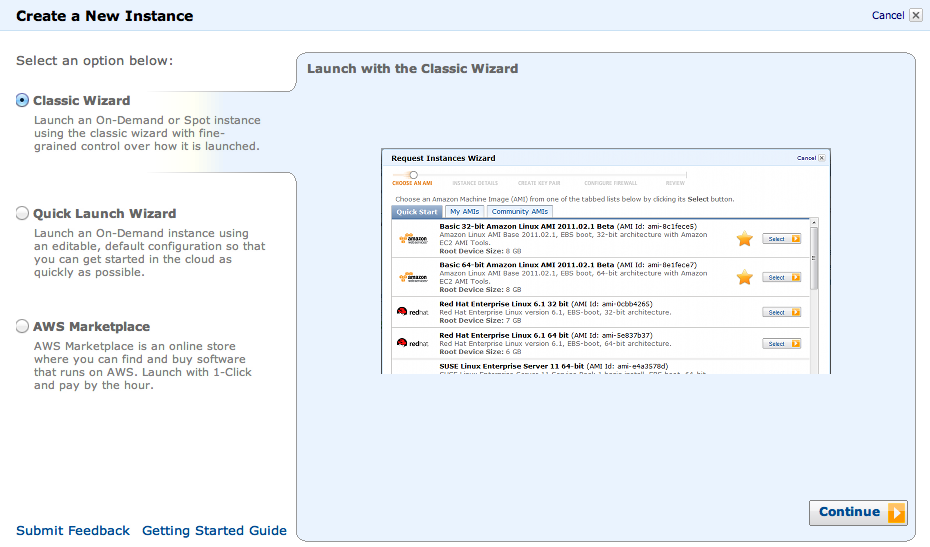
After you create a account and login , click on EC2 page and then Launch Instance. We need to create a EC2 (Virtual Instance) for starting our work. Use Classic Wizard
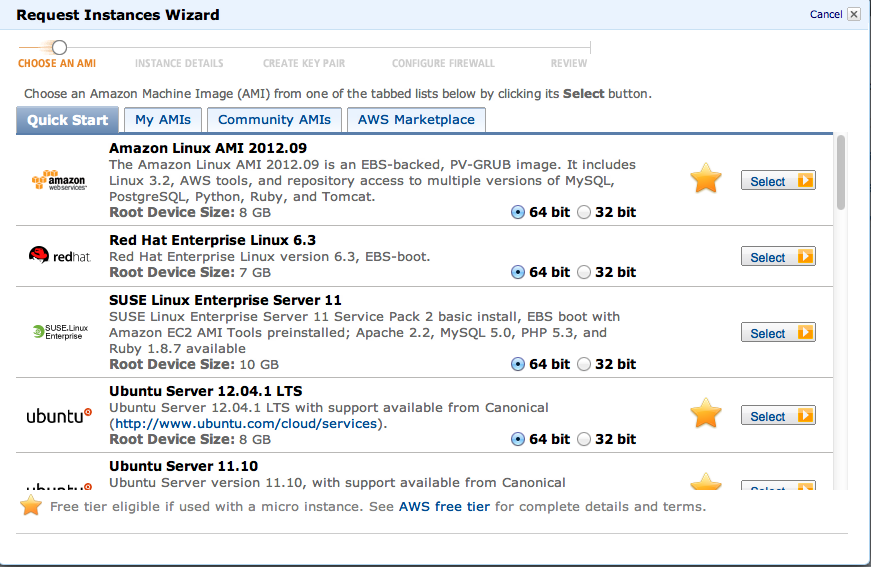
I selected Amazon Linux AMI 2012.09 (64-bit) option
Select Instance Type as T1.Micro Instance Type 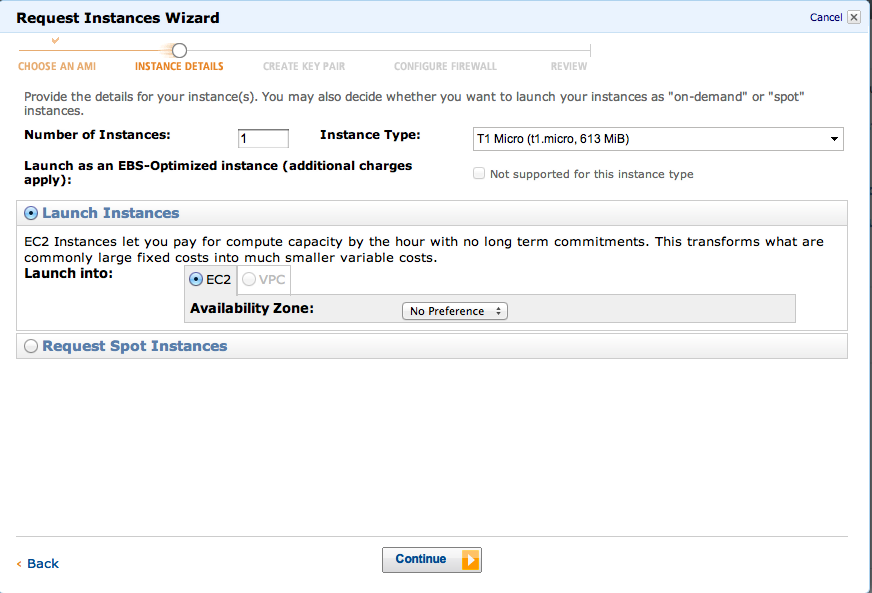
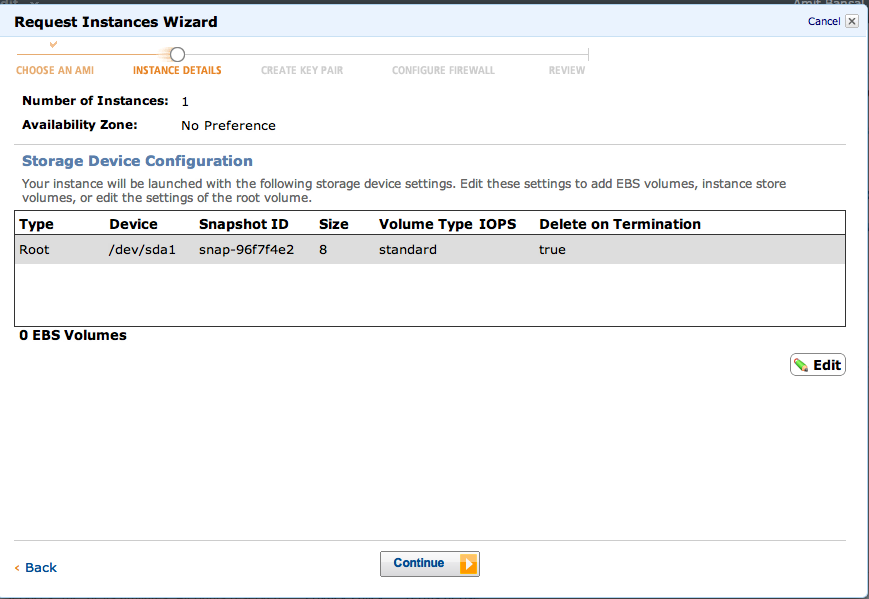
Micro Instance allows only EBS volume
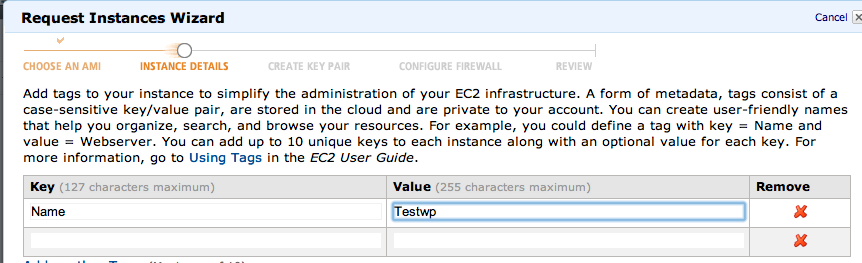
Provide a tag for server so that you can identify your servers distinctly
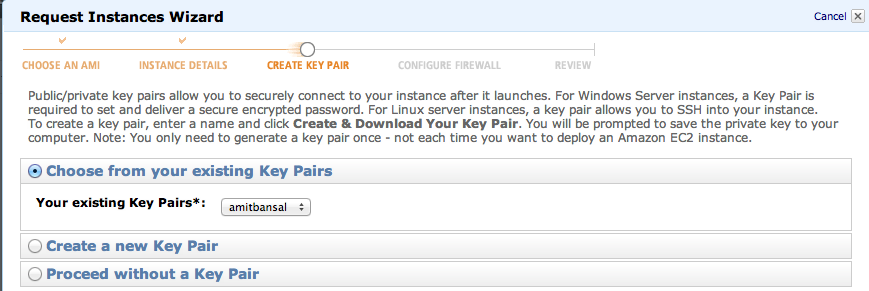
We need to create a key pair for connecting to EC2 instance. I have already created key pair and going to use it. You can also create a new key pair. Once you are done creating key pair and you have to download the keys and save it on desktop. Important note: Preserve this key as if you loose you cant download the key again and will loose access to EC2
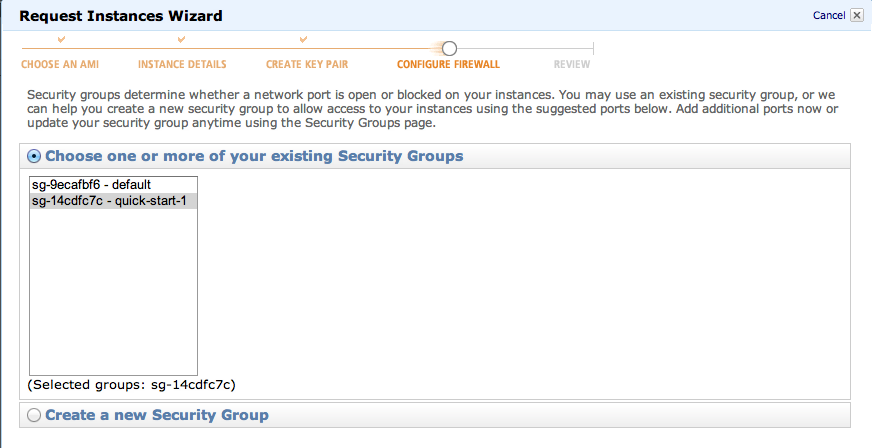
Choose Security group (can use default)
Final confirmation screen lists down option selected. Launch instance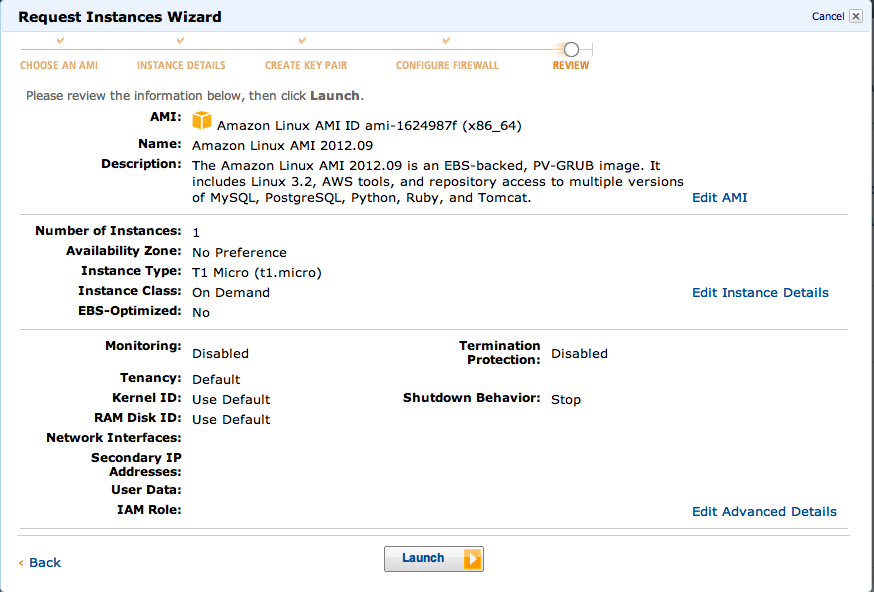
Once we launch instance, this will start a Virtual machine and would have Public DNS name like ec2-54-243-14-65.compute-1.amazonaws.com.

This is ok if we are accessing hosts but we can’t use it for assigning web address.To fix this, we need to allocate IP address. We need to go to Elastic IP’s page and click on “Allocate New Address”. Next select the IP and associate the IP address with the Virtual Machine
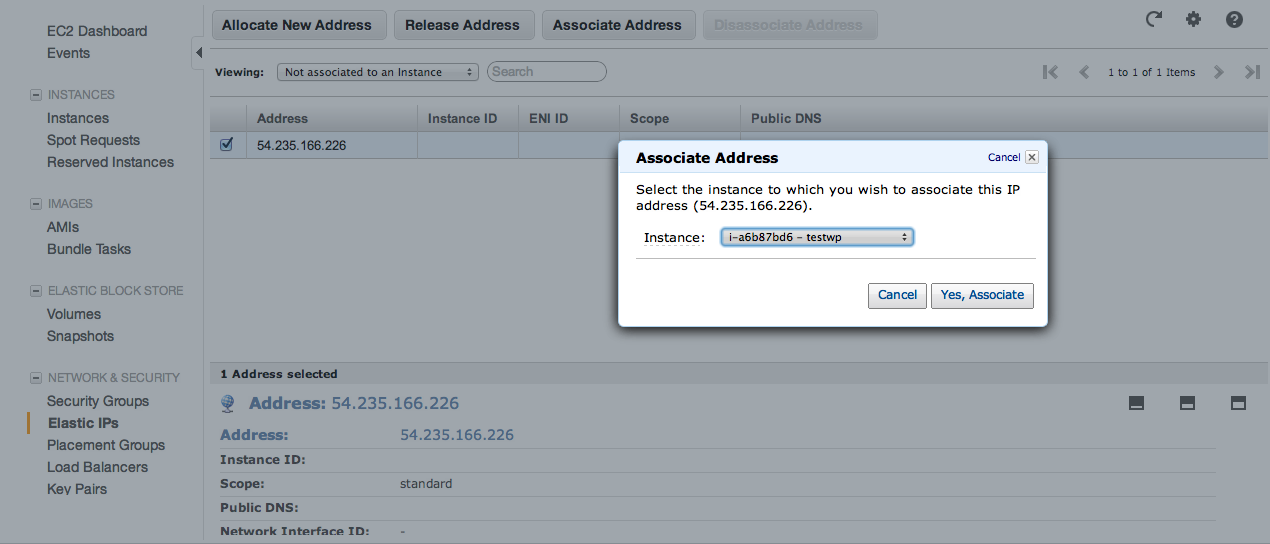
We can see that we have IP allocated to the Virtual Machine.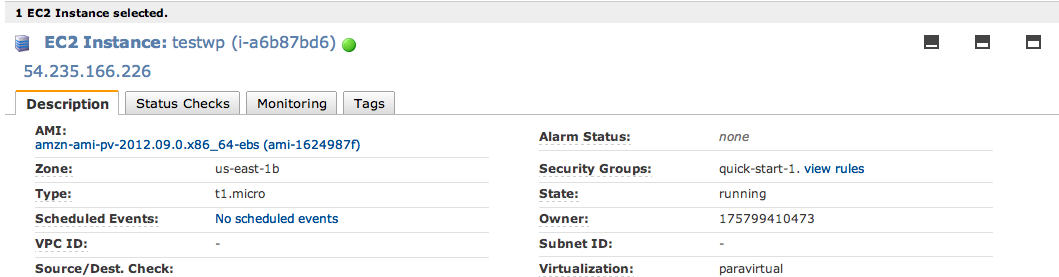
To access the machine, we need to use the private keys downloaded earlier.
ssh ec2-user@ ec2-54-243-14-65.compute-1.amazonaws.com -i ~/.ssh/amitbansal.pem
Configuring EC2 Instance
To host website, we need 3 components. Apache server, Php and Mysql Database.
We will use yum to install all the components. Starting with Apache Web Server
yum install httpd
Start the Apache Web Server:
service httpd start
To install PHP, type:
yum install php php-mysql php-devel
yum install php-mbstring
yum install php-xml
I faced error after setting up wordpress captcha ,si-captcha.php plugin says GD image support not detected in PHP!
To avoid it install php-gd
yum install php-gd
Set apache directory permission as following
chown -R apache /var/www/html
chmod -R 755 /var/www/html
Restart the Apache Web Server:
service httpd restart
Next we install MySQL
yum install mysql-server
Start MySQL:
service mysqld start
Create your “blog” mysql database:
mysqladmin -uroot create blog
We need to Secure mysql database. This is required as we need to avoid remote root connections and remove anonymous user.
mysql_secure_Installation
Use following options:
Enter current password for root: Press return for none
Change Root Password: Y
New Password: Enter your new password
Remove anonymous user: Y
Disallow root login remotely: Y
Remove test database and access to it: Y
Reload privilege tables now: Y
To install WordPress, type:
cd /var/www/html
wget http://wordpress.org/latest.tar.gz
tar -xzvf latest.tar.gz
mv wordpress weblog
Create the WordPress wp-config.php file:
cd weblog
mv wp-config-sample.php wp-config.php
vi wp-config.php
Modify the database connection parameters as follows:
define(‘DB_NAME’, ‘blog’);
define(‘DB_USER’, ‘root’);
define(‘DB_PASSWORD’, ‘YOUR_PASSWORD’);
define(‘DB_HOST’, ‘localhost’);
If we try accessing http://54.235.166.226/weblog/ , this will not work. To make this work, we need to modify the “Security Group” and add HTTP/HTTPS rule. Once done we can use the website
Migrating WordPress Data
After the wordpress default setup is done, we need to migrate the mysql data and wordpress files from existing installation.
1)Take backup of mysql database using mysqldump or phpadmin tool.
Note: – If you have set mysql backup plugin and have been getting emails, ensure that all tables are selected in backup. I did mistake of not checking it and there were few tables which were missing.
Then import data using phpadmin or mysql command. Below we are importing data in “blog” database
mysql -u root -ptest blog <mysql_data.sql
2) Copy all the files including plugins/themes,images from existing installation to new site.
3) Run following commands in mysql database to try out temporary site
UPDATE wp_options SET option_value = replace(option_value, 'http://askdba.org/weblog', 'http://54.235.166.226/weblog') WHERE option_name = 'home' OR option_name = 'siteurl';
UPDATE wp_posts SET guid = replace(guid, 'http://askdba.org/weblog','http://54.235.166.226/weblog');
UPDATE wp_posts SET post_content = replace(post_content, 'http://askdba.org/weblog', 'http://54.235.166.226/weblog');
4)Next login to WordPress Dashboard and update the permalinks setting which will fix the permalinks.
Optimizing Webhost Setup
If we run with default setup, our site would suffer downtime as server will run out of memory. We can see Out of memory errors in apache error logs. AWS EC2 instances have 613M RAM and are not configured with swap. You can configure
But instead of configuring swap, I decided to tune the apache server threads and other parameters. Following changes were made to Apache config file /etc/httpd/conf/httpd.conf
Timeout 30
KeepAlive on
MaxKeepAliveRequests 50
KeepAliveTimeout 15
#Changes to prefork module
<IfModule prefork.c>
StartServers 3
MinSpareServers 2
MaxSpareServers 5
ServerLimit 256
MaxClients 10
MaxRequestsPerChild 1000
</IfModule>
After saving file, we need to restart apache process. Let’s wait and tune php and mysql database.
To tune mysql memory, I used following values
[mysqld]
port		= 3306
socket		= /var/lib/mysql/mysql.sock
skip-external-locking
key_buffer_size = 16M
max_allowed_packet = 1M
table_open_cache = 64
sort_buffer_size = 1M
net_buffer_length = 8K
read_buffer_size = 256K
read_rnd_buffer_size = 512K
myisam_sort_buffer_size = 8M
query_cache_limit       = 1M
query_cache_size        = 16M
Next we modify memory available for php. We allocated 128M
# grep memory_limit /etc/php.ini
memory_limit = 128M
Once done, restart mysql server
service mysqld restart
This might fail as we made changes to innodb parametes. To fix it remove /var/lib/mysql/ib_logfile* files and restart mysqld again.
Now restart apache server
service httpd restart
Making actual Move
By now, you will be able to determine if everything is working fine with your site on AWS. To make actual move, take fresh backup of mysql database and restore it to new site. You can follow step 1,2 in “Migrating WordPress Data” .
Now move to your webhosting portal and go to DNS management and modify your A record and update with Amazon Elastic IP address associated with EC2 instance. DNS propogation may take some time. I have signed up with cloudflare (Free account0 and pointed my Dreamhost Name servers to cloudflare , so DNS management is done in Cloudflare and propagation happens in less then 5 mins.
You can rename your directory at old hosting site to ensure that you are not logging in at old site. Once logged in new site Dashboard, update permalinks. You are done moving your site:)
Optimizing WordPress with w3tc
W3 Total Cache is most popular caching software and is highly recommended for any website using wordpress. You can use w3tc to further optimize the wordpress by using caching and CDN.
Caching
You can cache the pages,DB queries, objects to OS so that they are served directly from cache. If using AWS or any virtual hosting you can also make use of APC(Alternative PHP Cache) to cache these files. To use it we need to first install the rpm and then restart the apache server
#yum install php-pecl-apc
You need to allocate memory to APC. It is controlled by /etc/php.d/apc.ini and shm_size parameter.
apc.shm_size=64M
#service httpd restart
Once done, w3tc will enable opcode:Alternative PHP Cache(APC) option for caching.
CDN
You can make use of CDN network to cache images,files. This can relieve some load on your webhosting server. Amazon AWS provides Amazon Cloudfront and Amazon S3 storage.
Configuring S3 storage is easy. You go to S3 console on AWS dashboard and create a bucket.e.g cacheserver.askdba.org. Edit the properties of this bucket and add permission and grant view permission to everyone.Next go to WordPress Dashboard ->Performance ->General and choose S3 storage. Then go to Dashboard ->Performance ->CDN and enter information shown below. You can get access key and secret key from Security Credentials page
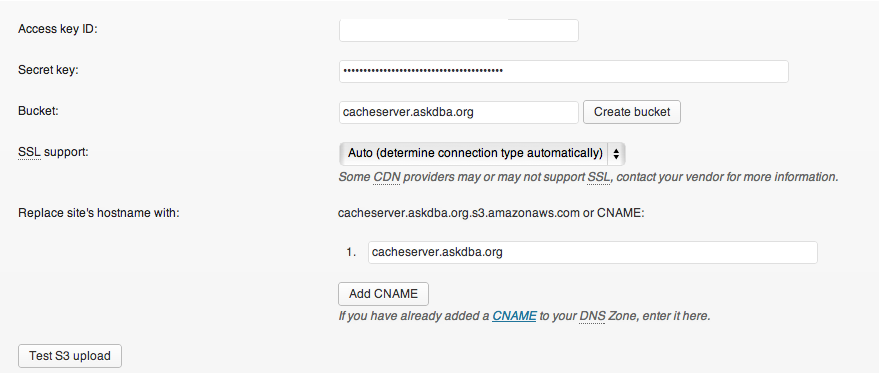
Add a cname entry in DNS portal.It should be cacheserver.askdba.org should be alias of s3.amazonaws.com. Next you can upload the attachments ,plugins,theme files to S3 (Find under CDN->General)
If you want files to be served with low latency, then you can make use of Amazon Cloudfront which provides caching at various data centres like US,Europe, APAC(Tokyo) and APAC(Singapore).
To setup Cloudfront, go to AWS Cloudfront console. Next click on create distribution and in origin Domain name, enter your domain. You can also use S3 storage to serve these files. Provide list of cname which you would like to use. Cname is useful as otherwise images will show url as dfkkfkk.cloudfront.net/1.img. You can specify upto 10 cname. Also create these aliases in your DNS portal (cname entries) In Price class use default i.e All locations.
Next go to Wordpress Dashboard ->Performance ->General and choose Amazon Cloudfront (under origin pull).We then need to update CDN entries as below (get Cloudfront domain name under distribution settings in AWS console).

Deployment would take around 10-15 mins.
Is Free AWS actually Free?
I had mentioned above that Amazon AWS provides free account for 1 year. But in reality it is not Free!! Reason is that Micro instance comes up with EBS volume and have 2 million I/O as monthly free quota. But I noticed that EC2 instance does I/O of 1 Million I/O daily (OS,apache,mysql takes it). This costs 0.1$ per 1 million I/O and it also reflects in my monthly Amazon AWS Billing statement with total charge of $2.57 (upto 25 Jan). So this Free account would cost $3 for month (if you use cloudfront or S3 storage, there will be additional charges)
| Charges | I/O’s | Cost ($) |
| $0.10 per 1 million I/O requests | 25,727,955 | 2.57 |
How much will it cost?
As per AWS EC2 pricing plan , if we host site in US East (N.Virginia) following rates apply

So if we go for 3 year reserved micro instance , it would cost us
| Upfront payment ($100 for 3 years) | 100/36 | $2.78 |
| Monthly payment (30 days) | 24*30*0.005 | $3.6 |
| EC2 I/O | $3.0 | |
| Amazon Cloudfront/S3 | $0.5 |
This would cost nearly $10 per month which is not bad (Plus additional $10 for Domain). Note that this pricing is applicable only for 3 year reserved instance and would cost more for other plans
Summary
Amazon AWS provides lot of benefit and flexibility for hosting websites . Big websites can even make use of Amazon RDS database which can provide high availability. Using AWS allows you to move to bigger servers for hosting websites very quickly (you can clone the host using EBS volume) .Downside of using AWS for wordpress blog is that you need to do lot of setup and maintenance might not be easy task.You might also experience some downtime if things are not configured properly .
References
http://coenraets.org/blog/2012/01/setting-up-wordpress-on-amazon-ec2-in-5-minutes/
http://imperialwicket.com/tuning-apache-for-a-low-memory-server-like-aws-micro-ec2-instances
3 thoughts on “Moving WordPress Blog to Amazon Web Services”