Featured

Moving WordPress Blog to Amazon Web Services

[—ATOC—]
[—TAG:h3—]

Why I moved?

Last Month I had moved my blog hosting from Dreamhost to Amazon Web Services(AWS). I decided to change hosting provider as my blog suffered 17  outages (as per pingdom report for month of December 2012)


Uptime Outages Response time
97.33% 17 2359 ms

Dreamhost mentioned that my wordpress processes were running out of memory (30M) and it was being killed by their memory manager. They recommended to either uninstall some of plugins or move to Virtual Private server at additional cost of $15 per month (300M memory)
At this point I decided to explore other hosting providers. I had read about Amazon web service and searching on internet revealed articles detailing setup (mentioned in reference section below). I decided for AWS as it provides free account for 1 year which was fine for me to test

Setting up AWS EC2 Instance

To start with we need to create AWS account at http://aws.amazon.com. Amazon offers one full free year of AWS use and offers micro instance (with 613M memory) as part of package. You can refer to AWS free tier usage page to know details about services part of this package

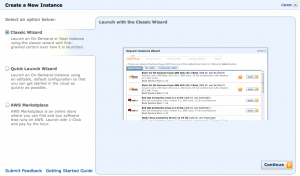
After you create a account and login , click on EC2 page and then Launch Instance. We need to create a EC2 (Virtual Instance) for starting our work. Use Classic Wizard

aws_0

I selected Amazon Linux AMI 2012.09 (64-bit) option

aws_1

Select Instance Type as T1.Micro Instance Type aws_2

Micro Instance allows only EBS volume

aws_3

Provide a tag for server so that you can identify your servers distinctly
aws_4

We need to create a key pair for connecting to EC2 instance. I have already created key pair and going to use it. You can also create a new key pair. Once you are done creating key pair and you have to download the keys and save it on desktop. Important note: Preserve this key as if you loose you cant download the key again and will loose access to EC2
aws_5

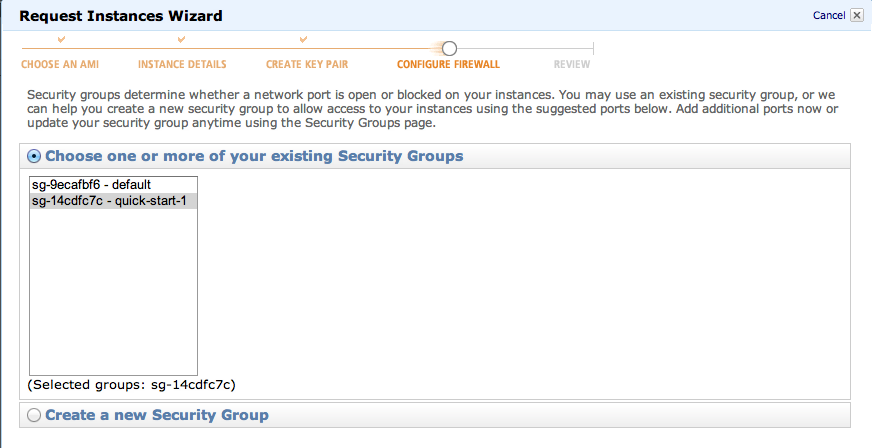
Choose Security group (can use default)

aws_6

Final confirmation screen lists down option selected. Launch instanceaws_7


Once we launch instance, this will start a Virtual machine and would have Public DNS name like ec2-54-243-14-65.compute-1.amazonaws.com. 

aws_8

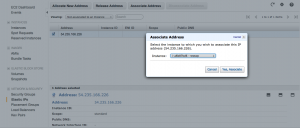
This is ok if we are accessing hosts but we can’t use it for assigning web address.To fix this, we need to allocate IP address. We need to go to Elastic IP’s page and click on “Allocate New Address”. Next select the IP and associate the IP address with the Virtual Machine

aws_9

We can see that we have IP allocated to the Virtual Machine.aws_10

To access the machine, we need to use the private keys downloaded earlier.

ssh ec2-user@ ec2-54-243-14-65.compute-1.amazonaws.com -i ~/.ssh/amitbansal.pem

Configuring EC2 Instance

To host website, we need 3 components. Apache server, Php and Mysql Database.

 We will use yum to install all the components. Starting with Apache Web Server

yum install httpd

Start the Apache Web Server:

service httpd start

To install PHP, type:

yum install php php-mysql php-devel
yum install php-mbstring
yum install php-xml

I faced error after setting up wordpress captcha ,si-captcha.php plugin says GD image support not detected in PHP!

To avoid it install php-gd

yum install php-gd

Set apache directory permission as following

chown -R apache /var/www/html
chmod -R 755 /var/www/html

Restart the Apache Web Server:

service httpd restart

Next we install MySQL

yum install mysql-server

Start MySQL:

service mysqld start

Create your “blog” mysql database:

mysqladmin -uroot create blog

We need to Secure mysql database. This is required as we need to avoid remote root connections and remove anonymous user.

mysql_secure_Installation

Use following options:

Enter current password for root: Press return for none
Change Root Password: Y
New Password: Enter your new password
Remove anonymous user: Y
Disallow root login remotely: Y
Remove test database and access to it: Y
Reload privilege tables now: Y

To install WordPress, type:

cd /var/www/html
wget http://wordpress.org/latest.tar.gz
tar -xzvf latest.tar.gz
mv wordpress weblog

Create the WordPress wp-config.php file:

cd weblog
mv wp-config-sample.php wp-config.php
vi wp-config.php

Modify the database connection parameters as follows:

define(‘DB_NAME’, ‘blog’);
define(‘DB_USER’, ‘root’);
define(‘DB_PASSWORD’, ‘YOUR_PASSWORD’);
define(‘DB_HOST’, ‘localhost’);

If we try accessing http://54.235.166.226/weblog/ , this will not work. To make this work, we need to modify the “Security Group” and add HTTP/HTTPS rule. Once done we can use the website

Migrating WordPress Data

After the wordpress default setup is done, we need to migrate the mysql data and wordpress files from existing installation.

1)Take backup of mysql database using mysqldump or phpadmin tool.

Note: – If you have set mysql backup plugin and have been getting emails, ensure that all tables are selected in backup. I did mistake of not checking it and there were few tables which were missing.

Then import data using phpadmin or mysql command. Below we are importing data in “blog” database

mysql -u root -ptest blog <mysql_data.sql

2) Copy all the files including plugins/themes,images from existing installation to new site.

3) Run following commands in mysql database to try out temporary site

UPDATE wp_options SET option_value = replace(option_value, 'http://askdba.org/weblog', 'http://54.235.166.226/weblog') WHERE option_name = 'home' OR option_name = 'siteurl';
UPDATE wp_posts SET guid = replace(guid, 'http://askdba.org/weblog','http://54.235.166.226/weblog');
UPDATE wp_posts SET post_content = replace(post_content, 'http://askdba.org/weblog', 'http://54.235.166.226/weblog');

4)Next login to WordPress Dashboard and update the permalinks setting which will fix the permalinks.

Optimizing Webhost Setup

If we run with default setup, our site would suffer downtime as server will run out of memory. We can see Out of memory errors in apache error logs. AWS EC2 instances have 613M RAM and are not configured with swap. You can configure

But instead of configuring swap, I decided to tune the apache server threads and other parameters. Following changes were made to Apache config file /etc/httpd/conf/httpd.conf

Timeout 30
KeepAlive on
MaxKeepAliveRequests 50
KeepAliveTimeout 15
#Changes to prefork module
<IfModule prefork.c>
StartServers 3
MinSpareServers 2
MaxSpareServers 5
ServerLimit 256
MaxClients 10
MaxRequestsPerChild 1000
</IfModule>

After saving file, we need to restart apache process. Let’s wait and tune php and mysql database.

To tune mysql memory, I used following values

[mysqld]
port		= 3306
socket		= /var/lib/mysql/mysql.sock
skip-external-locking
key_buffer_size = 16M
max_allowed_packet = 1M
table_open_cache = 64
sort_buffer_size = 1M
net_buffer_length = 8K
read_buffer_size = 256K
read_rnd_buffer_size = 512K
myisam_sort_buffer_size = 8M
query_cache_limit       = 1M
query_cache_size        = 16M

Next we modify memory available for php. We allocated 128M

# grep memory_limit /etc/php.ini
memory_limit = 128M

Once done, restart mysql server

service mysqld restart

This might fail as we made changes to innodb parametes. To fix it remove /var/lib/mysql/ib_logfile* files and restart mysqld again.

Now restart apache server

service httpd restart

Making actual Move

By now, you will be able to determine if everything is working fine with your site on AWS. To make actual move, take fresh backup of mysql database and restore it to new site. You can follow step 1,2  in “Migrating WordPress Data” .

Now move to your webhosting portal and go to DNS management and modify your A record and update with Amazon Elastic IP address associated with EC2 instance. DNS propogation may take some time. I have signed up with cloudflare (Free account0 and pointed my Dreamhost Name servers to cloudflare , so DNS management is done in Cloudflare and propagation happens in less then 5 mins.

You can rename your directory at old hosting site to ensure that you are not logging in at old site. Once logged in new site Dashboard, update permalinks. You are done moving your site:)

Optimizing WordPress with w3tc

W3 Total Cache is most popular caching software and is highly recommended for any website using wordpress. You can use w3tc to further optimize the wordpress by using caching and CDN.

Caching

You can cache the pages,DB queries, objects to OS so that they are served directly from cache. If using AWS or any virtual hosting you can also make use of APC(Alternative PHP Cache) to cache these files. To use it we need to first install the rpm and then restart the apache server

#yum install php-pecl-apc

You need to allocate memory to APC. It is controlled by /etc/php.d/apc.ini and shm_size parameter.
apc.shm_size=64M

#service httpd restart

Once done, w3tc will enable  opcode:Alternative PHP Cache(APC) option for caching.

CDN

You can make use of CDN network to cache images,files. This can relieve some load on your webhosting server. Amazon AWS provides Amazon Cloudfront and Amazon S3 storage.

Configuring S3 storage is easy. You go to S3 console on AWS dashboard and create a bucket.e.g cacheserver.askdba.org. Edit the properties of this bucket and add permission and grant view permission to everyone.Next go to WordPress Dashboard ->Performance ->General and choose S3 storage. Then go to Dashboard ->Performance ->CDN and enter information shown below. You can get access key and secret key from Security Credentials page

aws_s3_cdn

Add a cname entry in DNS portal.It should be cacheserver.askdba.org should be alias of s3.amazonaws.com.  Next you can upload the attachments ,plugins,theme files to S3 (Find under CDN->General)

If you want files to be served with low latency, then you can make use of Amazon Cloudfront which provides caching at various data centres like US,Europe, APAC(Tokyo) and APAC(Singapore).

To setup Cloudfront, go to AWS Cloudfront console. Next click on create distribution and in origin Domain name, enter your domain. You can also use S3 storage to serve these files. Provide list of cname which you would like to use. Cname is useful as otherwise images will show url as dfkkfkk.cloudfront.net/1.img. You can specify upto 10 cname. Also create these aliases in your DNS portal (cname entries) In Price class use default i.e All locations.

Next go to  Wordpress Dashboard ->Performance ->General and choose Amazon Cloudfront (under origin pull).We then need to update CDN entries as below  (get Cloudfront domain name under distribution settings in AWS console).

aws_cloudfront

Deployment would take around 10-15 mins.

Is Free AWS actually Free?

I had mentioned above that Amazon AWS provides free account for 1 year. But in reality it is not Free!! Reason is that Micro instance comes up with EBS volume and have 2 million I/O as monthly free quota. But I noticed that EC2 instance does I/O of 1 Million I/O daily (OS,apache,mysql takes it). This costs 0.1$ per 1 million I/O and it also reflects in my monthly Amazon AWS Billing statement with total charge of $2.57 (upto 25 Jan). So this Free account would cost $3 for month (if you use cloudfront or S3 storage, there will be additional charges)


Charges I/O’s Cost ($)
$0.10 per 1 million I/O requests 25,727,955 2.57

How much will it cost?

As per AWS EC2 pricing plan  , if we host site in US East (N.Virginia) following rates apply

aws_cost
So if we go for 3 year reserved micro instance , it would cost us

Upfront payment ($100 for 3 years) 100/36 $2.78
Monthly payment (30 days) 24*30*0.005 $3.6
EC2 I/O $3.0
Amazon Cloudfront/S3 $0.5


This would cost nearly $10 per month which is not bad (Plus additional $10 for Domain). Note that this pricing is applicable only for 3 year reserved instance and would cost more for other plans

Summary

Amazon AWS provides lot of benefit and flexibility for hosting websites . Big websites can even make use of  Amazon RDS database which can provide high availability. Using AWS allows you to move to bigger servers for hosting websites very quickly (you can clone the host using EBS volume) .Downside of using AWS for wordpress blog is that you need to do lot of setup and maintenance might not be easy task.You might also experience some downtime if things are not configured properly .

References

http://coenraets.org/blog/2012/01/setting-up-wordpress-on-amazon-ec2-in-5-minutes/
http://imperialwicket.com/tuning-apache-for-a-low-memory-server-like-aws-micro-ec2-instances

Get Upgrading: Upgrade to Enterprise Manager Cloud Control 12c

PreUpgradeConsole

This post describes the steps to upgrade an existing 11g Enterprise Manager Grid Control (11.1.0.1.0) to 12c (12.1.0.1.0). The Complete Upgrade process will be carried out under 3 different stages:

1. Patch existing 11g OMS to get the 12c upgrade console.
2. Deploy and Configure 12c agents.
3. Upgrade 11g OMS to 12c.

The approach used for this upgrade is 1-system upgrade approach. This approach enables you to upgrade to Enterprise Manager Cloud Control on the same host where your earlier release of Enterprise Manager is running. This approach also upgrades the Oracle Management Repository (Management Repository) in the existing database. Since the upgrade happens  on the same host, there is a reasonable downtime involved. This approach does not refer to upgrading of an Enterprise Manager system in an environment with one Oracle Management Service (OMS). It refers to upgrading of an Enterprise Manager system on the same host as the old one, and having only one Enterprise Manager system existing at any point. 

 Environment Details:

Operating System: OEL5.4 x86_64
Database Version: 11.2.0.1
Existing Grid Control/Agent: 11.1.0.1.0

The supported earlier releases for upgrade include:

Oracle Management Agent 10g Release 2 (10.2.x.x.x),
Oracle Management Agent 11g Release 1 (11.1.0.1.0),
Oracle Management Service 10g Release 5 (10.2.0.5.0) and
Oracle Management Service 11g Release 1(11.1.0.1.0).

Unlike earlier releases Oracle Management Service 12c communicates only with Oracle Management Agent 12c. Therefore, unlike the earlier releases, you must first upgrade the Management Agents in your system before upgrading your existing OMS.

1. Patch existing 11g OMS to get the 12c upgrade console

To start the upgrade process we need to get the 12c upgrade console, which we can get by installing patch for bug# 10044087 on your existing Enterprise Manager system.
To apply this patch OMS needs to be down which means that there is a downtime required for the existing GridControl environment.
Download the patch and apply for your platform click HERE for download link.

This patch application is a simple patch apply process with opatch. Following are the mandatory things before you start patch apply:

— It is mandatory to apply PSU1(10065631) or later on the existing OMS home

— There is a chance of hitting bug  9953045 and  bug 12360281, to escape these situations, set  SQLNET.ENCRYPTION_TYPES_SERVER= (3DES168)  in sqlnet.ora of your oracle database sqlnet file.

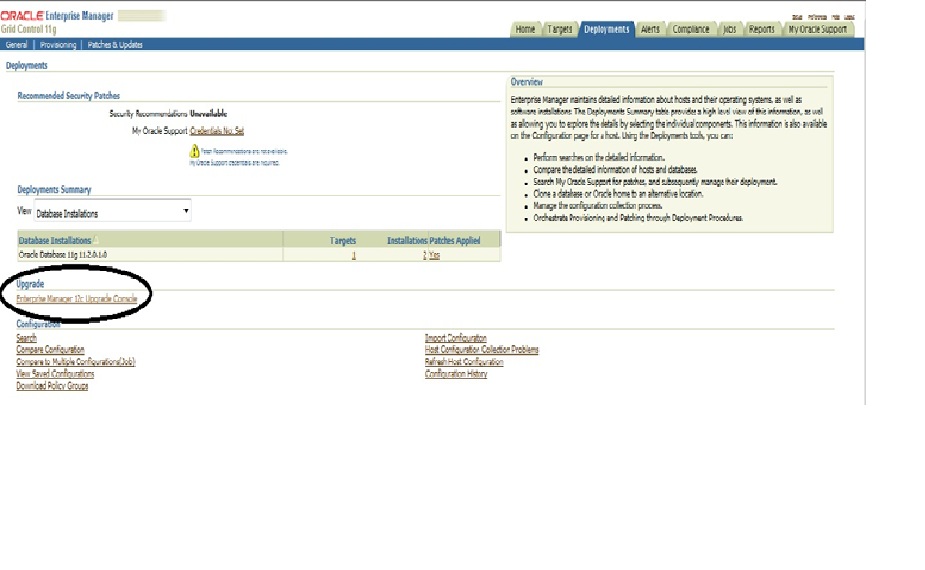
Follow the patch readme to apply this patch. Once this patch is applied and the post scripts(puc_dblink_pkgdef.sql, puc_dblink_pkgbody.sql and pre_upg_console.sql) are run and OMS is started, you can see the “Enterprise manager 12c Upgrade Console”  under “Deployments” tab of  Grid Control.

PreUpgradeConsole

2. Deploy and Configure 12c agents:

Download the following software, and stage them to an accessible location:

– Oracle Management Agent 12c
– All the required plug-ins

Click HERE to download.

Don’t unzip the binaries after downloading them. Verify the checksum after downloading the zip files.
To manage information about the location of the core Management Agent software and its associated plug-ins, follow these steps:

1. In Grid Control, click Deployments.
2. On the Deployments page, in the Upgrade section, click Enterprise Manager 12c Upgrade Console.
3. On the Upgrade Console page, in the Select Upgrade Type section, select one of the following:

– To upgrade your Enterprise Manager system with downtime (even if you manually install Management Agents), select 1-System.
– To upgrade your Enterprise Manager system with “near zero” downtime (even if you manually install Management Agents), select 2-System.
– To upgrade your Enterprise Manager system with downtime on a different host, select 1-System on a Different Host.

Select 1-system approach here.

Enterprise Manager Grid Control refreshes the page and displays a table with a list of tasks you need to perform for the upgrade approach you selected.

4. In the Preupgrade Steps section, from the table, click Manage Software.
5. On the Manage Software page, in the Agent Upgradability and Target Upgradability pie charts, click the hyperlinks in the respective legends and identify the Management Agents and targets that can be upgraded, and that cannot be upgraded due to unavailability of the Management Agent software or the plug-in software.

6. In the Provide Software Location section, enter the absolute path to the directory where the core Management Agent software and the plug-in software are present for the required platforms.

For example, /u01/app/plugin

And then click Validate to register that location with the Enterprise Manager system. Once validate is complete you will see the below pie charts adn these should be in all green. If they are not in green, it means that you have missed some plugin(you will find the list of all required plugins at the botton of same page), download and stage the missing plugin and validate again.


Validate

Validate


Once the software have been verified we can continue to deploy and configure the software binaries of Oracle Management Agent 12c.

1. In Grid Control, click Deployments.
2. On the Deployments page, in the Upgrade section, click Enterprise Manager 12c Upgrade Console.
3. On the Upgrade Console page, in the Select Upgrade Type section, select  1-system approach.

In the “Preupgrade Steps” section, from the table, click Deploy and Configure Agents.


4. On the Deploy and Configure Agents page, for Operation Name, enter a unique name for the deployment operation you are about to perform. The custom name you enter can be any intuitive name, and need not necessarily be in the same format as the default name.
For example, Deploy_Agents_Phase1_2010_12_27.
6. In the Select Operation Type section, select Deploy Agent and Plug-In Software
and Configure Agent and Plug-In Software.
7. In the Search Agents section, search and add the existing, old Management Agents
for which you want to deploy the software. In the table that lists the Management Agents, enter an installation base directory
and an instance home directory for each of the Management Agents.

In the Agent Credentials section, retain the default selection, that is, Use Oracle Home Preferred Credentials,if you have already set these, so that the preferred credentials stored in the Management Repository can be used for this job.In the OMS Host and Port section, validate the name and the secure port of the host where you plan to install Oracle Management Service 12c. To change the values, click Edit. After filling up the port details click next, do not select any pre and post upgrade script.
Provide the root credentials and click submit. Agent will start a job with the name that you have provided, click at the job to see the status.

 Generate Health Report of Deployed Oracle Management Agents.  Follow the steps by clicking the “Generate help report” , once it is completed, you will see following screen:

Verify and sign off the health check report. After this you have to Switch-Over to 12c agents. Under “Agent Upgrade Steps” click switch agents:

Search for all the agents and provide the oracle preferred credentials. Click submit. 

 Once this job completes, the old agents will be stopped and new agents from 12g home will be started.

 3. Upgrade 11g OMS to 12c

Download and unzip the 12c software from the link mentioned earlier in the post. It is mandatory to meet all the required prerequisites mentioned at ORACLE DOCUMENTATION otherwise the installation will fail at some later stage. I will list one import prerequisite step here:

Copy EMkey to repository: To do so, check the status of emkey as:
[oracle@cloud1 bin]$ emctl status emkey
Oracle Enterprise Manager 11g Release 1 Grid Control
Copyright (c) 1996, 2010 Oracle Corporation. All rights reserved.
Enter Enterprise Manager Root (SYSMAN) Password : xxxxx
The EMKey is configured properly.

Copy the emkey as:

     $ emctl config emkey -copy_to_repos

After meeting all the prerequisites, continue with the OMS upgrade:

Invoke runInstaller from 12c unzip location:

 $ ./runInstaller

Choose your option to receive updates via MOS and click next. I opted to remain uninformed from MOS updates.

On the Software Updates screen, select one of the following sources from where the software updates can be installed while the Enterprise Manager system gets upgraded. If you do not want to apply them now, then select Skip. I opted to skip these updates for the installation. Click next.


On the Prerequisite Checks screen, check the status of the prerequisite checks run by the installation wizard, and verify whether your environment meets all the minimum requirements for a successful upgrade. It may show “Failed” for some of the packages, make sure that those were installed or higher versions of those packages are already in place. Once confirmed all settings, click next.

Under Install Type, select to upgrade an existing instance option and choose 1-system upgrade approach. It will automatically find the existing middleware home. Enter a valid middleware home location where it will install the required components for 12c. Provide the location of Middleware home . Click next.

Provide sys and sysman password and click next.

You can select the plug-ins that you want to install, the already installed plugins will be greyed-out.
Click next after selecting the plugins.


If you are upgrading from Enterprise Manager 11g Grid Control Release 1 (11.1.0.1.0), then on the Extend WebLogic Server Domain screen, validate the AdminServer host name and its port, and the WebLogic user name. Enter the WebLogic user account password for extending the existing Oracle WebLogic Server Domain to the upgraded release.


Installation status.. once the installation finishes, it will ask you to run allroot.sh as root user.
Run the script as root user and click finish.

Launch the Cloud Console as you will see like:

Login using sysman and now you are ready to control clouds 🙂

11g: Multiple failed login attempt can block New Application connections

In Oracle database 11g, a new feature/enhancement has potential of bringing down the application due to multiple sessions hitting database with wrong password.

As per Bug 7715339 – Logon failures causes “row cache lock” waits – Allow disable of logon delay [ID 7715339.8]

In 11g there is an intentional delay between allowing failed logon attempts to retry. After 3 successive failures a sleep delay is introduced starting
at 3 seconds and extending to 10 seconds max. During each delay the user X row cache lock is held in exclusive mode preventing any concurrent logon attempt as user X (and preventing any other operation which would need the row cache lock for user X).

Let’s simulate this using a test case.I am using a 11.2.0.3 database.Open two or more database server  connections

Connection 1

create user amit identified by amit;
grant connect to amit;
alter user amit profile MONITORING_PROFILE;

MONITORING_PROFILE has failed_login_attempts set to unlimited.

Create two scripts

$cat 1.sh
sqlplus -s amit/test123 <<EOF
EOF
$cat lock_db.sh
#!/bin/bash
for i in {1..1000}
do
nohup sh 1.sh &
done

I have set loop to 1000 which you can increase depending on your process limit. This is test database with process parameter set to 150. Execute script

sh lock_db.sh 

Now if you go to Connection 2, you will see following issues

a) Database will not allow fresh connections for short time as you will get ORA-00020: maximum number of processes (150) exceeded errors.
After that database connections will be possible
b) You cannot connect to AMIT user for considerable time even with correct password. All sessions will be waiting on library cache lock

 select event,count(*) from V$session group by event order by 2;

EVENT								   COUNT(*)
---------------------------------------------------------------- ----------
Streams AQ: waiting for time management or cleanup tasks		  1
VKTM Logical Idle Wait							  1
Space Manager: slave idle wait						  1
SQL*Net message from client						  1
ges remote message							  1
ASM background timer							  1
GCR sleep								  1
smon timer								  1
pmon timer								  1
Streams AQ: qmn coordinator idle wait					  1
asynch descriptor resize						  1
Streams AQ: qmn slave idle wait 					  1
PING									  1
class slave wait							  2
gcs remote message							  2
DIAG idle wait								  2
wait for unread message on broadcast channel				  2
rdbms ipc message							 18
library cache lock							101

select
 distinct
   ses.ksusenum sid, ses.ksuseser serial#, ses.ksuudlna username,KSUSEMNM module,
   ob.kglnaown obj_owner, ob.kglnaobj obj_name
   ,lk.kgllkcnt lck_cnt, lk.kgllkmod lock_mode, lk.kgllkreq lock_req
   , w.state, w.event, w.wait_Time, w.seconds_in_Wait
 from
  x$kgllk lk,  x$kglob ob,x$ksuse ses
  , v$session_wait w
where lk.kgllkhdl in
(select kgllkhdl from x$kgllk where kgllkreq >0 )
and ob.kglhdadr = lk.kgllkhdl
and lk.kgllkuse = ses.addr
and w.sid = ses.indx
order by seconds_in_wait desc
/

      SID    SERIAL# USERNAME	 MODULE 			     OBJ_OWNER	     OBJ_NAME		LCK_CNT  LOCK_MODE   LOCK_REQ STATE		  EVENT 			  WAIT_TIME SECONDS_IN_WAIT
---------- ---------- ---------- ----------------------------------- --------------- --------------- ---------- ---------- ---------- ------------------- ------------------------------ ---------- ---------------
       153	   77		 testbox01		     84 		      0 	 0	    3 WAITING		  library cache lock			  0		  3
	36	  101		 testbox01		     84 		      0 	 0	    3 WAITING		  library cache lock			  0		  3
	16	  137		testbox01		     84 		      0 	 0	    3 WAITING		  library cache lock			  0		  3
       143	  203		 testbox01		     84 		      0 	 0	    3 WAITING		  library cache lock			  0		  3
	26	  261		 testbox01		     84 		      1 	 3	    0 WAITED KNOWN TIME   library cache lock			119		  3

You will notice that seconds_in_wait value will increase . Also ‘alter system kill session’  takes long time to kill session (it seems as if hung). As per bug ,any operation involving row cache lock for that user will not be allowed. I confirmed by trying to reset profile to Default and session was stuck.

Till all these sessions are cleared from database, you will not be allowed to login. This can severy impact applications as fresh connection would not be possible. Pre-existing sessions will work
If you repeat same experiment in 10g, you will not face similar issue.

To disable this behavior i.e no sleep delay set following event

event=”28401 trace name context forever, level 1″

You can set it dynamically too using

alter system set events ‘28401 trace name context forever, level 1’;

To go back to original behavior

alter system set events ‘28401 trace name context off’;

Bug 7715339 mentions that if FAILED_LOGIN_ATTEMPTS is set to some value, then further attempts to log in will then correctly fail immediately with no delay

I tested this and found that this is not entirely true as my script was able to again spawn 101 sessions which were waiting on library cache lock again. Fresh connection with correct password was again stuck. DBA_USERS view was showing that account is locked. Though here the session cleared in quick time as compared to test case involving failed_login_attempts to unlimited.

Plan Stability using Sql Profiles and SQL Plan Management

PLAN STABILITY

How many times you have noticed a query using Index X when you wanted it to use index Y or query performing Nested Loop join when Hash Join would have completed the query much faster.Or take a scenario when the application suddenly starts using wrong plan after database restart. To solve all these issues oracle provides feature called Plan stability. As per docs

“Plan stability prevents certain database environment changes from affecting the performance characteristics of applications. Such changes include changes in optimizer statistics, changes to the optimizer mode settings, and changes to parameters affecting the sizes of memory structures, such as SORT_AREA_SIZE and BITMAP_MERGE_AREA_SIZE. “

Oracle provides following ways to ensure it

1) Stored outlines
2) Sql Profiles
3)Sql Plan Management

Stored outlines

A stored outline is a collection of hints associated with a specific SQL statement that allows a standard execution plan to be maintained, regardless of changes in the system environment or associated statistics.
You can read about outlines at ORACLE-BASE

Sql Profiles

As per Jonathan Lewis post,

SQL Profile consists of a stored SQL statement, and a set of hints that will be brought into play when that SQL has to be optimised. Unlike Stored Outlines, the hints for SQL Profiles do not attempt to dictate execution mechanisms directly. Instead they supply arithmetical correction factors to the optimizer as it does its arithemetic as, even with a 100% sample size, it is still possible for the optimizer to misinterpret your statistics and produce an unsuitable execution path.

In principle, if the data distributions do not change, then a stored profile will ensure that the optimizer “understands” your data and does the right thing – even when the data volume changes.

Difference between stored outline and stored profiles

Quoting Tom kyte post 

Stored outlines are a set of hints that say “use this index, do this table first, do that next, use this access path, perform this filter then that filter”….

Sql profiles are more like extended statistics – they are the result of “analyzing a query”, the information provided to the optimizer is not HOW to perform the query – but rather better information about how many rows will flow out of a step in the plan, how selective something is.

Say you have a query, you generate a stored outline for it. You now add an index to the underlying table. This index would be GREAT for the query. A stored outline won’t use it, the stored outline says “use this index – query that table – then do this”. Since the GREAT index did not exist when the outline was generated – it won’t be used.

Say you have a query, you generate a profile for it. You now add an index to the underlying table. This index would be GREAT for the query. A profile can use it – since the profile is just more information for the CBO – better cardinality estimates.

So Stored outlines will ensure that whatever plan you fix, it will be used whereas a Sql profile might use different plan if we see some change in data distribution or new indexes.

There are two ways of generating sql profiles

1)Using Sql Tuning Advisor – A lot has been written about this, so I won’t discuss this.
2)Manually – This might be a surprising for lot of people as they might not be aware that we can generate a sql profile manually.I will be discussing this in detail below

Oracle provides a script coe_xfr_sql_profile.sql as part of Note 215187.1 – SQLT (SQLTXPLAIN) – Tool That Helps To Diagnose SQL Statements Performing Poorly which can be used to manually create Sql profiles.

It’s usage is pretty simple.

a) You need to execute the script and it will prompt you to pass sql_id for statement.
b)Then it will scan AWR repository and return Plan hash value for all possible execution plans for query along with average elapsed time.
c)You need to select the plan hash value which you think corresponds to good plan.
d)This will generate a script in current working directory which can be run as sys user and it will create the sql profile

This script is also useful if we wish to move the good plan from Non production environment to Production environment. To give a demo, I will create a table PLAN_STABILITY and index IDX_PLAN_STABI_OWNER on owner column.

SQL> create table plan_stability as select * from dba_objects;
Table created.

SQL> insert into plan_stability select * from dba_objects;
75048 rows created.

SQL> insert into plan_stability select * from plan_stability;
300192 rows created.
..
..
SQL> insert into plan_stability select * from plan_stability;
1200768 rows created.
SQL> commit;

22:15:05 SQL> create index IDX_PLAN_STABI_OWNER on plan_stability(owner);

Index created.
SQL> select count(*) from plan_stability;

COUNT(*)
----------
2401536

Let’s query the table for count of objects owned by SYS

SQL> select count(*) from plan_stability where owner='SYS';

COUNT(*)
----------
1020384

SQL> select * from table(dbms_xplan.display_cursor);

PLAN_TABLE_OUTPUT
---------------------------------------------------------------------------------------------------------------
SQL_ID g3wubsadyrt37, child number 0
-------------------------------------
select count(*) from plan_stability where owner='SYS'

Plan hash value: 3082746383

------------------------------------------------------------------------------------------
| Id | Operation | Name | Rows | Bytes | Cost (%CPU)| Time |
------------------------------------------------------------------------------------------
| 0 | SELECT STATEMENT | | | | 57 (100)| |
| 1 | SORT AGGREGATE | | 1 | 6 | | |
|* 2 | INDEX RANGE SCAN| IDX_PLAN_STABI_OWNER | 23092 | 135K| 57 (0)| 00:00:01 |
------------------------------------------------------------------------------------------

Predicate Information (identified by operation id):
---------------------------------------------------

2 - access("OWNER"='SYS')

We see that we are using index IDX_PLAN_STABI_OWNER. Since data is less , Index access is best approach.But for this demo I want to force a Full table scan . Let’s generate a plan with FTS for plan_stability. To do this we can use  Invisible indexes (11g feature)  so that optimizer ignores index.

SQL> alter index IDX_PLAN_STABI_OWNER invisible;

Index altered.
SQL> select count(*) from plan_stability where owner='SYS';

COUNT(*)
----------
1020384

SQL> select * from table(dbms_xplan.display_cursor);

PLAN_TABLE_OUTPUT
---------------------------------------------------------------------------------------------------------------
SQL_ID g3wubsadyrt37, child number 0
-------------------------------------
select count(*) from plan_stability where owner='SYS'

Plan hash value: 363261562

-------------------------------------------------------------------------------------
| Id | Operation | Name | Rows | Bytes | Cost (%CPU)| Time |
-------------------------------------------------------------------------------------
| 0 | SELECT STATEMENT | | | | 2476 (100)| |
| 1 | SORT AGGREGATE | | 1 | 6 | | |
|* 2 | TABLE ACCESS FULL| PLAN_STABILITY | 23092 | 135K| 2476 (1)| 00:00:30 |
-------------------------------------------------------------------------------------

Predicate Information (identified by operation id):
---------------------------------------------------

2 - filter("OWNER"='SYS')
19 rows selected.
--Let's make it index visible again

SQL> alter index IDX_PLAN_STABI_OWNER visible;

Index altered.

We will have to take manual AWR snapshots before and end of the test, so that sql plans goes into AWR repository . This is necessary as coe_xfr_profile.sql will look at AWR data for plan history for a sql. Now we run coe_xfr_profile.sql and it will prompt us for sql_id. On passing the sql_id, it reports that there are two plans. We choose plan 363261562 (having higher elapsed time) as we wish to force a Full table scan

SQL>@coe_xfr_profile.sql

Parameter 1:
SQL_ID (required)

Enter value for 1: g3wubsadyrt37
PLAN_HASH_VALUE AVG_ET_SECS
--------------- -----------
3082746383 .064
363261562 .184

Parameter 2:
PLAN_HASH_VALUE (required)

Enter value for 2: 363261562

Values passed:
~~~~~~~~~~~~~
SQL_ID : "g3wubsadyrt37"
PLAN_HASH_VALUE: "363261562"
Execute coe_xfr_sql_profile_g3wubsadyrt37_363261562.sql
on TARGET system in order to create a custom SQL Profile
with plan 363261562 linked to adjusted sql_text.
COE_XFR_SQL_PROFILE completed.

This has generated a file coe_xfr_sql_profile_g3wubsadyrt37_363261562.sql in same directory which can be run to create the sql profile.Note that script has force_match => FALSE which means that if sql varies in literal, sql_profile will not work. To force it ,we need to set the paramter to force.

SQL>@coe_xfr_sql_profile_g3wubsadyrt37_363261562
SQL>REM
SQL>REM $Header: 215187.1 coe_xfr_sql_profile_g3wubsadyrt37_363261562.sql 11.4.1.4 2011/12/18 csierra $
SQL>REM
SQL>REM Copyright (c) 2000-2010, Oracle Corporation. All rights reserved.
SQL>REM
SQL>REM coe_xfr_sql_profile_g3wubsadyrt37_363261562.sql
SQL>REM
SQL>REM DESCRIPTION
SQL>REM This script is generated by coe_xfr_sql_profile.sql
SQL>REM It contains the SQL*Plus commands to create a custom
SQL>REM SQL Profile for SQL_ID g3wubsadyrt37 based on plan hash
SQL>REM value 363261562.
SQL>REM The custom SQL Profile to be created by this script
SQL>REM will affect plans for SQL commands with signature
SQL>REM matching the one for SQL Text below.
SQL>REM Review SQL Text and adjust accordingly.
SQL>REM
SQL>REM PARAMETERS
SQL>REM None.
SQL>REM
SQL>REM EXAMPLE
SQL>REM SQL> START coe_xfr_sql_profile_g3wubsadyrt37_363261562.sql;
SQL>REM
SQL>REM NOTES
SQL>REM 1. Should be run as SYSTEM or SYSDBA.
SQL>REM 2. User must have CREATE ANY SQL PROFILE privilege.
SQL>REM 3. SOURCE and TARGET systems can be the same or similar.
SQL>REM 4. To drop this custom SQL Profile after it has been created:
SQL>REM EXEC DBMS_SQLTUNE.DROP_SQL_PROFILE('coe_g3wubsadyrt37_363261562');
SQL>REM 5. Be aware that using DBMS_SQLTUNE requires a license
SQL>REM for the Oracle Tuning Pack.
SQL>REM
SQL>WHENEVER SQLERROR EXIT SQL.SQLCODE;
SQL>REM
SQL>VAR signature NUMBER;
SQL>REM
SQL>DECLARE
2 sql_txt CLOB;
3 h SYS.SQLPROF_ATTR;
4 BEGIN
5 sql_txt := q'[
6 select count(*) from plan_stability where owner='SYS'
7 ]';
8 h := SYS.SQLPROF_ATTR(
9 q'[BEGIN_OUTLINE_DATA]',
10 q'[IGNORE_OPTIM_EMBEDDED_HINTS]',
11 q'[OPTIMIZER_FEATURES_ENABLE('11.2.0.3')]',
12 q'[DB_VERSION('11.2.0.3')]',
13 q'[OPT_PARAM('_b_tree_bitmap_plans' 'false')]',
14 q'[OPT_PARAM('optimizer_dynamic_sampling' 0)]',
15 q'[ALL_ROWS]',
16 q'[OUTLINE_LEAF(@"SEL$1")]',
17 q'[FULL(@"SEL$1" "PLAN_STABILITY"@"SEL$1")]',
18 q'[END_OUTLINE_DATA]');
19 :signature := DBMS_SQLTUNE.SQLTEXT_TO_SIGNATURE(sql_txt);
20 DBMS_SQLTUNE.IMPORT_SQL_PROFILE (
21 sql_text => sql_txt,
22 profile => h,
23 name => 'coe_g3wubsadyrt37_363261562',
24 description => 'coe g3wubsadyrt37 363261562 '||:signature||'',
25 category => 'DEFAULT',
26 validate => TRUE,
27 replace => TRUE,
28 force_match => FALSE /* TRUE:FORCE (match even when different literals in SQL). FALSE:EXACT (similar to CURSOR_SHARING) */ );
29 END;
30 /

PL/SQL procedure successfully completed.

SQL>WHENEVER SQLERROR CONTINUE
SQL>SET ECHO OFF;

SIGNATURE
---------------------
4782703451567619555
... manual custom SQL Profile has been created
COE_XFR_SQL_PROFILE_g3wubsadyrt37_363261562 completed

Let’s verify the plan again now

SQL> select * from table(dbms_xplan.display_cursor);

PLAN_TABLE_OUTPUT
---------------------------------------------------------------------------------------------------------------
SQL_ID g3wubsadyrt37, child number 1
-------------------------------------
select count(*) from plan_stability where owner='SYS'

Plan hash value: 363261562

-------------------------------------------------------------------------------------
| Id | Operation | Name | Rows | Bytes | Cost (%CPU)| Time |
-------------------------------------------------------------------------------------
| 0 | SELECT STATEMENT | | | | 2476 (100)| |
| 1 | SORT AGGREGATE | | 1 | 6 | | |
|* 2 | TABLE ACCESS FULL| PLAN_STABILITY | 23092 | 135K| 2476 (1)| 00:00:30 |
-------------------------------------------------------------------------------------

Predicate Information (identified by operation id):
---------------------------------------------------

2 - filter("OWNER"='SYS')

Note
-----
- SQL profile coe_g3wubsadyrt37_363261562 used for this statement

In the Note section we can see that Sql Profile “coe_g3wubsadyrt37_363261562” has been used for this statement.

Suppose we now have to create a sql profile, when we don’t have good plan in AWR, then we will have to do a hack. There are two ways to do it

a)You can use coe_xfr_profile.sql to do same. You will have to run the script twice, one for original statement and secondly for hinted statement. Once done you need to copy the values corresponding to h := SYS.SQLPROF_ATTR from hinted sql and replace it in original script.e.g

I am creating a sql profile for following hinted statement

SQL> select /*+ full(plan_stability) */ count(*) from plan_stability where owner='SYS';

  COUNT(*)
----------
   1020384

 SQL> select /*+ full(plan_stability) */ count(*) from plan_stability where owner='SYS';

  COUNT(*)
----------
   1020384

SQL> select * from table(dbms_xplan.display_cursor);

PLAN_TABLE_OUTPUT
---------------------------------------------------------------------------------------------------------------
SQL_ID	9p07a64q8fgrn, child number 0
-------------------------------------
select /*+ full(plan_stability) */ count(*) from plan_stability where
owner='SYS'

Plan hash value: 363261562

-------------------------------------------------------------------------------------
| Id  | Operation	   | Name	    | Rows  | Bytes | Cost (%CPU)| Time     |
-------------------------------------------------------------------------------------
|   0 | SELECT STATEMENT   |		    |	    |	    |  2476 (100)|	    |
|   1 |  SORT AGGREGATE    |		    |	  1 |	  6 |		 |	    |
|*  2 |   TABLE ACCESS FULL| PLAN_STABILITY | 23092 |	135K|  2476   (1)| 00:00:30 |
-------------------------------------------------------------------------------------

Predicate Information (identified by operation id):
---------------------------------------------------

   2 - filter("OWNER"='SYS')

--Creating Sql profile now

SQL>@coe_xfr_profile.sql 9p07a64q8fgrn 363261562

Parameter 1:
SQL_ID (required)

PLAN_HASH_VALUE AVG_ET_SECS
--------------- -----------
      363261562        .193

Parameter 2:
PLAN_HASH_VALUE (required)

Values passed:
~~~~~~~~~~~~~
SQL_ID	       : "9p07a64q8fgrn"
PLAN_HASH_VALUE: "363261562"

Execute coe_xfr_sql_profile_9p07a64q8fgrn_363261562.sql
on TARGET system in order to create a custom SQL Profile
with plan 363261562 linked to adjusted sql_text.

COE_XFR_SQL_PROFILE completed.

Now we create sql profile script for original statement using plan_hash_value corresponding to index access

20:47:52 SQL> @coe_xfr_profile.sql g3wubsadyrt37 3082746383

Parameter 1:
SQL_ID (required)

PLAN_HASH_VALUE AVG_ET_SECS
--------------- -----------
     3082746383        .084
      363261562        .184

Parameter 2:
PLAN_HASH_VALUE (required)

Values passed:
~~~~~~~~~~~~~
SQL_ID	       : "g3wubsadyrt37"
PLAN_HASH_VALUE: "3082746383"

Execute coe_xfr_sql_profile_g3wubsadyrt37_3082746383.sql
on TARGET system in order to create a custom SQL Profile
with plan 3082746383 linked to adjusted sql_text.

COE_XFR_SQL_PROFILE completed.

Now copy following section from coe_xfr_sql_profile_9p07a64q8fgrn_363261562.sql and replace in the coe_xfr_sql_profile_g3wubsadyrt37_3082746383.sql. Also change the name from coe_g3wubsadyrt37_3082746383 to coe_g3wubsadyrt37_363261562

h := SYS.SQLPROF_ATTR(
q'[BEGIN_OUTLINE_DATA]',
q'[IGNORE_OPTIM_EMBEDDED_HINTS]',
q'[OPTIMIZER_FEATURES_ENABLE('11.2.0.3')]',
q'[DB_VERSION('11.2.0.3')]',
q'[ALL_ROWS]',
q'[OUTLINE_LEAF(@"SEL$1")]',
q'[FULL(@"SEL$1" "PLAN_STABILITY"@"SEL$1")]',
q'[END_OUTLINE_DATA]');

This has again created a sql profile with FTS plan.

SQL> select name,SIGNATURE,SQL_TEXT,FORCE_MATCHING,STATUS from dba_sql_profiles;

NAME						    SIGNATURE SQL_TEXT								     FOR STATUS
------------------------------ ------------------------------ ---------------------------------------------------------------------- --- --------
coe_g3wubsadyrt37_363261562		  4782703451567619555 select count(*) from plan_stability where owner='SYS'		     NO  ENABLED

b) You can use scripts provided by Kerry Osborne in following article
http://kerryosborne.oracle-guy.com/2009/10/how-to-attach-a-sql-profile-to-a-different-statement-take-2/

SQL Plan Management

Let’s use the 11g feature SQL Plan Management to implement plan stability.SQL plan management is a preventative mechanism that records and evaluates the execution plans of SQL statements over time, and builds SQL plan baselines composed of a set of existing plans known to be efficient.
The SQL plan baselines are then used to preserve performance of corresponding SQL statements, regardless of changes occurring in the system. We can capture plans

a)Automatically – We can use OPTIMIZER_CAPTURE_SQL_PLAN_BASELINES=true and capture the sql baseline plans. This is pretty useful if you are upgrading database as you can capture good plans and then upgrade the database without worrying about plan change. e.g Post 11g upgrade from 10.2.0.4, set optimizer_features_enable=10.2.0.4 and capture all the plans.Once done you can set the OPTIMIZER_CAPTURE_SQL_PLAN_BASELINES=false and also set optimizer_features_enable back to 11.1/11.2. You can then enable/disable the plans or mark them Fixed. Fixed plans get preference over non-fixed plans.

Note that only plans for repeatable statements are stored in the SPM

b)Manually – We can use DBMS_SPM.LOAD_PLANS_FROM_CURSOR_CACHE and DBMS_SPM.LOAD_PLANS_FROM_SQLSET to load plans from cursor cache and Sqlset respectively.

Loading plan from Cursor Cache

We will discuss fucntion DBMS_SPM.LOAD_PLANS_FROM_CURSOR_CACHE to load plans from the cursor cache.In our test,we need to fix plan 363261562 for sql_id g3wubsadyrt37.Since the plan is available in cursor cache,  we will use following syntax

DECLARE
my_plans pls_integer;
BEGIN
my_plans := DBMS_SPM.LOAD_PLANS_FROM_CURSOR_CACHE(
sql_id => 'g3wubsadyrt37',
PLAN_HASH_VALUE =>363261562,
FIXED =>'YES');
dbms_output.put_line('Value is '||my_plans);
END;
/

It will return number of plans loaded.Let’s verify baseline by querying dba_sql_plan_baselines

SQL>select sql_handle, plan_name, enabled, accepted, fixed from dba_sql_plan_baselines;

SQL_HANDLE PLAN_NAME ENA ACC FIX
------------------------------ ------------------------------ --- --- ---
SQL_425f937308b8fde3 SQL_PLAN_44rwmfc4bjzg3621540b0 YES YES YES

We can plan corresponding to this baseline

SQL> select * from table(
dbms_xplan.display_sql_plan_baseline(
sql_handle=>'SQL_425f937308b8fde3',
format=>'basic')); 

PLAN_TABLE_OUTPUT
---------------------------------------------------------------------------------------------------------------

SQL handle: SQL_425f937308b8fde3
SQL text: select count(*) from plan_stability where owner='SYS'
--------------------------------------------------------------------------------

--------------------------------------------------------------------------------
Plan name: SQL_PLAN_44rwmfc4bjzg3621540b0	  Plan id: 1645559984
Enabled: YES	 Fixed: NO	Accepted: YES	  Origin: MANUAL-LOAD
--------------------------------------------------------------------------------

Plan hash value: 363261562

---------------------------------------------
| Id  | Operation	   | Name	    |
---------------------------------------------
|   0 | SELECT STATEMENT   |		    |
|   1 |  SORT AGGREGATE    |		    |
|   2 |   TABLE ACCESS FULL| PLAN_STABILITY |
---------------------------------------------

20 rows selected.

We can check if our original query is using  the plan

SQL> select count(*) from plan_stability where owner='SYS';

COUNT(*)
----------
1020384

SQL> select * from table(dbms_xplan.display_cursor);

PLAN_TABLE_OUTPUT
---------------------------------------------------------------------------------------------------------------
SQL_ID g3wubsadyrt37, child number 1
-------------------------------------
select count(*) from plan_stability where owner='SYS'

Plan hash value: 363261562

-------------------------------------------------------------------------------------
| Id | Operation | Name | Rows | Bytes | Cost (%CPU)| Time |
-------------------------------------------------------------------------------------
| 0 | SELECT STATEMENT | | | | 2476 (100)| |
| 1 | SORT AGGREGATE | | 1 | 6 | | |
|* 2 | TABLE ACCESS FULL| PLAN_STABILITY | 23092 | 135K| 2476 (1)| 00:00:30 |
-------------------------------------------------------------------------------------

Predicate Information (identified by operation id):
---------------------------------------------------

2 - filter("OWNER"='SYS')

Note
-----
- SQL plan baseline SQL_PLAN_44rwmfc4bjzg3621540b0 used for this statement

We see from Note section  that SQL plan baseline SQL_PLAN_44rwmfc4bjzg3621540b0 has been used for the statement.

Loading plan from AWR/SQL Tuning set

If you know that good plan of the query is available in AWR, then you can use dbms_spm.load_plans_from_sqlset. To do this we need to first create a sql tuning set. This can be done by using DBMS_SQLTUNE

BEGIN
DBMS_SQLTUNE.CREATE_SQLSET(
sqlset_name => 'sqlset_g3wubsadyrt37',
description => 'Example to show dbms_spm.load_plans_from_sqlset');
END;
/

Let’s load the sql_id g3wubsadyrt37 in this Sql tuning set from AWR. We need to pass begin_snap and end_snap for SQL. We can also use basic_filter clause to restrict this sqlset to only one particular sql_id.

DECLARE
baseline_cursor DBMS_SQLTUNE.SQLSET_CURSOR;
BEGIN
OPEN baseline_cursor FOR
SELECT VALUE(p)
FROM TABLE (DBMS_SQLTUNE.SELECT_WORKLOAD_REPOSITORY(
BEGIN_SNAP => 641,
END_SNAP => 667,
BASIC_FILTER => 'sql_id = ''g3wubsadyrt37''',
ATTRIBUTE_LIST =>'ALL')) p;

DBMS_SQLTUNE.LOAD_SQLSET(
sqlset_name => 'sqlset_g3wubsadyrt37',
populate_cursor => baseline_cursor);
END;
/

Lets verify that both plans are loaded in the sqlset

SELECT SQL_ID,PLAN_HASH_VALUE FROM TABLE(DBMS_SQLTUNE.SELECT_SQLSET(
'sqlset_g3wubsadyrt37'));

SQL_ID PLAN_HASH_VALUE
------------- ---------------
g3wubsadyrt37 363261562
g3wubsadyrt37 3082746383

Next we create sql plan baseline using DBMS_SPM.LOAD_PLANS_FROM_SQLSET

DECLARE
my_plans pls_integer;
BEGIN
my_plans := DBMS_SPM.LOAD_PLANS_FROM_SQLSET(
SQLSET_NAME => 'sqlset_g3wubsadyrt37'
);
dbms_output.put_line('Value is '||my_plans);
END;
/

We now see that two plans are loaded

SQL> select sql_handle, plan_name, enabled, accepted, fixed from dba_sql_plan_baselines;

SQL_HANDLE PLAN_NAME ENA ACC FIX
------------------------------ ------------------------------ --- --- ---
SQL_425f937308b8fde3 SQL_PLAN_44rwmfc4bjzg3621540b0 YES YES NO
SQL_425f937308b8fde3 SQL_PLAN_44rwmfc4bjzg3ec110d89 YES YES NO

We can disable the SQL_PLAN_44rwmfc4bjzg3ec110d89 as we only want FTS plan

DECLARE
my_plans pls_integer;
BEGIN
my_plans := DBMS_SPM.ALTER_SQL_PLAN_BASELINE(
sql_handle =>'SQL_425f937308b8fde3',
PLAN_NAME =>'SQL_PLAN_44rwmfc4bjzg3ec110d89',
attribute_name =>'enabled',
attribute_value=>'NO');
dbms_output.put_line('Value is '||my_plans);
END;
/

Above statement will mark the index plan as disabled and our query will use only FTS plan.

To drop the baselines, we can use following syntax

DECLARE
my_plans pls_integer;
BEGIN
my_plans := DBMS_SPM.DROP_SQL_PLAN_BASELINE(
sql_handle => 'SQL_425f937308b8fde3'
);
dbms_output.put_line('Value is '||my_plans);
END;
/

Till now we have  discussed  scenarios when we have good plan in cursor cache/AWR. Suppose there is no good plan available but we can generate a good plan using hints. With SPM we can easily transfer profile from hinted sql to our original statement. Let’s see it in action

First we need to create a baseline with existing plan for query. This is required as it would generate a sql_handle which can be used to assign a plan. We are using PLAN_HASH_VALUE =>3082746383 i.e Indexed access path to create the sql baseline

DECLARE
my_plans pls_integer;
BEGIN
my_plans := DBMS_SPM.LOAD_PLANS_FROM_CURSOR_CACHE(
sql_id => 'g3wubsadyrt37',
PLAN_HASH_VALUE =>3082746383
);
dbms_output.put_line('Value is '||my_plans);
END;
/

SQL>select sql_handle, plan_name, enabled, accepted, fixed,sql_text from dba_sql_plan_baselines;

SQL_HANDLE PLAN_NAME ENA ACC FIX SQL_TEXT
------------------------------ ------------------------------ --- --- --- --------------------------------------------------------------------------------
SQL_425f937308b8fde3 SQL_PLAN_44rwmfc4bjzg3ec110d89 YES YES NO select count(*) from plan_stability where owner='SYS'

Querying dba_sql_plan_baselines we get sql_handle as SQL_425f937308b8fde3.Now let’s create a plan for query using hints.

SQL> select /*+ full(plan_stability) */ count(*) from plan_stability where owner='SYS';

COUNT(*)
----------
1020384

SQL> select /*+ full(plan_stability) */ count(*) from plan_stability where owner='SYS';

COUNT(*)
----------
1020384

SQL> select * from table(dbms_xplan.display_cursor);

PLAN_TABLE_OUTPUT
---------------------------------------------------------------------------------------------------------------
SQL_ID 9p07a64q8fgrn, child number 0
-------------------------------------
select /*+ full(plan_stability) */ count(*) from plan_stability where
owner='SYS'

Plan hash value: 363261562

-------------------------------------------------------------------------------------
| Id | Operation | Name | Rows | Bytes | Cost (%CPU)| Time |
-------------------------------------------------------------------------------------
| 0 | SELECT STATEMENT | | | | 2476 (100)| |
| 1 | SORT AGGREGATE | | 1 | 6 | | |
|* 2 | TABLE ACCESS FULL| PLAN_STABILITY | 23092 | 135K| 2476 (1)| 00:00:30 |
-------------------------------------------------------------------------------------

Predicate Information (identified by operation id):
---------------------------------------------------

2 - filter("OWNER"='SYS')

We need to now copy plan corresponding to sql_id=9p07a64q8fgrn and plan_hash_value=363261562. This can be done by using sql_handle for original statement and using sql_id/plan_hash_value of hinted statement

DECLARE
my_plans pls_integer;
BEGIN
my_plans := DBMS_SPM.LOAD_PLANS_FROM_CURSOR_CACHE(
sql_id => '9p07a64q8fgrn',
sql_handle =>'SQL_425f937308b8fde3',
PLAN_HASH_VALUE =>363261562,
FIXED =>'YES'
);
dbms_output.put_line('Value is '||my_plans);
END;
/

Note that I have used FIXED=>YES argument which would mark this plan as Fixed.A fixed plan takes precedence over a non-fixed plan. We can drop the old baseline plan now by passing sql_handle and plan_name. If you use only sql_handle, it will drop both the plans

DECLARE
my_plans pls_integer;
BEGIN
my_plans := DBMS_SPM.DROP_SQL_PLAN_BASELINE(
sql_handle => 'SQL_425f937308b8fde3',
PLAN_NAME =>'SQL_PLAN_44rwmfc4bjzg3ec110d89');
dbms_output.put_line('Value is '||my_plans);
END;
/

Instead of dropping plan, you can also disable the above plan using DBMS_SPM.ALTER_SQL_PLAN_BASELINE

DECLARE
my_plans pls_integer;
BEGIN
my_plans := DBMS_SPM.ALTER_SQL_PLAN_BASELINE(
sql_handle =>'SQL_425f937308b8fde3',
PLAN_NAME =>'SQL_PLAN_44rwmfc4bjzg3ec110d89',
attribute_name =>'enabled',
attribute_value=>'NO');
dbms_output.put_line('Value is '||my_plans);
END;
/

We now have two plans in baseline but only enabled plan SQL_PLAN_44rwmfc4bjzg3621540b0 will be used by the query.

Note: Whenever we create/drop sql baseline plan, sql is purged from cursor cache and we perform a hard parse.

While testing this , I found that if I create a alias for table , SQL Plan baseline is not working

SQL> select /*+ full(a) */ count(*) from plan_stability a where owner='SYS';

COUNT(*)
----------
1020384

Elapsed: 00:00:00.18
select /*+ full(a) */ count(*) from plan_stability a where owner='SYS';

COUNT(*)
----------
1020384

SQL> select * from table(dbms_xplan.display_cursor);

PLAN_TABLE_OUTPUT
---------------------------------------------------------------------------------------------------------------
SQL_ID 85hj3c8570fdu, child number 0
-------------------------------------
select /*+ full(a) */ count(*) from plan_stability a where owner='SYS'

Plan hash value: 363261562

-------------------------------------------------------------------------------------
| Id | Operation | Name | Rows | Bytes | Cost (%CPU)| Time |
-------------------------------------------------------------------------------------
| 0 | SELECT STATEMENT | | | | 2476 (100)| |
| 1 | SORT AGGREGATE | | 1 | 6 | | |
|* 2 | TABLE ACCESS FULL| PLAN_STABILITY | 23092 | 135K| 2476 (1)| 00:00:30 |
-------------------------------------------------------------------------------------

Predicate Information (identified by operation id):
---------------------------------------------------

2 - filter("OWNER"='SYS')

SQL>DECLARE
my_plans pls_integer;
BEGIN
my_plans := DBMS_SPM.LOAD_PLANS_FROM_CURSOR_CACHE(
sql_id => '85hj3c8570fdu',
sql_handle =>'SQL_425f937308b8fde3',
PLAN_HASH_VALUE =>363261562,
FIXED =>'YES'
);
dbms_output.put_line('Value is '||my_plans);
END;
/

SQL>select sql_handle, plan_name, enabled, accepted, fixed,sql_text from dba_sql_plan_baselines;

SQL_HANDLE PLAN_NAME ENA ACC FIX SQL_TEXT
------------------------------ ------------------------------ --- --- --- --------------------------------------------------------------------------------
SQL_425f937308b8fde3 SQL_PLAN_44rwmfc4bjzg3621540b0 YES YES YES select count(*) from plan_stability where owner='SYS'

SQL> select * from table(dbms_xplan.display_cursor);

PLAN_TABLE_OUTPUT
---------------------------------------------------------------------------------------------------------------
SQL_ID g3wubsadyrt37, child number 1
-------------------------------------
select count(*) from plan_stability where owner='SYS'

Plan hash value: 363261562

-------------------------------------------------------------------------------------
| Id | Operation | Name | Rows | Bytes | Cost (%CPU)| Time |
-------------------------------------------------------------------------------------
| 0 | SELECT STATEMENT | | | | 2476 (100)| |
| 1 | SORT AGGREGATE | | 1 | 6 | | |
|* 2 | TABLE ACCESS FULL| PLAN_STABILITY | 23092 | 135K| 2476 (1)| 00:00:30 |
-------------------------------------------------------------------------------------

Predicate Information (identified by operation id):
---------------------------------------------------

2 - filter("OWNER"='SYS')

We can check baseline information using dbms_xplan.display_sql_plan_baseline function.Let’s see why we didnt use FTS even though profile was successfully created

SQL> select * from table(
dbms_xplan.display_sql_plan_baseline(
sql_handle=>'SQL_425f937308b8fde3',
format=>'basic'));

PLAN_TABLE_OUTPUT
--------------------------------------------------------------------------------------------------------------

SQL handle: SQL_425f937308b8fde3
SQL text: select count(*) from plan_stability where owner='SYS'
--------------------------------------------------------------------------------

--------------------------------------------------------------------------------
Plan name: SQL_PLAN_44rwmfc4bjzg3621540b0 Plan id: 1645559984
Enabled: YES Fixed: YES Accepted: YES Origin: MANUAL-LOAD
--------------------------------------------------------------------------------

Plan hash value: 3082746383

--------------------------------------------------
| Id | Operation | Name |
--------------------------------------------------
| 0 | SELECT STATEMENT | |
| 1 | SORT AGGREGATE | |
| 2 | INDEX RANGE SCAN| IDX_PLAN_STABI_OWNER |
--------------------------------------------------

--------------------------------------------------------------------------------
Plan name: SQL_PLAN_44rwmfc4bjzg3ec110d89 Plan id: 3960540553
Enabled: YES Fixed: NO Accepted: NO Origin: AUTO-CAPTURE
--------------------------------------------------------------------------------

Plan hash value: 3082746383

--------------------------------------------------
| Id | Operation | Name |
--------------------------------------------------
| 0 | SELECT STATEMENT | |
| 1 | SORT AGGREGATE | |
| 2 | INDEX RANGE SCAN| IDX_PLAN_STABI_OWNER |
--------------------------------------------------

From above we see that SQL_PLAN_44rwmfc4bjzg3621540b0 is showing plan which uses Index and not FTS.I am not sure if this is correct behavior or a bug. One reason could be that  same alias is not present in parent table.

I believe Sql Plan Management is superior to SQL Profile and outlines as it allows you to have multiple plans for a given sql statement. Also a nightly maintenance job runs automatic SQL tuning task and targets high-load SQL statements.If it thinks that there is better plan , then it adds that SQL Plan baseline to history. This is called Evolving Sql Plan Baselines.

Christian Antognini has written a good article on Automatic Evolution of SQL Plan Baselines which explains this feature.

Licensing

As per Optimizer blog article  ,DBMS_SPM is not licensed until we are loading plans from SQL Tuning set (which requires tuning pack).SQL profiles are  licensed and require diagnostic and tuning pack.

In-Place Upgrade 11gR2 RAC : 11.2.0.1 To 11.2.0.2

Sharing a post from my friend “Carthik” on 11gR2 RAC in-place upgrade.

Overview
========
Starting oracle 11gR2 the Oracle database and Clusterware upgrades are done via the “Out of place upgrade”. And is the easier way to perform your upgrade.  However, the intent of this blog is to explain how an “In-Place upgrade” of a RAC database is done in 11gR2, the advantages, disadvantages, pre-requisites and pain points involved in this method which is the traditional method of upgrading an oracle database. And I have chosen to upgrade a 2 Node 11.2.0.1 RAC Database to 11.2.0.2 RAC Database.

Clearly, the advantage is that you save space, Instead of installing a new Oracle Home.

The greatest disadvantage is that you need to back up the oracle home and run detach oracle home commands. This could potentially damage your oracle binaries. However, when done carefully it should not cause a problem.

The pain points Include:
1. Backing up the Oracle home
2. Restoring the Oracle Home from backup in-case of installation failure.
3. Attach the restored home, and then bring up the instance.
Clearly, there is a lot of manual intervention, which is a major pain point.

The idea behind using an in-place upgrade is to save space. And this method of upgrade requires a significant amount time. The only time one should use this method is when you lack space on your server. However, you can use this method for your test and development environments to save space. Since this method was the traditional method of doing things, I thought it’s worth checking how it works in 11gR2.

NOTE: If you have an existing Oracle Clusterware installation, then you upgrade your existing cluster by performing an out-of-place upgrade. You cannot perform an in-place upgrade to the oracle Clusterware. However, you can perform an in-place upgrade for the database. This will be elaborated in this blog.
Prerequisites for Oracle 11gR2 11.2.0.2 installation is to install patch 9655006 to the 11.2.0.1 GI home before upgrading to 11.2.0.2 from 11.2.0.1. See Bug 9413827 on MOS. For additional details you can refer to the Metalink article Pre-requisite for 11.2.0.1 to 11.2.0.2 ASM Rolling Upgrade Metalink Note : 1274629.1. Additionally ,Refer to “How to Manually Apply A Grid Infrastructure PSU Without Opatch Auto” Metalink Note 1210964.1.

Performing an In-place upgrade of a RAC DB from 11.2.0.1 to 11.2.0.2

In-order to upgrade a RAC Database from 11.2.0.1 to 11.2.0.2 you need to upgrade

1. The grid infrastructure first.
2. Then, the Oracle Database.

Environment Setup Details used in this post:
— 2 Node RAC Red Hat Linux 5.5 with RACK Servers (R710).
— Applies to any storage.

Latest OPatch
It is recommended to we use the Latest Version of OPatch. Unzip the zip file and copy OPatch folder to $ORACLE_HOME And $GI_HOME by renaming
the earlier OPatch directory. You can refer to how to download and Install OPatch Metalink ID 274526.1.

Pre- Requisite Patch:

First, let’s discuss about the mandatory patches required before upgrading to 11.2.0.2. Patch 9655006 is required in order for the upgrade
to succeed, if not rootupgrade.sh will fail.
Patch 9655006 is downloadable from http://www.metalink.oracle.com/ For information on Bug 9655006, refer to Metalink article ID 9655006.8
Download the patch and unzip it to a stage directory (it can be any directory), once you unzip the downloaded patch, 2 folders will be created. In this example I have unzipped the patch to /patches directory.

Now, let’s see how to patch the $GI_HOME with Patch 9655006.

Before the patch is installed, we need to perform a pre-req check. Let’s see how to do this.
1. [root@rac1 patches]# su – oracle

2. [oracle@rac1 ~]$ cd /opt/app/oracle/product/11.2.0/dbhome_1/OPatch/

3. [oracle@rac1 OPatch]$ ./opatch prereq CheckConflictAgainstOHWithDetail -phBaseDir /patches

Invoking OPatch 11.2.0.1.6
Oracle Interim Patch Installer version 11.2.0.1.6
Copyright (c) 2011, Oracle Corporation.  All rights reserved.
PREREQ session
Oracle Home       : /opt/app/oracle/product/11.2.0/dbhome_1
Central Inventory : /opt/app/oraInventory
 from           : /etc/oraInst.loc
OPatch version    : 11.2.0.1.6
OUI version       : 11.2.0.1.0
Log file location : /opt/app/oracle/product/11.2.0/dbhome_1/cfgtoollogs/opatch/opatch2011-08-16_19-36-09PM.log
Invoking prereq "checkconflictagainstohwithdetail"
Prereq "checkConflictAgainstOHWithDetail" passed.
OPatch succeeded.

Patching the $GI_HOME
1. Stop the Instance running on Node1
srvctl stop instance -d upgrade -i upgrade1

2. As root User run the opatch auto from the $GI_HOME
./opatch auto /patches

Note: The Opatch auto takes care of the patching of both the Grid infrastructure Home and the Oracle Home with the mandatory patch .
Once the patching is done on Node1, start the instance on Node1

3. Starting the Instance on Node1
srvctl start instance -d upgrade -i upgrade1

Repeat the process of pre-req and patching on Node2

Once the mandatory patch is applied, we can proceed with the upgrade of the grid infrastructure home.

Patches required:

The software/Patch can be downloaded from My Oracle support: patch 10098816. Select p10098816_112020_Linux-x86-64_3of7.zip
for grid infrastructure download. Once downloaded, unzip them.

Upgrading Grid Infrastructure:

Unzip the patches downloaded and invoke runInstaller from the unzipped grid folder. You will be taken to the welcome screen.

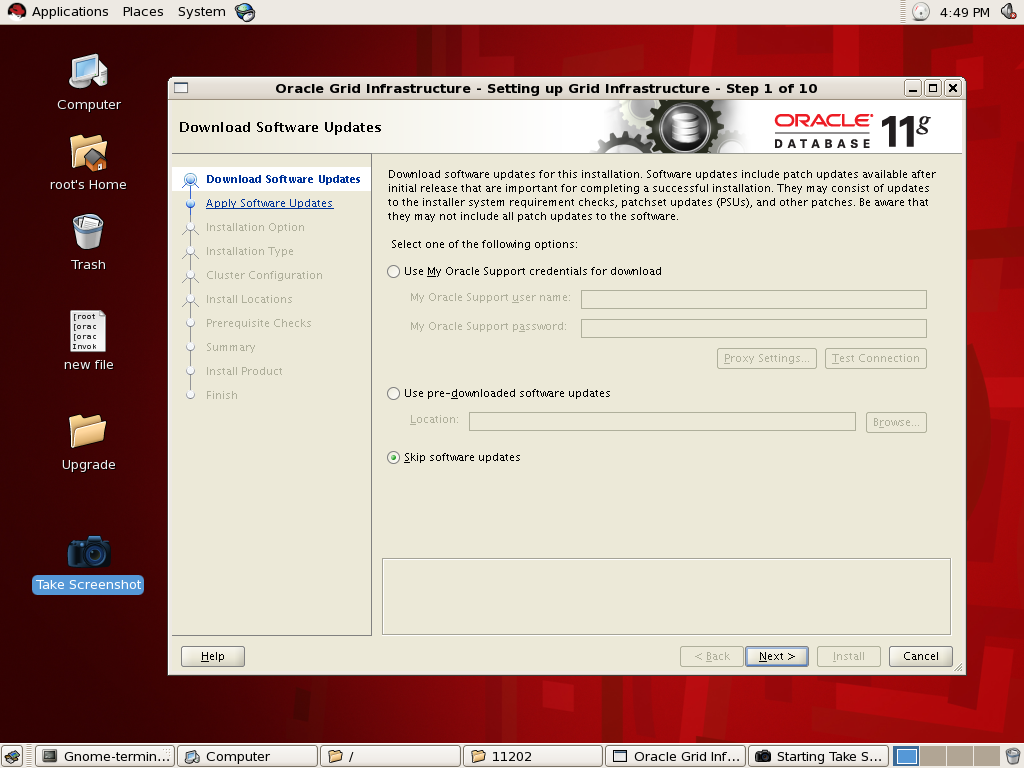
Choose Skip Software updates

Choose Upgrade Gird Infrastructure or Oracle ASM

Choose the Language

The Nodes present are selected by default, Click Next.

Leave the OS groups to Defaults

Choose the New Location where the Grid Infrastructure should be installed


The Pre-Requisite checks are performed, click next


The summary screen appears click next

Click on Install

Run rootupgrade.sh on both the nodes as specified in the screenshot

Upgrading the Database via In-place upgrade:

Patches Required:
The software/Patch can be downloaded from My Oracle support: patch 10098816.
Select p10098816_112020_Linux-x86-64_1of7.zip and p10098816_112020_Linux-x86-64_2of7.zip for database patch/software download.
Once downloaded, unzip them.

In-Place upgrades (Things to do before performing and In-place upgrade)

When performing an in-place upgrade, which uses the same Oracle home location, an error messages appears stating that the installer
detects Oracle Database software in the location that you specified.

Message: The installer has detected that the software location you have specified contains Oracle Database software release 11.2.0.1.
Oracle recommends that when upgrading to 11.2.0.2, you perform an out-of-place installation of the software into a new Oracle home and
then upgrade the database using the new software binaries.

Cause: The installer has detected that the software location you have specified contains Oracle Database software release 11.2.0.1.
Action: Either perform an in-place upgrade (Steps provided in this section), or perform an out-of-place upgrade

Performing an In-Place Upgrade for an Oracle RAC Database

To perform an in-place upgrade for Oracle RAC Database instances:
1. Back up the configuration data by backing up the following directories on all cluster nodes:
o ORACLE_HOME/dbs
o ORACLE_HOME/network/admin
o ORACLE_HOME/hostname_dbname
o ORACLE_HOME/oc4j/j2ee/OC4J_DBConsole_hostname_dbname

2. Run the following command on each of the nodes to detach the 11.2.0.1.0 Oracle RAC ORACLE_HOME:
$ORACLE_HOME/oui/bin/runInstaller -detachHome ORACLE_HOME=11.2.0.1.0 software location

3. Rename the 11.2.0.1.0 Oracle RAC ORACLE_HOME directory on all the nodes to a temporary name.

4. Install release 11.2.0.2 Software Only on all nodes:

From the unzipped folder, invoke the run Installer from the database folder

The welcome screen appears, uncheck the security updates and click next

Choose Skip Software Updates

Select Install Database Software Only and click next

Choose Oracle Real Application Clusters DB Installation and Select the Nodes and click next

Choose the Language and click next

Select Enterprise Edition and click next

Specify the location of the old home, and click next

Provide the Operating System groups and click next

Once the Pre-requisite checks are performed, click next

The summary screen appears, verify the settings and click next

The installation proceeds

Once the installation is done, run Root.sh on both the nodes as instructed and click ok.

Now, on all nodes, restore into the 11.2.0.2 ORACLE_HOME software location the backed up configuration data files
(from the backups you made of /dbs and network/admin), and also restore the following two directories:
/hostname_dbname and /oc4j/j2ee/OC4J_DBConsole_hostname_dbname. Specify the actual name for hostname_dbname.

Database Upgrade using DBUA:

Run DBUA from the 11.2.0.2 ORACLE_HOME/bin directory on the local node and select the 11.2.0.1.0 Oracle RAC database instance to
upgrade it to release 11.2.0.2.0.

The welcome screen appears once you invoke the DBUA, click next to proceed

DBUA Lists the databases that can be upgraded, select the one that you would like to upgrade

You can choose the Degree of parallelism and upgrading the time zone version and click next

Skip this screen by clicking next

The summary screen appears, click on finish for the upgrade to proceed.

The upgrade proceeds

NOTE: The only time one should use this method (in-place upgrade) is when you lack space on your server.
However, you can use this method for your test and development environments to save space.

Since this method was the traditional method of doing things,
Since this method is available, I thought it’s worth checking how it works in 11gR2.
During the entire upgrade process, I never ran into any issues, apart from the slightly higher downtime in
comparison to the out-of place upgrade. However, oracle doesn’t recommend this method. You can refer to the following metalink note 1291682.1.

Adding a reinstalled/reimaged node back to 11gR2 Cluster

There could be a scenario of node crash due to OS/hardware issues and a reinstall/reimage of the same. In such cases, just a normal node addition would not  help since the OCR still contain the references of original node. We need to remove them first and then perform a node addition.

Have tried to document one such usecase.

Assumptions :
Cluster Hostnames : node1 , node2
VIP : node1-v , node2-v

– Voting disk and OCR are on ASM( ASMLIB is being used to manage the shared disks )
– After the OS reinstall, user equivalence has been set and all required packages have been installed along with setup of ASMLIB
– The crashed node was node2

STEPS
———-
1. Clearing the OCR entries for re-imaged host.

# crsctl delete node -n node2

To verify the success of above step, execute “olsnodes” on surviving node and the reimaged host shouldnot show up in list.

2. Remove the VIP information of reimaged host from OCR

Execute the following on existing node :
	/u01/grid/11.2/bin/srvctl remove vip -i node2-v -f

3. Clear the inventory for reimaged host for GI and DB Homes.

From the surviving node, execute :

/u01/grid/11.2/oui/bin/runInstaller -updateNodeList ORACLE_HOME=/u01/grid/11.2 "CLUSTER_NODES=node1" CRS=TRUE -silent -local

Perform the similar for Database Home as well :

/u01/oracle/product/11.2/oui/bin/runInstaller -updateNodeList ORACLE_HOME=/u01/oracle/product/11.2 CLUSTER_NODES=node1 -silent -local

4. Now starts the actual step of adding node. Run the Run the Cluster Verification Utility

./cluvfy  stage -pre nodeadd -n node2 -verbose

If possible, redirect the output of above to some file so that it can be reviewed and any issues reported can be rectified.

For this case, since the OCR and Voting disk resides on ASM and ASMLIB is in use, the most impacting errors were

ERROR:
PRVF-5449 : Check of Voting Disk location “ORCL:DISK6(ORCL:DISK6)” failed on the following nodes:
node2:No such file or directory

PRVF-5431 : Oracle Cluster Voting Disk configuration check failed

Will explain the impact of this error in the subsequent steps..

5. Run “addNode.sh” from existing node.

[oracle@node1] /u01/grid/11.2/oui/bin% ./addNode.sh -silent "CLUSTER_NEW_NODES={node2}" "CLUSTER_NEW_VIRTUAL_HOSTNAMES={node2-v}"
[oracle@node1] /u01/grid/11.2/oui/bin%

In my case, the above command came out without giving any messages. Actually the addNode.sh didnot run at all.

Cause : Since ASMLIB is in use, we had hit the issue discussed in MOS Note : 1267569.1
The error seen in step 4 helped in finding this.

Solution :

Set the following parameters and run addNode.sh again.

IGNORE_PREADDNODE_CHECKS=Y
export IGNORE_PREADDNODE_CHECKS

[oracle@node1] /u01/grid/11.2/oui/bin% ./addNode.sh -silent "CLUSTER_NEW_NODES={node2}" "CLUSTER_NEW_VIRTUAL_HOSTNAMES={node2-v}"
Starting Oracle Universal Installer...

Checking swap space: must be greater than 500 MB.   Actual 12143 MB

Performing tests to see whether nodes node2 are available
............................................................... 100% Done.

Cluster Node Addition Summary
Global Settings
   Source: /u01/grid/11.2
   New Nodes
Space Requirements
   New Nodes
      node2

	Instantiating scripts for add node (Tuesday, December 21, 2010 3:35:16 AM PST)
			.                                                                 1% Done.
			Instantiation of add node scripts complete

			Copying to remote nodes (Tuesday, December 21, 2010 3:35:18 AM PST)
			...............................................................................................                                 96% Done.
			Home copied to new nodes

			Saving inventory on nodes (Tuesday, December 21, 2010 3:37:57 AM PST)
			.                                                               100% Done.
			Save inventory complete
			WARNING:
			The following configuration scripts need to be executed as the "root" user in each cluster node.
			/u01/grid/11.2/root.sh # On nodes node2
			To execute the configuration scripts:
			    1. Open a terminal window
			    2. Log in as "root"
			    3. Run the scripts in each cluster node

			The Cluster Node Addition of /u01/grid/11.2 was successful.
			Please check '/tmp/silentInstall.log' for more details.

6. Run root.sh on reimaged node to start up CRS stack.

This will completed Grid Infrastucture setup on the node.

7. Proceed to run addNode.sh for DB Home( on existing Node)

/u01/oracle/product/11.2/addNode.sh -silent "CLUSTER_NEW_NODES={node2}"

8. Once the DB Home addition is complete, use srvctl to check the status of registered DB and instances and add them if required.