Install

Upgrade Enterprise Manager Cloud Control 12.1.0.1 to 12.1.0.2

Oracle released 12.1.0.2 Enterprise Manager few days back and have released it for most of platforms.

You can directly upgrade Enterprise Manager Cloud Control 12c Release 1 (12.1.0.1) [with or without Bundle Patch 1] to 12.1.0.2
There are no pre patches required for this. But this upgrade requires considerable downtime. Oracle has termed this upgrade as 1-system upgrade approach which means that upgrades your Enterprise Manager Cloud Control on the same host—upgrades Oracle Management Service (OMS) on the same host and Oracle Management Repository (Management Repository) in the existing database.

I decided to upgrade my test EM 12c setup running on RHEL 5.6 x86_64 bit with single OMS and 11.2.0.3 database.Whole upgrade went fine without any major issues. To get started you need to download the software from here

I will be upgrading 12.1.0.1 running on Linux x86_64 bit. You can download the software from
http://download.oracle.com/otn/linux/oem/121020/em12cr2_linux64_disk1.zip
http://download.oracle.com/otn/linux/oem/121020/em12cr2_linux64_disk2.zip
http://download.oracle.com/otn/linux/oem/121020/em12cr2_linux64_disk3.zip

Once all files are downloaded, unzip them in single directory location.
To start the installation , run the runInstaller

./runInstaller

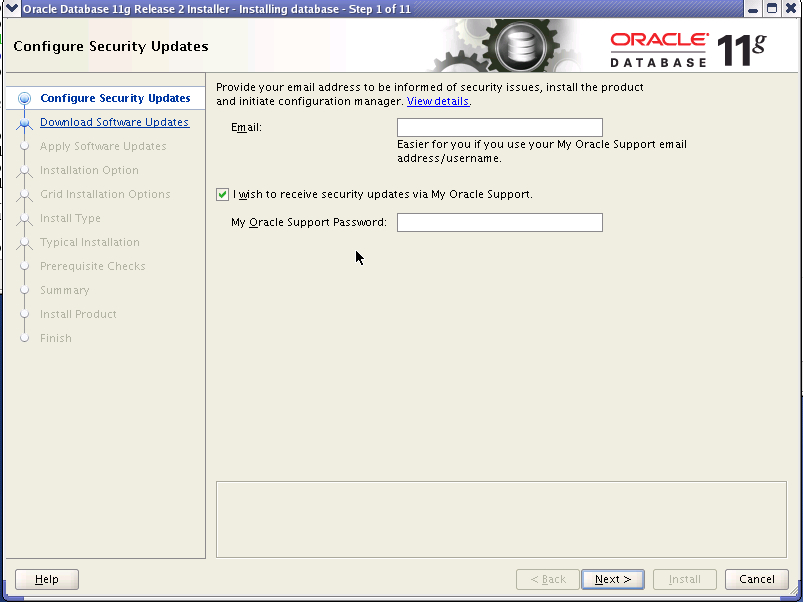
First screen asks for MOS details. You can choose to ignore it by unchecking box and click next.This will generate warning, press ok and click next

Next screen is related to software updates. You can “search for updates” and then select “My Oracle Support” to download the updates.We opted to “skip” this part.

On pre-requisite screen, installer checks whether your environment meets all the minimum requirements for a successful upgrade.
If some checks result in Warning or Failed status, then investigate and correct the problems before you proceed with the upgrade.

On the Installation Types screen, select Upgrade an Existing Enterprise Manager System, then select One System Upgrade. Then, select the OMS home you want to upgrade.

Next select the location for middleware home. 12.1.0.2 is out of place upgrade,so you need to specify new middleware home (without EM grid control) or a new home.

Next screen you pass connection details for EM repository.After you enter sys/sysman password it prompts you to stop oms

Stop the OMS using emctl utility.

$OMS_HOME/bin/emctl stop oms
Oracle Enterprise Manager Cloud Control 12c Release 12.1.0.1.0
Copyright (c) 1996, 2011 Oracle Corporation. All rights reserved.
Stopping WebTier...
WebTier Successfully Stopped
Stopping Oracle Management Server...
Oracle Management Server Successfully Stopped
Oracle Management Server is Down

Once OMS is stopped, we press ok on message and again click Next.Installer complains for pre-requisite check for emkey .This can be corrected by copying emkey to database repository.

Syntax for this is

$/bin/emctl config emkey -copy_to_repos_from_file -repos_host-repos_port-repos_sid-repos_user[-repos_pwd] -emkey_file/sysman/config/emkey.ora

I have replaced this with actual values for my setup

[oracle@oradbdev04]~% /home/oracle/Middleware/oms/bin/emctl config emkey -copy_to_repos_from_file -repos_host oradbdev04 -repos_port 1521 -repos_sid em12c -repos_user sysman -repos_pwd oracle123 -emkey_file /home/oracle/Middleware/oms/sysman/config/emkey.ora 
Oracle Enterprise Manager Cloud Control 12c Release 12.1.0.1.0  
Copyright (c) 1996, 2011 Oracle Corporation.  All rights reserved.
Enter Admin User's Password : 
The EMKey has been copied to the Management Repository. This operation will cause the EMKey to become unsecure.
After the required operation has been completed, secure the EMKey by running "emctl config emkey -remove_from_repos".

Next screen asks you to disable CBO gather stats job and set job_queue_processes to 0. You can press “Yes” and installer will automatically make changes for you.

We got next screen informing about some more pre-requisites which are not mandatory. We clicked ok and skipped them

On the Plug-In Upgrade screen, it will list plugins which are currently installed and new version post upgrade. Review them and click next

On the Plug-In Deployment screen, select the optional plug-ins you want to deploy in addition to the plug-ins that will automatically be upgraded while upgrading the OMS. ( I forgot to take screenshot of this page)

On the Extend WebLogic Server Domain screen , validate Adminserver details and enter WebLogic user account password.This is required to create a new WebLogic domain (GCDomain) on the same port and host name as the AdminServer used by the earlier release of the OMS you are upgrading.

We also need to enter new location for OMS instance base directory. As per oracle docs, it can be either inside or outside middleware home. Recommended approach is to keep it inside middleware home. We decided to use /home/oracle/product/middleware/gc_inst

You are next presented with summary screen and asked to click next

Next screen shows installation progress. This took nearly 1.5 hours.

Last step is to run $OMS_HOME/allroot.sh as root user

[root@oradbdev04 oms]# ./allroot.sh
Starting to execute allroot.sh .........
Starting to execute /home/oracle/product/middleware/oms/root.sh ......
 Running Oracle 11g root.sh script...
The following environment variables are set as:
 ORACLE_OWNER= oracle
 ORACLE_HOME= /home/oracle/product/middleware/oms
Enter the full pathname of the local bin directory: [/usr/local/bin]:
 The file "dbhome" already exists in /usr/local/bin. Overwrite it? (y/n)
 [n]:
 The file "oraenv" already exists in /usr/local/bin. Overwrite it? (y/n)
 [n]:
 The file "coraenv" already exists in /usr/local/bin. Overwrite it? (y/n)
 [n]:
Entries will be added to the /etc/oratab file as needed by
 Database Configuration Assistant when a database is created
 Finished running generic part of root.sh script.
 Now product-specific root actions will be performed.
 /etc exist
 /home/oracle/product/middleware/oms
 Finished execution of /home/oracle/product/middleware/oms/root.sh ......


Press ok on installer and we are finished with 12c installation.

Final screen lists down the url to access Enterprise manager grid control (12.1.0.2) and Weblogic Admin server.


Since one system upgrade only upgrades OMS and repository , we are still left with upgrading our central management agent.

1)Ensure that the Management Agents you want to upgrade are up and running.
2)Ensure that the Management Agents you want to upgrade are secure.

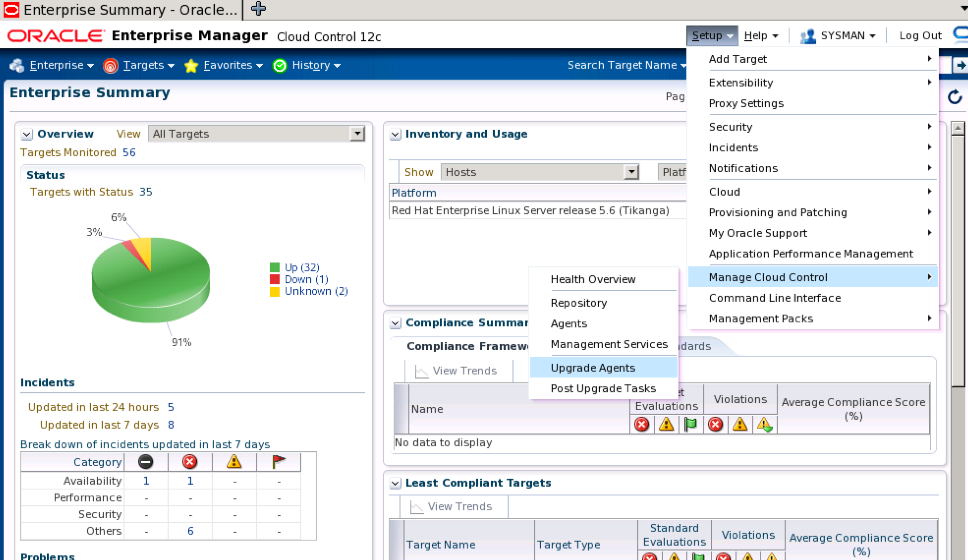
From the Setup menu, select Manage Cloud Control, then select Upgrade Agents. Click Add, select the Management Agents you want to upgrade, then click Select.

Select the Central management agent (which in this case is oradbdev04) and submit the job

Since we do not have root privileges, we have to run the $AGENT_BASE_DIR/core/12.1.0.2.0/root.sh script on the host after the upgrade.


You can monitor the agent install process

Note that oracle installs the agent in same base directory but creates new directory 12.1.0.2.0.

Before upgrade
/home/oracle/Middleware/agent/core/12.1.0.1.0

Post upgrade
/home/oracle/Middleware/agent/core/12.1.0.2.0

If you check agent status, you will find that oracle has automatically started the agent from new oracle home.

Run root.sh to complete the upgrade process

[root@oradbdev04 12.1.0.2.0]# ./root.sh
Finished product-specific root actions.
/etc exist
Finished product-specific root actions.

You can now upgrade the other management agent manually on the targets. Agent 12.1.0.1 is compatible with EMGC (12.1.0.2)

References

Oracle® Enterprise Manager Cloud Control Upgrade Guide12c Release 2 (12.1.0.2)
10gR2 Silent Install with 11gr2 CRS fails

I was trying to perform a 10.2 silent install with 11gR2 CRS. While doing pre-checks installer failed with following error

Check complete: Failed <<<<
Problem: The 'active' version of Oracle Clusterware is not 10g Release 2 (10.2).
Recommendation: You must upgrade all nodes of the cluster to Oracle Clusterware 10g Release 2.  If you have upgraded some but not all of the nodes to use the 10g Release 2 version of Oracle Clusterware, then the 'active' version is still 10g Release 1 (10.1)  You must upgrade all nodes in the cluster to Oracle Clusterware 10g Release 2 before installing Oracle 10g Release 2 Real Application Clusters.

I tried “ignoreSysPrereqs” option with runInstaller but it also did not succeed. I checked My Oracle Support (formerly metalink..anyways I still refer to as metalink) and also searched for any known issues, but couldn’t find any document. I could find some issues on OTN but there was no solution. Finally I searched for the file reporting this error in Oracle software staging location.

$% grep -r "version of Oracle Clusterware is not 10g Release 2" *
stage/prereq/db/db_prereq.xml:

This was part of following code( I have removed Angle brackets with Square brackets as wordpress confuses it with html tags)

[PREREQUISITE NAME="Detect10.2CRS"
                EXTERNALNAME="Checking Oracle Clusterware version ..."
                EXTERNALNAMEID="[email protected]"
                SEVERITY="Error"]
        [DESCRIPTION TEXT="This is a prerequisite condition to test if all nodes in the cluster have had the Clusterware upgraded to 10g Release 2 (10.2)."
                TEXTID="S_CHECK_10.2_CRS_DESCRIPTION@oracle.install.prereqs.resources.PrereqRes"/]
        [RULESETREF NAME="CRS102Checks" RULE="CheckFor102CRS" FILE="db/refhost.xml"
                RESULTS_FILE="install_rule_results.xml"/]
        [PROBLEM TEXT="The 'active' version of Oracle Clusterware is not 10g Release 2 (10.2)."
                TEXTID="S_CHECK_10.2_CRS_ERROR@oracle.install.prereqs.resources.PrereqRes"]
        [/PROBLEM]

Checking “Detect10.2CRS” in My Oracle Support, got exact hit

Silent Install 10.2.0.1 Database Fails When Cluster Is 11.1.0.6 [ID 755345.1]

As per note, we need to change the following lines in (software location)\stage\prereq\db\db_prereq.xml file ( I have removed Angle brackets with Square brackets as wordpress confuses it with html tags)

[PREREQUISITESET NAME="clusterTests"]
[PREREQUISITEREF NAME="Detect10.2CRS" SEVERITY="Error"/]
[/PREREQUISITESET]

to :

[PREREQUISITESET NAME="clusterTests"]
[/PREREQUISITESET]

You would be required to do same change for similar file to any 10g patchset on top of it. In case of 10.2.0.4 patch I found it under (software_location)/stage/prereq/patch_prereqs.xml
Searching on the error messages in My Oracle Support did not return above document. Anyways documenting it so that Search engines can report it faster. Note that to use 10g DB software with 11gR2 CRS, you will have to pin the nodes

$GRID_HOME/bin/crsctl pin css -n node1 node2

olsnodes -t will report current status of the nodes i.e whether pinned or not

BUG: Creating 11gR2 RAC Using VMware On Toshiba Laptop

I was setting up 11gR2 RAC grid infra on my new Toshiba L745 series laptop on OEL5.4, the installation was going very smoothly but suddenly the VMWare machines crashed while performing remote operations on second node with following message:

<span style="font-family: arial,helvetica,sans-serif;">"vmxaiomgr.retrycontabort" Please disconnect and reconnect if the storage is external to comupter</span>

The next thing was to look at the error file generated by vmware, and it states the following about this error:

<span style="font-family: arial,helvetica,sans-serif;">"Insufficient quota to complete the requested service (1453)" </span>

Though I had enough Diskspace, RAM availability, CPU etc. etc. it was hard to believe that I am running out of allocated resources.
Googling this error message, I saw THIS VMware Communities blog which explains the same error which I faced. It explains about a bug in Toshiba’s WiFi service “cfWiMAXService” i.e “ConfigFree WiMAX” which is causing all this and not allowing to perform the remote copy operation of Grid Infra install.

<span style="font-family: arial,helvetica,sans-serif;">The solution is to disable ConfigFree Service on Toshiba Laptop</span>

After disabling this service, the installation worked fine. Though I am not aware what will be the effect of disabling this serviceon laptop but the laptop is working fine since last two weeks.

Thanks to the above mentioned link which helped me solving this issue.

Steps to Upgrade 11.2.0.1 RAC to 11.2.0.2

This post is in continuation to Grid Infrastructure upgrade post written earlier. Ensure that you have downloaded the software and  have upgraded the infrastructure database.

Following files contain database software for 11.2.0.2.

p10098816_112020_Linux-x86-64_1of7.zip

p10098816_112020_Linux-x86-64_2of7.zip

Please note that this is full release , so if you are installing new software, you can directly install 11.2.0.2 without need of first installing 11.2.0.1 database.Unzip the software and start the runInstaller from the database directory.

cd $SW_HOME/database

./runInstaller

We will be presented with OUI screen asking for MOS credentials. Please note that we would be installing software into new ORACLE_HOME, which is a new feature called out of place upgrade.

Next screen ask’s again for MOS credentials. This can be used to check if there are any patches which need’s to be applied before software can be upgraded. Since we have already applied the PSU2, we will choose skip Software updates

We are now presented with 3 options

a)Create and Configure database – installs software and creates a database using dbca

b)Install database software only – Only installs 11.2.0.2 software

c) Upgrade exisiting database – Installs software and launches dbua to upgrade database

We chose option b) i.e Install database software only

Next screen presents you with 3 options

a)Single Instance database installation

b)Oracle RAC Installation

c)Oracle RAC One Node database Installation

I will be discussing RAC one node in a future post. For our installation we are upgrading RAC database and require RAC software

Next screen gives option to choose between Enterprise edition and Standard Edition

Next screen asks for database software installation directory. Unlike Grid infrastructure, where it is mandatory to install in new ORACLE_HOME, RAC database software can be installed in existing home. But we will be choosing Out of place upgrade i.e install in new home.

Choose the OSDBA and OSOPER group

Next screen checks the pre-requisites. You can ask oracle to create fixup script. Refer to my earlier post for detail

Finally we are prompted to run root.sh from both nodes

After you have run root.sh from both nodes, you can then use dbua to upgrade the database. Note that we have not yet brought down the database. This is great benefit of using out of place upgrade . Second benefit is that you are not touching the existing binaries,so you are not required to take backup of binaries and can can easily rollback the changes (if required). You can also continue using the old binaries for databases which you cannot get downtime and can upgrade them later.

Set the ORACLE_HOME and PATH to include 11.2.0.2 software location and start dbua. Take backup of database before you start upgrade process using dbua

$dbua

We are presented with welcome screen. Press next

DBUA presents you with list of databases currently registered in /etc/oratab. We select db11g which we need to upgrade

Next screen asks for following options

a) Option to recompile invalid objects and degree of parallelism for running utlrp.sql. We keep default value of 3

b) Option to disable archiving during upgrade

c)Upgrade the timezone file. We have not selected it now and will do upgrade manually

Next screen presents with option to select Fast Recovery area and size

Next we will be presented with summary screen and asked to take backup of database. If you have not taken it till now, its good time to take backup. Also now database will be stopped and will be started from new oracle home.Please ensure that you have appropriate setting for JAVA_POOL_SIZE and SHARED_POOL_SIZE during upgrade or can use SGA_TARGET/MEMORY_TARGET to avoid ora-4031

Following screen shows database upgrade progress screen.

Once upgrade completes, it gives summary of upgrade process. As you can see it has warned for DST upgrade.

Oracle 11.2.0.2 contains version 14 file. Starting 11g you can have multiple database running out of single oracle home to have different timezone version files.

You can refer to Updating the RDBMS DST version in 11gR2 (11.2.0.1 and up) using DBMS_DST [ID 977512.1]

Giving summary of steps taken by us to upgrade from version 11 to version 14

---Check the current version of file ---
SQL> select version from V$TIMEZONE_FILE;

   VERSION
----------
	11

SQL> SELECT PROPERTY_NAME, SUBSTR(property_value, 1, 30) value
FROM DATABASE_PROPERTIES
WHERE PROPERTY_NAME LIKE 'DST_%'
ORDER BY PROPERTY_NAME;  2    3    4  

PROPERTY_NAME		       VALUE
------------------------------ ------------------------------
DST_PRIMARY_TT_VERSION	       11
DST_SECONDARY_TT_VERSION       0
DST_UPGRADE_STATE	       NONE

---Confirm if $ORACLE_HOME/oracore/zoneinfo contains timezlrg_14.dat i.e version 14 file

--Prepare for upgrade
SQL> exec DBMS_DST.BEGIN_PREPARE(14);

PL/SQL procedure successfully completed.

--Confirm status

SQL> SELECT PROPERTY_NAME, SUBSTR(property_value, 1, 30) value
FROM DATABASE_PROPERTIES
WHERE PROPERTY_NAME LIKE 'DST_%'
ORDER BY PROPERTY_NAME;  2    3    4  

PROPERTY_NAME		       VALUE
------------------------------ ------------------------------
DST_PRIMARY_TT_VERSION	       11
DST_SECONDARY_TT_VERSION       14
DST_UPGRADE_STATE	       PREPARE

---Re-running prepare statement will give below error.
SQL> exec DBMS_DST.BEGIN_PREPARE(14);
BEGIN DBMS_DST.BEGIN_PREPARE(14); END;

*
ERROR at line 1:
ORA-56920: a prepare or upgrade window or an on-demand or datapump-job loading of a secondary time zone data file is in
an active state
ORA-06512: at "SYS.DBMS_SYS_ERROR", line 79
ORA-06512: at "SYS.DBMS_DST", line 1340
ORA-06512: at line 1

-- truncate logging tables if they exist.

TRUNCATE TABLE SYS.DST$TRIGGER_TABLE;
TRUNCATE TABLE sys.dst$affected_tables;
TRUNCATE TABLE sys.dst$error_table;

-- log affected data

BEGIN
DBMS_DST.FIND_AFFECTED_TABLES
(affected_tables => 'sys.dst$affected_tables',
log_errors => TRUE,
log_errors_table => 'sys.dst$error_table');
END;
/
---Query table to check if any affected table
SQL> SQL> SELECT * FROM sys.dst$affected_tables;

no rows selected

SQL>
SQL> SELECT * FROM sys.dst$error_table;

no rows selected

-- End the prepare phase
SQL> EXEC DBMS_DST.END_PREPARE;
A prepare window has been successfully ended.

--Startup the database in upgrade mode. Ensure you have set cluster_database=false

SQL> EXEC DBMS_DST.BEGIN_UPGRADE(14);
An upgrade window has been successfully started.

PL/SQL procedure successfully completed.

-- To confirm whether it has been upgraded to version 14
SQL> SELECT PROPERTY_NAME, SUBSTR(property_value, 1, 30) value
FROM DATABASE_PROPERTIES
WHERE PROPERTY_NAME LIKE 'DST_%'
ORDER BY PROPERTY_NAME;  2    3    4  

PROPERTY_NAME		       VALUE
------------------------------ ------------------------------
DST_PRIMARY_TT_VERSION	       14
DST_SECONDARY_TT_VERSION       11
DST_UPGRADE_STATE	       UPGRADE

--Restart the database after removing cluster_database

This completes the database upgrade process. I would recommend dbua to upgrade the database as  it takes care of copying the init.ora files,password file and also modified the OCR to point to new oracle home and upgraded srvctl version. Oracle Upgrade guide does not list any method documenting steps to be taken for srvctl. I referred following link i.e Oracle Database Upgrade documentation for the upgrade purpose

http://download.oracle.com/docs/cd/E11882_01/server.112/e17222/upgrade.htm#i1011981

In case you use manual method and use srvctl modify database to point to new oracle home, you will get errors like below

srvctl stop database -d test11g
PRCD-1027 : Failed to retrieve database test11g
PRCD-1229 : An attempt to access configuration of database test11g was rejected because its version 11.2.0.1.0 differs from the program version 11.2.0.2.0. Instead run the program from /oracle/product/app/11.2.0/dbhome_1.

You can use following command to upgrade the srvctl version

srvctl upgrade database -d test11g -o /oracle/product/app/11.2.0.2/dbhome_1

Happy Upgrading.

11.2.0.2 Patchset available.Download directly to server

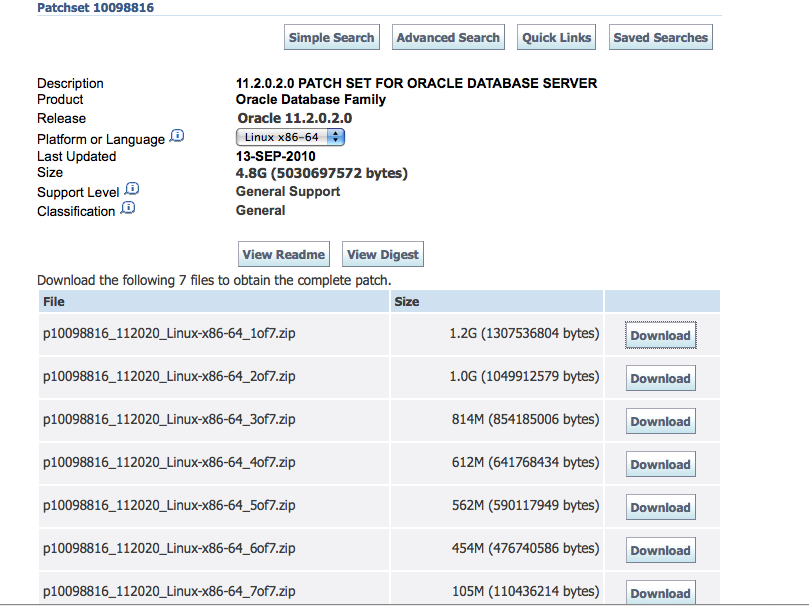
11.2.0.2 Software is now available for download. It contains 4G+ binaries as you now perform out of place upgrade i.e software is installed in separate home from current home. You can also use it to install 11.2.0.2 directly instead of upgrading from 11.2.0.1.  Use wget to download it directly to server (thus avoiding copying to your machine and then to server) .

Please find below description of each file. Download whatever is necessary

p10098816_112020_Linux-x86-64_1of7.zip  – 11.2.0.2 Database Installation Files

p10098816_112020_Linux-x86-64_2of7.zip – 11.2.0.2 Database Installation Files

p10098816_112020_Linux-x86-64_3of7.zip – 11.2.0.2 Grid Installation Files

p10098816_112020_Linux-x86-64_4of7.zip – 11.2.0.2  Client Installation Files

p10098816_112020_Linux-x86-64_5of7.zip – 11.2.0.2 Gateway Installation Files

p10098816_112020_Linux-x86-64_6of7.zip – Examples file

p10098816_112020_Linux-x86-64_7of7.zip – 11.2.0.2 Deinstall Utility Files

You need to copy the link location for patchset (right click on download link+ copy link location) and then supply MOS username and password using -http-user and –http-password clause

Syntax is

wget –http-user=”<username>” -http-password=”<passwd>” –output-document=”<patchname>” “link”

Note: – There is double dash before each parameter but due to html formatting , it is not being preserved. Look below example

wget --http-user="[email protected]" --http-password="amit123" --output-document="p10098816_112020_Linux-x86-64_1of7.zip"
"http://updates.oracle.com/Orion/Download/process_form/p10098816_112020_Linux-x86-64_1of7.zip?file_id=32675713&aru=12918649&[email protected]&[email protected]&patch_password=&patch_file=p10098816_112020_Linux-x86-64_1of7.zip"

Above credentials will not work , they are just dummy 😛

100%[====================================================================================================================>] 1,307,536,804   27.87M/s    ETA 00:00

05:21:26 (25.76 MB/s) - `p10098816_112020_Linux-x86-64_1of7.zip' saved [1307536804/1307536804]

Wow!! That was fast.
Happy downloading!

Downloading Oracle Software directly to Server

This article is based on Pythian’s aricle DOWNLOADING FROM OTN DIRECTLY TO YOUR DATABASE SERVER.

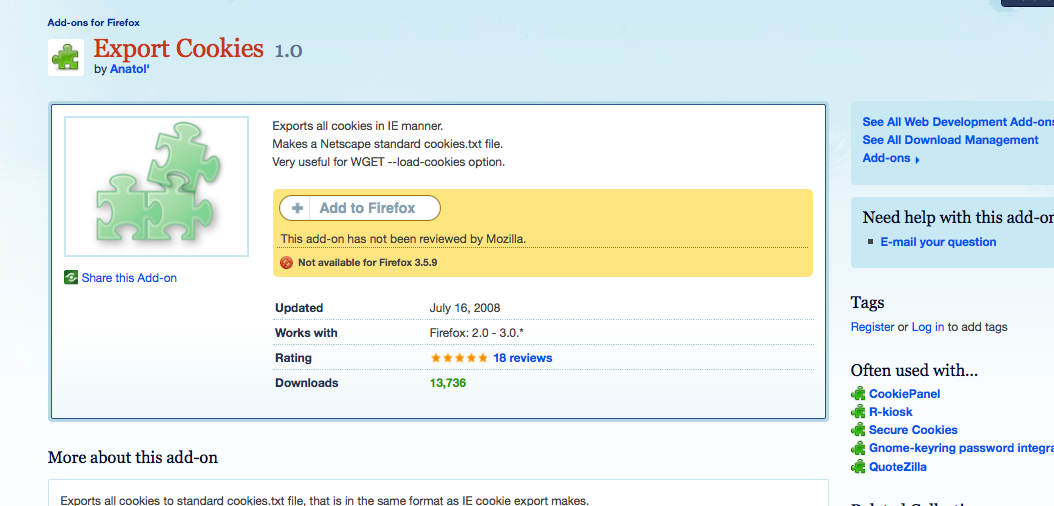
Article tell’s about using lynx (text based web browser available on linux) to generate the cookies file which can be then used with wget to download software. But when I tried to use lynx , it repeatedly gave error for javascript.  On searching net , I found a firefox extension “Export Cookies” which creates wget compatible cookies.

You can find the extension at https://addons.mozilla.org/en-US/firefox/addon/8154/

After you install the extension, clear your cookies and then login to otn.oracle.com and sign in. After you have done this,  go to Tools -> Export cookies and save the file.

Then you can copy the file to your server and use wget to download the software. Syntax is

wget –load-cookies=cookies.txt <otn_url>

E.g To download 11gr2 Grid infrastructure software for linux x86-64 bit

wget --load-cookies=cookies.txt http://download.oracle.com/otn/linux/oracle11g/R2/linux.x64_11gR2_grid.zip